Baking Bread in a Dutch Oven!
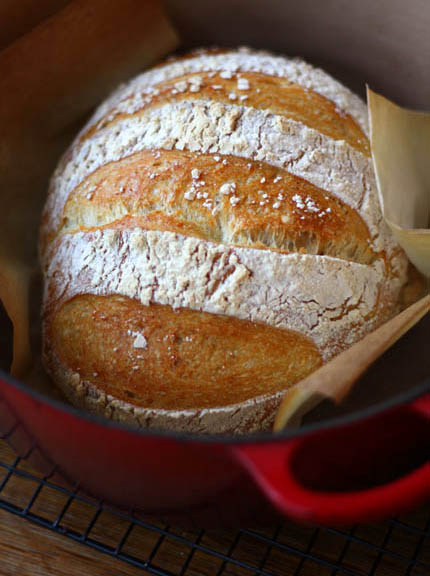
Here is yet another way to get a fabulous crust on your bread without using any steam in the oven. An unsophisticated disposable lasagna pan is an option but here’s another idea. Baking bread in a Dutch oven is a very old idea. All the iron-pot methods are based on the old European technique of baking inside a closed clay pot. Most people don’t have one of those, but enameled cast-iron pots are readily available—and they trap all of the internal moisture in the dough and that creates the steam you need to get a crisp and shiny crust. It really is fantastic and it works perfectly with our stored doughs from the book.
As you can imagine, the only drawback to baking bread in a dutch oven is that you are limited to a bread that is the shape of your Dutch oven. Luckily, Le Creuset has several shapes to choose from and I’m determined to try them all! The company even sells a special knob that can withstand the 500°F baking temperature of this method. All of these items (including the metal replacement knob) are available in Minneapolis-St. Paul at Cooks of Crocus Hill or nationally through Amazon (which offers a 7 1/4 quart pot, a 6 3/4 quart oval, a two-quart, and others.
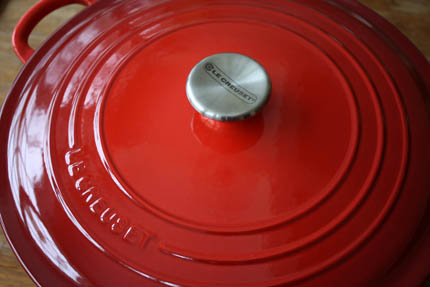
Using a metal replacement knob is really essential to baking with this method, the hard plastic knobs will smoke at 500°F. Otherwise you’re limited to the maximum temperature recommended by Le Creuset (usually 450 degrees), and the crust won’t get as crisp.
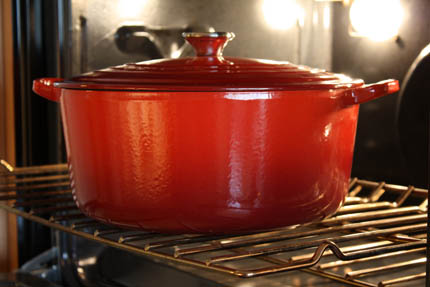
Preheat the pot with the lid on to 500°F for about 20 minutes. I used a 7 1/4 quart pot to bake a 1 1/2 pound loaf of bread.
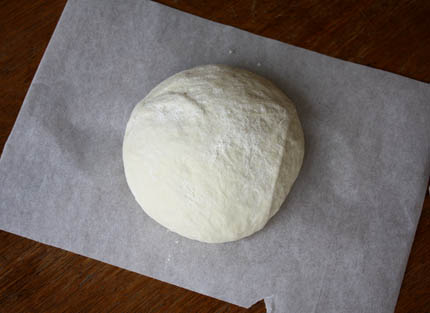
Shape your boule from any of the non-enriched doughs from the book and allow to rest on a piece of parchment paper as suggested in the recipe. What’s used here is the master recipe–let it rise for about 90 minutes. It’s easiest to get the dough into the very hot pot if you can drop it in right on the paper.
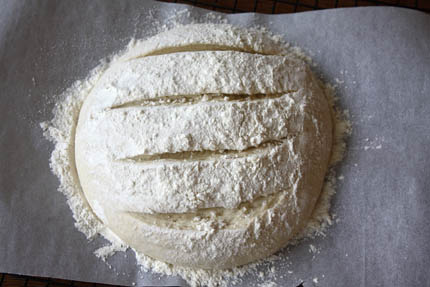
Slash the dough 1/4″ deep.
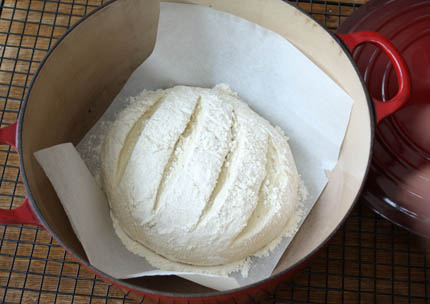
VERY carefully lift the dough and drop it, with paper and all into the preheated pot. This can be awkward the first time you do it. Take the pot out of the oven and rest it on a cooling rack so that it’s at a comfortable height to get the dough in without fear of touching the hot pot! It is very easy, but just be careful! Replace the lid and slip it back into the oven.
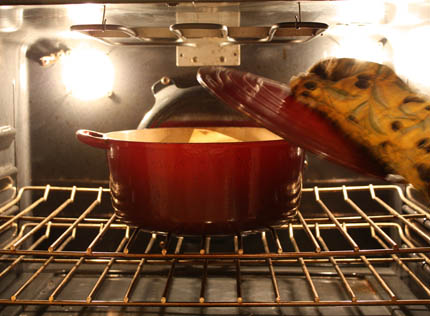
After 15 minutes of baking remove the lid. The dough only needs to bake in the steam for that amount of time. now it is time to get a lovely caramel color to the bread. Turn the heat down to 450°F and bake for another 15-20 minutes, depending on the size of the loaf.
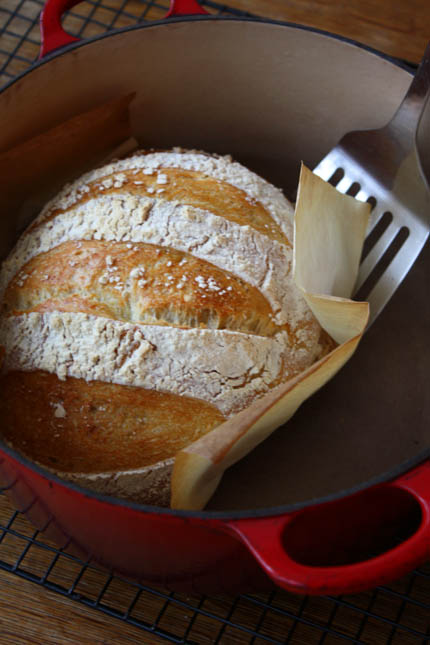
Once the loaf is nicely browned, carefully remove it from the pot with a spatula.
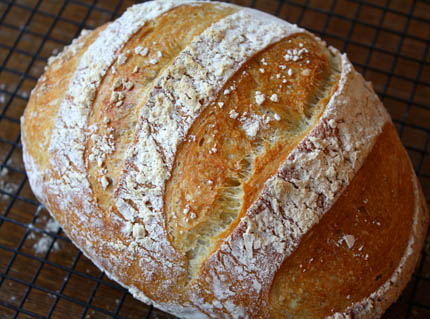
Peel off the parchment and allow to cool on a cooling rack.
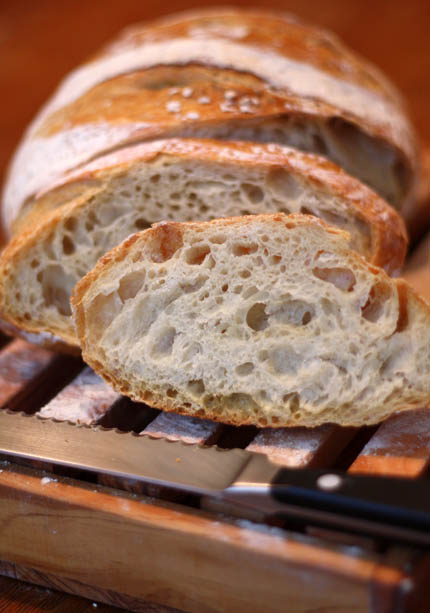
Once the bread is totally cool, cut and you can see how fantastic the crumb is!
Note: BreadIn5.com is reader supported. When you buy through links on the site, BreadIn5 LLC earns commissions.
Can a regular cast iron Dutch Oven be used for this method, or does it need to be one that is an enamel cast iron?
You can do it, especially if it’s well-seasoned.
I would recommend using the regular cast iron dutch oven over the enameled one if the enamel is light color. The heat will turn the enamel dark brown/grey. It does not hurt the pan it just does not look nice. I purchased a lodge set for ~$30 where the top (lid) can also be used as a skillet. You can also put the loaf in the lid, heat the pan, then put the pan over the loaf and back into the oven.
Hi I just made my big batch of dough last night, it looks really good. First time. I wanted to make a bread in my cast iron dutch oven, it is only 4qt. how much dough should I use and do I change the timing at all?? Love your book, excited about the recipes in it.
Which dough, from which of our books (and page number)?
You mentioned that the shape of the pot effects the shape of the loaf but does the volume of the pot matter; i.e. 7 quarts vs 4 quart ?
Absolutely–you’ll need much more dough in the 7, otherwise it’ll be flat.
I have a 7.5 qt oval Dutch oven can I use this or is it the wrong shape?
Hi Jayne,
No such thing as the wrong shape. The loaf may come out oval, but that will be beautiful!
Cheers and enjoy! Zoë
Thanks Zoe I am dying to try this this will be my first time so I am overly cautious
Have a great day!
Followed your instructions but the top of the bread burned after I took of the cover and lowered to 450 degrees. What did I do wrong?
Hi Mimi,
Do you use an oven thermometer? Was the Dutch oven near the top of your oven? Which recipe are you baking?
Thanks, Zoë
How much dough would you use, by weight, in a 2 quart lodge covered pot? Thank you!
Hi Beth,
I’d make a 1-pound loaf. It may touch the sides, but that is okay.
Enjoy, Zoë
Hi,
What will happen if I can’t preheat my creuset? I want to make bread for a dinner and the main course will be in the oven during optimal preheating time. With baking and cooling, I don’t want the main course to sit for too long after it comes out of the oven. I know I could make the bread before but was wondering if it is possible to skip the preheat and go straight into baking?
Best
Hi Meghan,
You really want your bread to cool for nearly an hour before you cut into it or it can be gummy on the inside. So, you may be better baking the bread first and then your main course. You can also bake the bread in a crock pot and then just crisp the crust under the broiler: https://artisanbreadinfive.com/2012/05/29/crock-pot-bread-baking-fast-bread-in-a-slow-cooker
Thanks, Zoë
Hola from Ecuador
I have a 4.7 L stainless steel dutch oven. May I have a recommendation for amount of dough and baking requirements. I am looking at the basic boule. Gracias
You should be fine with 1 or 2 pounds of dough, and the directions we give here. Though we’ve never done this in stainless steel, it should work. Much more instructional material in our books.
How did you get such an open airy crumb????
This is the white flour recipe; that’s part of it. Which recipe are you using (which of our books/which page number?)?
The bottom of my boule keeps coming out burnt using this method. Should I lower the temperature? I preheated my Dutch oven and my oven thermometer was at 500.
WHich of our dough recipes; from which book and page number?
I purchased some Reynolds brand parchment paper for this method, but the box says that the paper is safe up to 420 degrees. Is it safe to use this paper or should I find a different brand?
It’s very hard to find papers that are officially rated that high–that’s all I can tell you–at your own risk otherwise.
Jeff,
I have used the Reynolds, also Wilton brand. It gets quite brown and crispy, but has never caught fire. It does make for some technical issues if you want to lift the baked loaf out by the paper corners, since they get very brittle, but I manage. Did have better paper survival rates with the Wilton brand.
Hope that helps!
Yep, when I’ve used papers rated below what was called for, same experience. No adverse effect except browning and weakening of the paper.
Thanks for the replies Jeff and Jennifer. What I found online about the issue conforms to your experience Jennifer. There’s a brand called “Regency” that is rated to 450, so it might fare better at the higher temps. There’s another way I’ve seen, which is to sprinkle flour on the work surface, turn out the proofed dough onto it, and then put the dough into the Dutch oven without paper. I get my first Dutch oven tomorrow so I will try both methods.
Ah yes, you don’t have to use parchment, just makes it easier. Cornmeal is the way I used to routinely do it.
I made a long thick strip of foil that hangs over the rim of my dutch oven. I then slip my dough(which is on parchment paper) on the strip. When bread is done, i simply lift it out with my makeshift gadget. Works great
Nice!
I forgot to add cheese to the dough (basic recipe) can I grate some cheddar and put it on top of the loaf after I take the dutch oven cover off for the final 20 minutes at 450? Thanks
You may have to experiment– the cheese may run off or burn at this temp.
Hello Zoe,
I baked the master recipe bread from the ‘new’ healthy bread book. I followed the instructions above & just took it out the oven, it looks great! The only problem is the bottom has some burnt spots. What did I do wrong? (I did sprinkle the parchment paper with cornmeal)
Rosemarie
Hi Rosemary,
Do you use an oven thermometer in your oven? It may run a bit hot. Did you have the Dutch oven in the center of the oven? You can always turn the temperature down by about 20 degrees next time and see if you like the results better.
Thanks, Zoë
No oil in the pot?
Hi Suzanne,
No oil in the pot, just a piece of parchment under the dough.
Thanks, Zoe
Can you please share your rule of thumb for how big a pot for a given weight of dough? Thanks
Hi.
If you don’t want the loaf to touch the sides, then you want to bake a 1-pound loaf in a 5-quart pot. If you don’t care if it touches the sides (which only effects the shape of the loaf) then you can use a smaller pot.
Thanks, Zoë
I have a 6.5 qt enamel Lodge dutch oven that I just bought. I have heated it up for 30 minutes at 450 while my dough is rising. Then transferring it to the dutch oven. I’m using parchment paper.I bake it for an additional 10 minutes to make the crust darker, but I noticed the bottom of the loaf is overcooked=dark brown/black. Also, how much can I make in that size container as it is much bigger than the 3 cups recipe. If I double the recipe will it still come out, and how much longer will I need to cook it? Do you have recipes for a larger loaf=cups flour and cooking times anywhere? I also noticed that my dough when I put in my hot water doesn’t look as sticky as the you tube videos. Am I doing something wrong? Wasn’t sure how hot to make the hot water. Our hottest water is about 110 or thereabouts. I have an instapot that is much hotter. I don’t want to kill the yeast, but I also want to make sure to activate it. I’ve only let it rest for 5 hours. I will try overnight and see if that makes a difference. Some people say it doesn’t matter. Thanks. Robin
Hi Robin,
Here is a post on making a larger loaf from the dough: https://artisanbreadinfive.com/2012/03/20/how-to-make-a-2-pound-loaf/
I’m not sure I understand when you are adding hot water? The only time you use hot water is when you are creating steam in the oven, but you don’t need that with a Dutch Oven. To make the actual dough you’d never want to use hot water or you may kill the yeast. Warm water is used for mixing the dough.
Thanks, Zoë
Hi, my bread seems to burn on the bottom in my Creuset on parchment paper baking at 450 or even 425…..for 35 min… is there a way to avoid this. Could you cut a silicone baking pad..to fit the bottom of the pot. Might help?
Before that–check your oven temp with something like https://ow.ly/8CVPU
If it’s not that the oven’s too hot, try a higher shelf so the bottom aspect of the Dutch oven’s further from the heat source.
If those both don’t help, your approach might also be something worth trying (though you’ll sacrifice a silicone baking pad in the experiment).
Le Creuset (which you have in the photo) state in the hand book that the casserole dish should never be used dry on the hob or in the oven. Doing so will damage the non stick liner and or the ceramic glaze. . Yes, that Casserole dish is non stick. They was there must be something inside on the bottom even if it a little oil. Also never to heat it above 220 deg C.
A cast iron dutch pot is best for this.
Cheers
Kevin
We’ve been using Le Creuset for a long time this way, with no ill effects, but if you’re really concerned, do avoid using the enameled pot for this purpose.
Hi, I’m using the healthy master recipe in an Emile Henry Dutch oven that’s loaf sized – can I let it proof in the loaf pan to make sure it fits? My thinking is that I’ll take it out (on parchment) when it’s time to preheat.
Hi Jennifer, is the pan an actual loaf shape with a lid or a Dutch oven that is just smaller? If it is loaf shape you can just bake it in that without taking it out to preheat. I’m afraid the loaf may lose some of its rise if you move it around that much before baking.
Thanks, Zoë
So, what is the total rise time? In the master recipe I let it rise as it’s written 2 hrs at room temp. The. Another 1 hr and 20 min on the parchment paper? Thanks!
Hi Megan,
Yes, that sounds about right depending on the size of the loaf and if the dough is chilled. If you are using dough that is not chilled yet, it is half that amount of time once you shape the loaf and set it on the parchment. If this is your first time baking the bread, I recommend shaping it once it is chilled, because it is easier to handle, but that does mean a longer second rise.
Hope that helps! Zoë
How would I do this with the gluten free master recipe? I checked the index in the back of the book for Dutch oven and didn’t see it in there.
Take a look at page 33…
hi Zoe,
Thank you for taking all these questions!! I have been making Jim lahey’s bread for over a year now. But recently bought your book cause I wanted to have dough ready every day instead of mixing dough for a loaf 24 hours in advance of baking. i noted here, on this page, that you also recommend using a Dutch oven (which would save me the anxiety of using a broiler pan for steam)
I was surprised to read that others said that Lodge recommended filling a pan with water first!!?? I have a lodge but i guess I hadn’t remembered that part of the instructions. (Now that makes me nervous) However, i have been baking Lahey’s bread for over a year without this step and my Dutch oven seems fine.
So, is it OK that I continue to use my Dutch Oven instead of the broiler pan steam method?
Thanks for taking the time to answer!
Betsy
Hi Betsy,
I’m so thrilled to hear you’ve been baking so much! I use the Dutch oven just as you have with no problems. If you are having success, then I would keep on doing what you are. There is no reason to use water/steam when baking in a Dutch Oven.
Cheers, Zoë
Thank you for this technique–I did try it once before with a different recipe and I had trouble with the “dropping” step–once I negotiated my beautiful well-risen round loaf into the pan, it had lost a lot of its loft — I believe I literally dropped it into the hot pot by turning it over and letting it kind of tumble out… Maybe it is easier with the parchment to hang onto. Your instructions give me the confidence to try again.
Hi Deb,
The parchment paper is a great help to get the dough into the hot pot.
Thanks, Zoë
Hi,
I was hoping to find the answer to my question but it seems as though I may be the first. I baked two loaves using your master recipe and they turned out really well. I baked them both after the initial rise time of two hours and adequate rest time. They both had a nice open crumb and lovely crust. I stored the remainder of dough in the fridge, loosely covered with plastic wrap. I went to bake it the next day and when I pulled it out, it seemed to have developed some hard chunks. I briefly shaped it and let it rest for two hours lightly covered. When I pulled it out of my Dutch oven it had nice oven spring and a beautiful crust, but when it was cool and I finally cut into it, it was so dense! It was nothing like the first two loaves I made with the same batch. What happened?
Which of our recipes are using, from which book and what page number?
What’s your thoughts about preheating oven but not preheating the Dutch oven? Have you trialled this method?
Hi Karen,
We have tried that method and it certainly works, but we prefer the oven spring (rise) with a preheated DO.
Thanks, Zoë
I am making betsy’s seeded oat bread. The book tells us to cook 40 min at 400. Do I use the same temp and cook time in the dutch oven?
That’s a good starting point, but every oven’s different–same for Dutch ovens–that add another variable to the picture. So watch your first loaf closely and adjust baking time as needed.
Hi, after watching the Easy Breads episode on Magnolia network I decided to try it. My bread turned out beautiful and delicious!!! Yay!!!! It was so easy and I love the Dutch oven method. Thank you so much for the recipe.
Fantastic, so glad it worked well for you. Much more in our books, click on any of The Links at the top of the home page.
My oven only goes to 400 degrees, if I’m looking to cook the master recipe in my dutch oven, how do I adjust cooking times for a lower temperature? I’ve botched every bread I’ve ever made but I’ve been scouring the internet for all your tips! Thank you!!
Impossible to say. But I try an increase of about 20%. Problem is it may not brown…
I was sick for 3 weeks so my refrigerated dough is pass 14 days. Can I still bake it? Only enough left for 1 loaf. Can I use it to add to a new batch?
Yes to both questions. If you find the 3-wk dough to strong-tasting, or yields a flattish free-form loaf, then use it to build a new batch (I do this all the time).
Hello,
My first attempt at making gluten-free bread went well. The crumb was acceptable, only the crust was too hard to chew. I used a cast-iron Dutch oven to bake the bread ball and a pizza stone for French baguettes. The result is the same: the crust is too hard to chew. Is it due to the lack of humidity or the high baking temperature?
Hmm, not sure. Are you making any changes in my recipe?
When using my enamel covered dutch oven, do I need to oil it before heating or with the bread still slide out without it… I have a Chef’s Corner Cast Iron 9” Round Casserole With Lid Enamel Coated Inside and Outside.
Thanks…
I usually use a parchment “sling” but oiling it would also work. If you use a fair amount of cornmeal that would work, but there’ll be some smoking. The real question is whether you can use nothing at all in a pre-heated cast-iron; it might work but I just haven’t tried it. Similar to how you don’t have to oil (and shouldn’t) when using a baking stone. Fail-safe is the parchment.