Baking in Tuscany, without any of my equipment!
Jeff and I are always wanting to convey how simple and forgiving these recipes are, not to mention delicious. During my stay in Tuscany this summer I rented an apartment just outside of San Gimignano. The foundation of the house was built around 500AD, but thankfully the kitchen had been updated in this century. It seemed a must for me to bake bread during my week there. I went to the store and bought flour, salt and yeast. Got back to the apartment and realized I had none of the equipment I usually count on in my kitchen. There were no measuring cups or spoons, no pizza stone, no peel and the oven was in celsius, not fahrenheit. No matter, I still dumped everything in a bowl, mixed it up, hoped for the best and ended up with a gorgeous dough. Over the next few days I baked rolls in the house and pizzas in a wood fired oven outside my door.
Jeff and I are teaching in Edina, MN this weekend and we’d love to have you in class! See end of post for details…
The flour I found was “00” which is something we Americans rarely find in our grocery stores. It is the flour used to make those lovely pizzas I ate in Naples. (More to come on this beauty of an ingredient in our next book on pizzas and flatbreads.) I was thrilled to see entire shelves of it and bought several kinds. The only yeast I found in Italy was fresh (cake) yeast and the salt was fine sea salt.
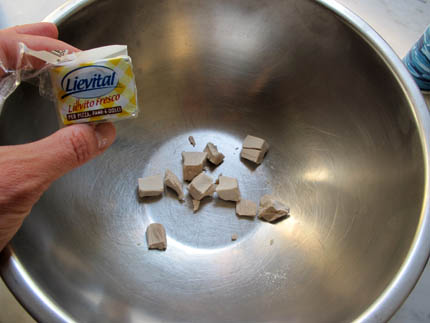
There was no way of measuring the cake yeast so I just broke off what seemed to be about 2 tablespoons…but who knows how much it actually was. As we’ve always said the amount of yeast doesn’t really matter, if you use less it just takes longer for the dough to rise. More yeast information here.
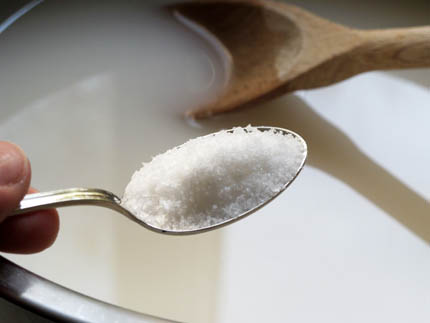
No way to measure the salt either. It was a fine sea salt so I started by using 1 heaping teaspoon, instead of 1 1/2 tablespoons of kosher salt. I figured I could always add more and the Tuscans are very used to unsalted bread anyway. You can make the bread without salt, but I find the flavor is flat. More salt information here.
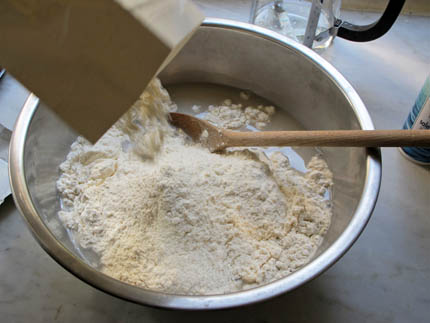
The flour was the biggest issue when not able to measure. The “00” flour is unlike our unbleached all-purpose flour so I had to keep dumping flour in until it felt like the consistency of our “Master” recipe. Once you have made the recipe several times you will get to know what it should feel like. I started this process in a bowl…
but quickly realized I was going to have to add more and more flour until I had to transfer to a pot. It turned out to be the perfect vessel, because it had a lid and hopefully enough room to grow.
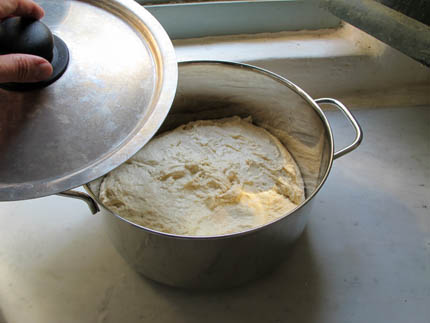
Checked the dough as it rose on the counter for 2 hours. It grew….
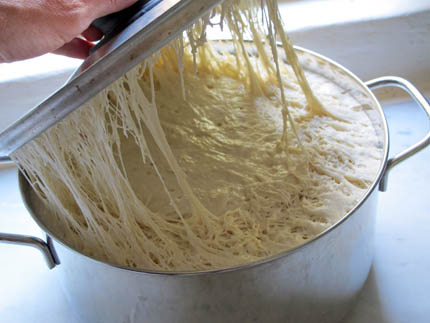
and grew until it hit the lid. Luckily it stopped there! I threw it in the refrigerator and headed off to Pisa with the boys.
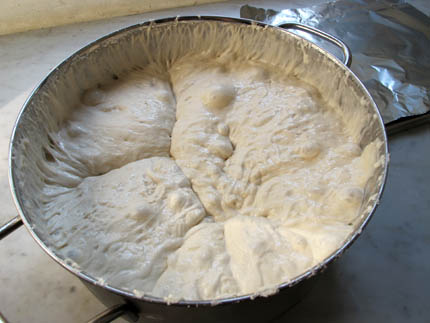
When I returned the chilled dough had collapsed, just as it is meant to do. I have to admit I was relieved not to have to clean up an over flowing pot of dough, which I was prepared to do.
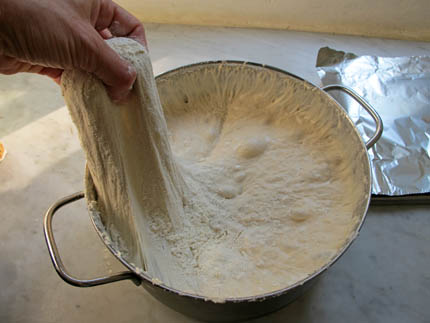
The next day I made rolls for breakfast. The dough was gorgeous and stretchy.
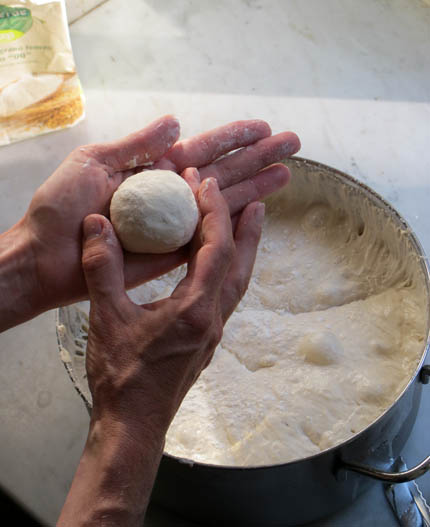
Using a serrated knife I took out a golf ball sized piece and
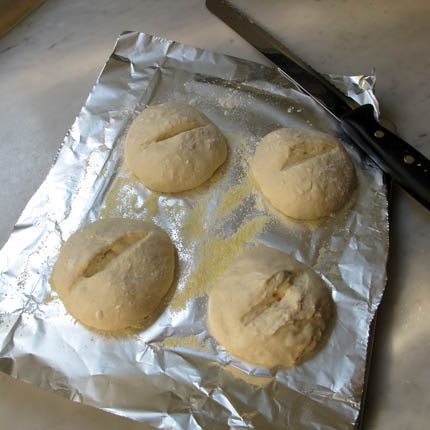
set it on a piece of aluminum foil dusted with semolina flour. I had no parchment and no peel, so I figured this might do the job instead. I repeated that to make 4 rolls.
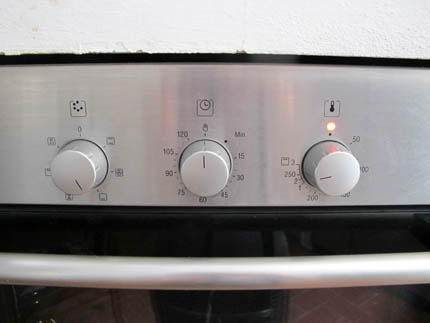
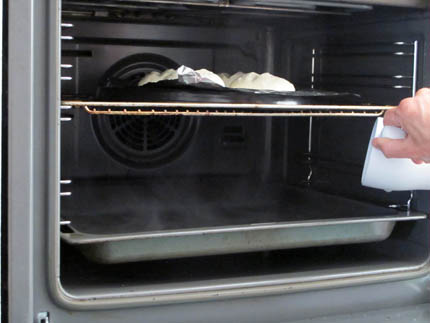
Once I figured out the conversion, without the internet or the conversion table in HBin5, I set the oven to 240 degrees Celsius (450 degrees F) and allowed it to preheat with the very-durable-metal-tray from the microwave as my Baking Stone.
After 20 minutes of resting I lightly dusted the tops of the buns and slashed them.
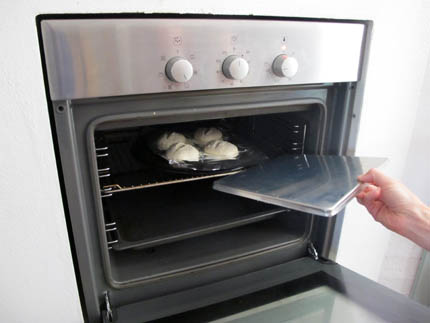
Using the back side of a flimsy metal tray as my Pizza Peel, I got the rolls into the oven. The aluminum foil was my insurance that they would slip right in.
added the water for steam, shut the door and crossed my fingers that the dough wouldn’t be glued to the foil when they came out.
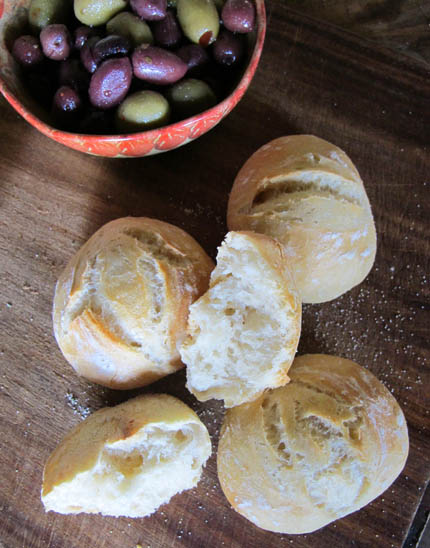
They came right off the foil and as a cooling rack I put the rolls in this wire fruit basket to cool before we ate.
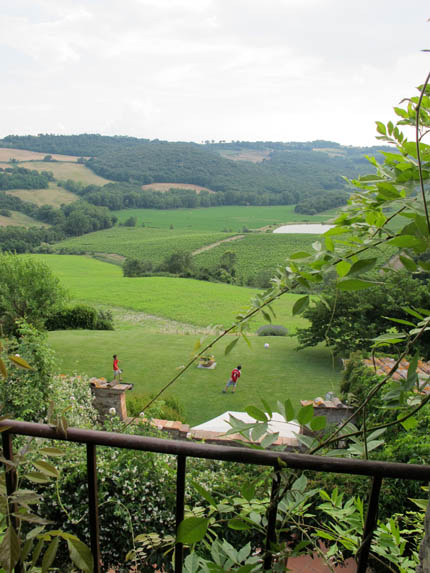
Here is the view the rolls had as they sat.
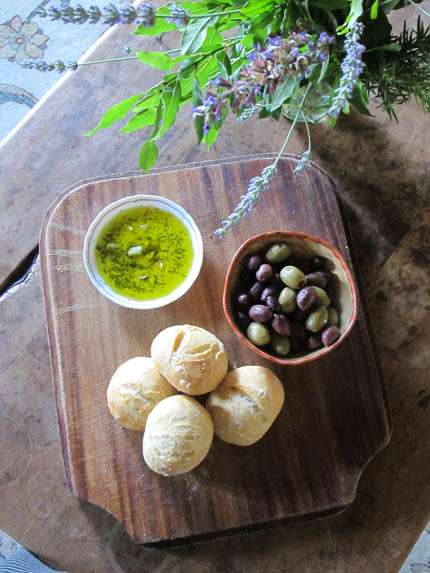
Some lovely local olives, cheese, salami and olive oil were all we needed to make us happy. The next night we had a pizza party in front of the wood fired oven with the rest of the dough, stay tuned….
Join Jeff and me at Cooks of Crocus Hill this weekend (8/7) as we bake up a feast of breads from our first book Artisan Bread in Five Minutes a Day. We’d love to meet you! For more information call the Edina location 952-285-1903.




Going to try whole wheat bread from the 2nd book. My coop sells “whole wheat bread flour” which I like b/c it is very fine — no big coarse stuff. They all sell whole wheat flour that is more coarse and whole wheat pastry flour which I think is not good for bread. Wondering if I need to modify the recipe at all to use “whole wheat bread flour”?
Thanks.
Hi Susan,
The higher protein WWbread flour may end up absorbing more water than the regular whole wheat, it depends on the brand often times. If the dough feels tighter than usual just add a couple more tablespoons of water.
Thanks! Zoë
Zoe — Well, with a view like that, the rolls had to be very happy. But they would have been wonderful, regardless.
Looks amazingly delicious, Zoe!! It’s interesting how we can get along with less when we use our imaginations! You are very adventureous!
This post is truly beautiful….love the simplicity. Good bread is at the heart of everything good in life. Thank you for showing us how easy it can be.
Amazing! Thank you so much for the video tour!!!
I love that you included a picture of the view the rolls had. What happy rolls those must have been!
What is 00 flour? Was it more of a whole grain? Thanks for sharing.
Hi Halley,
It is a white flour that is ground very fine and makes for a lovely dough. We will be talking about it in some length in our upcoming book about pizza and flatbreads.
Thanks! Zoë
A bunch of us just went on vacation. We brought a ton of stuff with us to make bread–the bucket, some silpats (our preferred baking surface), and ingredients. The only thing we didn’t have was refrigerator space. Luckily there were 15 of us, so we just baked an entire batch of dough whenever it was ready, and all the bread was eaten that day. So, the dough is fine unrefrigerated for at least 24 hours–just punch it down before you shape it.
The other thing we learned is: you can’t overbake this bread. Really. We accidentally left some in the oven for over 50 minutes, possibly an hour. The crust was so dark and hard that we were sure the inside would be dry and it would all be inedible. You know what? It was delicious! The crust was nice and crunchy and there was absolutely nothing wrong with it. The oven temperature may have been off–I would guess 425–so maybe that’s why it was OK?
Hi Sarah,
What a great adventure. Jeff has even put his bucket in a river when camping! 😉
Our dough is so wet that it is very difficult to dry it out with over baking. The only thing to look out for is an overly tough crust, but it sounds like yours was just perfect.
Thanks! Zoë
When making rolls like that…..how long to bake?
Gorgeous!!!
Hi Helen,
Here is a post that gives the times for baking rolls. https://artisanbreadinfive.com/?p=536
Enjoy, Zoë
What a wonderful experience you had…and ventured to making bread in Tuscany of all places! The villa looks just charming. I have looked at villas in Europe and would love to plan it sometime. And that tasty butter from Europe…glass of vino, olives, cheese, you are truly taken away…to Tuscany. Thanks for sharing!
Oh, that takes me back! I spent a semester in Florence when I was in college (2003). After a few rounds with the very hard local bread, I decided I really needed a softer crust, so I had my mom e-mail me a simple French Bread recipe, and I made my own bread the whole semester. I used a Nuetella “cup” and a spoon for my primary measures. Unlike you, I was able to find dried yeast, but I did spend much too much time staring at the flours, trying to determine which one to use!
Thank you for sharing–it’s great to go back in my memories to that semester!
This is a wonderful post. Inspiring.
Gorgeous–the scenery, the pretty little window, and especially the rolls. What a wonderful trip!
I have to laugh as this is close to how I make my bread all the time, except I mostly cook it in a camp oven.
Zoe, thanks for sharing not only your experience but the view. I particularly enjoyed seeing your boys playing in that beautiful locale.
I love your new healthy breads book! I am wondering, however, how to add sprouted grains into your master recipe? thx.
Hi Rosanne,
Neither of us have tried adding sprouted grains yet. Many people have inquired and we hope to hear the results of their experiments. Eventually we’d like to play with adding them, but until then we’ll wait and hear what others have done.
Thanks, Zoë
Sorry about the random post: I’ve spent the last 12 months improving my bread making (kneading, second rise etc. etc.) and just tried your Master Recipe for a laugh today. It obliterated any bread I’ve made before. Perfect crust, perfect texture, great taste. It’s awesome and demoralising at the same time!
Really impressed. You guys are great.
Hi Noelle,
Wow, thank you so much for giving our method a try and for the sweet note! I hope you enjoy all the bread you are baking, no matter the method!
Cheers! Zoë
Hi, Zoe and Jeff! I have just started baking bread using your HBin5 book–I LOVE IT, and I was wondering if I can put any of the dough from your recipes into a loaf pan and cook it so that we can have sandwich bread. I’ve seen the sandwich bread recipes in the book, but I was just wondering if I could toss other doughs in a loaf pan as well w/o making any adjustments. Also, why do most of your breads contain no eggs, but the recipe for soft, sweet sandwich bread your kids will love(sorry, that’s not the right name I know) calls for eggs? Just wondering why there was a difference. Thanks so much!
JOY
Hi Joy,
Here is a post about baking breads in a loaf pan: https://artisanbreadinfive.com/?p=904
Adding the eggs tends to result in a lighter textured loaf, which has an even crumb and makes great PB&J. These loaves also have a softer crust. The breads without eggs tend to have a more open hole interior and a crisper crust. They are just two different styles of bread and depending on what I am in the mood for I love them both.
Thanks! Zoë
I’ve just found this blog when researching bread making. How great- I love that you did a step-by-step with ingredients found in Italy. I’ve also been wondering about using the fresh yeast found in Spain. I also don’t have all the equipment that I used to have, so this has been inspiring, thank you!
Hi Katharine,
happy baking in Spain!
Enjoy, Zoë
I just had to share that I finally made pita bread…and it was amazing! My boys helped roll out the first piece, which opend up beautifully in the oven. The second piece I made didn’t open much at all, but it didn’t matter!
I cut one for our dinner tonight and shared the other with our neighbor.
Once again, you two rock!
Thanks Tara! Most likely bread I’ll make, indoors or out is pita or some other flatbread. Some posts on the subject:
https://artisanbreadinfive.com/?p=1984
https://artisanbreadinfive.com/?p=1365
https://artisanbreadinfive.com/?p=768
https://artisanbreadinfive.com/?p=518
https://artisanbreadinfive.com/?p=94
I just made my first loaf from the master recipe yesterday, as did my girlfriend and we both had trouble with wet dough and little rise…I mean it looked delicious and tasted pretty darn good, but I missed the mark…Any pointers to make my next loaf better. (I internal temped it to 205 degrees, also not very brown …on top at all…I think I needed way more water in my broiler pan, as it all had evaporated by the time I took it out)..the only equipment I am missing is the oven thermometer..Any help would be appreciated. Thanks so much and I LOVE your book….
Amanda: First off, your oven temp may be off, which would explain the poor browning and lack of oven spring (rising on contact with the hot surface and air in the oven). https://bit.ly/czmco2 works well. Any chance you used bleached flour? Would be too, too wet (not enough protein in there). Check all our FAQs on that page too…
The water in the pan SHOULD be gone by the end, but you may have a leaky oven, and a steam alternative might work better:
Baking in a Dutch Oven: https://artisanbreadinfive.com/?p=552
Aluminum Roasting Pan for Crust: https://artisanbreadinfive.com/?p=510
Cloche baking: https://artisanbreadinfive.com/?p=566
Hi again, thanks so much for your response. I will definitely buy the thermometer this week before I try another loaf. Does it matter if the steam tray was above the loaf, the book said any rack….And definitely used unbleached flour and followed directions to a tee…but we’ll see with the next loaf tomorrow!!
Hi Amanda,
It doesn’t matter which rack you place the steam, as long as there is room for the loaf to rise.
Let us know how the next loaf goes! Zoë
Hello! I just found out about your book and recipes and I am lacking some tools–baking stone and pizza peel! I plan to go buy some, but won’t be able to for a few days. I currently have the dough sitting out for the 2 hours and will put it in the fridge later on, I’m anxious to try it, so what can I use instead of the stone and pizza peel? I saw what Zoe did for the rolls, what can I use? cookie sheet? I have a metal frozen pizza “sheet” (has small holes in it), could that work? I don’t want to wait until I have the materials! Please help 🙂 Thank you in advance!
Hi Theresa,
Thanks for giving the bread a try.
You can bake the bread on a cookie sheet or in a Dutch oven. Here is a post about baking the bread in a closed pot: https://artisanbreadinfive.com/?p=552.
To get the loaf into the oven you can use a baking sheet that has no sides, this makes it easy to slip in.
Hope this helps! Zoë
I love your books and have been using them for several years. Over the last few months though, the crust on the breads have seemed thin and are fairly soft. Any idea on what I’m doing wrong? I can’t figure out what’s changed as I used to get great crusts!
Thanks so much!
Hi Zoe, amazing post! The view outside is magical (Tuscany is on my list of “have to see” places). I think it’s also great that you’re showing people that baking doesn’t have to be strictly by the book and a little experimentation can still lead to great (or at least acceptable) results. This is when baking and cooking become fun.
Hi Zoe – same Kathy with the dense bread but I want to ask where you stayed outside San Gimigiano. We were in a villa/appartments just past the east end of town in April of 2009 – place was called Il Borgetto and we had a fabuous visit. We want to go bakc but might want to check out other apartments in the area. Thanks
I found some “00” flour at my local Italian grocery store in Milwaukee (Glorioso’s) on Brady Street. I bought it with the intent on using it for pizza dough but I have been told that it can also be used for making pasta too. I am really jazzed for the release of your new book. In your new book, will you be speaking about using the 00 flour and how much to add without adding too much? I seem to be a little heavy handed with the flour so my results haven’t been optimal yet.
Danno: We will have a recipe using some “00” indeed. I’d love to publish it here… but my publisher will kill me if I do! Thanks for the kind words. Jeff
G’day from Down under!
Zoe and Jeff, my deepest congratulations for such an amazing discovery in bread!!! I just made your plain white with poppyseeds ontop, and it was AMAZING!
Coming from a European background, naturally I ask whether I can have instead 6.5 cups white flour, I can have 3 cups of rye flour and 3.5 cups of white flour? I find that the rye adds a more deeper taste to the bread.
Thank you so much for sharing with the world your amazing, amazing bread!
You can, but you’ll need a little more water. 1/4 cup? It’ll take some experimentation, possibly vital wheat gluten. See our post on using more whole grains at https://artisanbreadinfive.com/?p=1087. Also see our rye recipe in the first book (https://www.amazon.com/gp/product/0312362919?ie=UTF8&tag=arbrinfimiada-20&linkCode=as2&camp=1789&creative=9325&creativeASIN=0312362919).
Thanks for the kind words! Jeff
Hi Zoe, I have a copy of “Healthy Bread in 5 Min./Day. I made Whole Wheat Brioche. Something was wrong, so I checked with my friend, Mary. She looked in her book on p. 275. Her recipe calls for 1/4 vital wheat gluten. On p.275 in my book the recipe calls for 2-1/4 cups vital wheat gluten!! Clearly, mine must be the misprint. Have you had other people asking about this? How could this happen if there has only been one edition so far? Am I right in assuming that 1/4 cup v.w.g. is correct?
Mary and I took your Cooks of Crocus class last month. Thanks so much! I am baking great stuff now. My family loves it. You’re a great teacher!
Hi Kathy,
That was a mistake in the first printing, and the publisher immediately fixed it, but we didn’t catch it before it was on the store shelves. You will want to check out the error page before baking anything else. There are not many in this book, but unfortunately the one you found was a big mistake: https://artisanbreadinfive.com/?page_id=73
Sorry about that and I hope you enjoy the rest of the breads you bake! Zoë
I had this same experience in Tuscany this summer–no measuring implements, no mixing bowls, no recipes, no internet. But armed with my experience working from your first book, I was able to make gorgeous breads and pizzas from a bag of 00 flour and a little yeast and salt–boy, was my family impressed! And now I know that I can make bread anywhere, anytime, with just a few basic ingredients and a few minutes. Truly a gift, for which I send you deep thanks.
Hi Maya,
That is so fantastic! Thank you so much for sharing your story. Makes me want to be back in Tuscany!
Thanks, Zoë
What brands of durum semolina do you recommend for your Italian semolina bread.
Hi Richard,
We tested with both Bob’s Red Mill and the product available on Kind Arthur Flour.
Thanks, Zoë
Did you ever redo this in order to tell us how much flour to use? I have some Caputo 00 flour. Tried a Tuscan bread recipe but it was flat tasting. Sure which I could duplicate Turano Italian bread (bakery in Chicago). Ingredients state unbleached flour (wheat and malt barley_ but no idea as to which flour that is.
We have a recipe for using Caputo or similar Italian brands of “00” flour in our pizza book (https://artisanbreadinfive.com/pizza), on page 73. Our publisher will stop speaking to us if we put all our recipes here on the website! Be aware that the recipe version on page 72 has an error, see the corrections for that book at https://artisanbreadinfive.com/2011/11/15/corrections-to-first-printing-of-artisan-pizza-and-flatbread-in-five-minutes-a-day/.
That said, if you have something in mind which used wheat flour and malted flours, Caputo 00 isn’t going to give you that. You can try adding some malted flour to white wheat flour (a couple tablespoons?) and start experimenting from there.