intro copy

The homemade bread revolution continues, with healthy new recipes…


… ARTISAN BREAD IN FIVE MINUTES A DAY taught busy people how to make great bread at home, with only five minutes of active preparation time. Now, HEALTHY BREAD IN FIVE MINUTES A DAY whips up fabulous breads made with more whole grains, fruits and vegetables. The secret? Mix up a lightning-fast batch of moist no-knead dough, save it in your refrigerator, tear off portions over the next week or more, shape, and bake.

click to purchase

Click to purchase

store logos

amazon

Follow us on Twitter


Red Star Yeast

Recent Posts

Categories

Links:

Master Recipe for White-Flour dough: Great coverage in “The Week” Magazine, but there was one little problem…
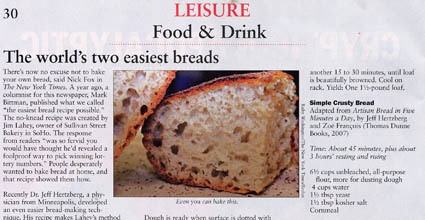
Print | Email | by Jeff, April 27, 2008
Filed Under press | 130 Comments

mastheadjpg.jpgthe-week-reprint.jpg

Our book had great coverage in “The Week” magazine on April 18th (page 30 in the paper version).  But their version of our recipe has you throwing in 4 cups of water, rather than the correct 3 cups (see the fine print on the right, above).  Please use 3 cups, or you’ll have pancake batter!  The correct version of our basic recipe in the book (page 26) is:

3 cups  lukewarm water

1 1/2 tablespoons granulated yeast

1 1/2 tablespoons kosher or other coarse salt

6 1/2 cups unbleached all-purpose flour

Cornmeal for the pizza peel

And then, you know the drill.  Mix with a spoon in a food-safe bucket, let it rise at room temperature for 2 to 5 hours, then into the fridge for two weeks.  Tear off chunks, shape, rest, and bake as needed.  And you all know you can decrease the yeast (http://www.artisanbreadinfive.com/?p=85) and the salt if you like it.  Details in the book.

But there it is, pretty much.


Comments

Bonnie said...
April 27, 2008 at 5:13 pm

A newspaper article about your book that contained the master recipe was posted on a food forum that I read quite often. I love making the no knead bread but your concept really intrigued me. To think of having dough ready to bake in the fridge whenever I want bread sounded amazing. So I went shopping for a nice big container and started a batch. Made a loaf last night and it was fantastic. Bought the book after supper. I’m really looking forward to trying your other recipes and ideas. Thank you so much — bread making has never been so much fun!

zoe said...
April 27, 2008 at 7:44 pm

Hi Bonnie,

Thanks for writing! I’m so glad you are enjoying the bread and now the book.

I look forward to hearing about your experience with some of the other breads!

Zoë

Kristy Harmon said...
May 2, 2008 at 6:42 pm

Hi Jeff,

Thanks for visiting my blog! I love your book. The brioche is next on my list, but after the 5 pounds the challah left with me, I may need to workout for a week, first. I read on another blog, that the brioche is good made into little rolls, served warm, split, with dark chocolate inside.
Can’t wait!
Thank you jeff & Zoe for a great book.

jeff said...
May 2, 2008 at 6:44 pm

Kristy: Was yours the knitting blog where we decided to adopt the slogan “bread is the new knitting”?

Not to take anything away from knitting!

Thanks so much for your comments. That brioche dough is very, very versatile, let us know how you make out. Jeff

Shimrit said...
June 11, 2008 at 4:59 am

Hello from Israel.

I just found your interesting and raved-about technique online and want to try it out myself.

Only thing is – I’m not sure what type of yeast the recipe calls for (as here when we say “granulated” yeast we refer to a type of fresh yeast).

Looking at the amount of flour used my guess would be you meant dry yeast (sometimes called instant yeast), i.e. the type not necessarily kept in the fridge. Is this correct?

Many thanks!

zoe said...
June 11, 2008 at 5:27 am

Welcome Shimrit,

Yes, you are right, we are referring to dry yeast.

You can use fresh yeast but you have to use much more of it than we call for in the recipe.

Have fun and let us know how you like the bread!

Thanks, Zoë

Shimrit said...
June 11, 2008 at 12:48 pm

Thank you, Zoe, for your quick reply. I’ll let you know how it goes!

Elise Ackerman said...
June 13, 2008 at 11:05 pm

Hi there. I bought am on my second order of books. I love how easy the recipes are. My favorite is pita, which requires no time to rise and is really delicious. I am craving a recipe for walnut bread and was wondering if it would be as easy as adding walnuts to the olive oil bread?

jeff said...
June 14, 2008 at 9:26 am

Elise: Thanks for buying all those books, you’re the best!

As they say in the commercials, “Just Do It!” Either mix in the coarsely chopped (or even halved) nuts with the mixing water, or roll them in as we do with other add-ins in the book. It may take a little more resting time and baking time. Jeff

Shimrit said...
June 27, 2008 at 7:29 am

Hello again.

This is just to say I have tried the basic recipe and the bread came out very tasty. The only thing I would like to improve is the crust -could you give me a tip as to how to make the crust crustier? It was kind of soft even slightly rubbery – I heated the oven well before putting the bread in and I poured water in it. Any advice on this?(It was still very good, don’t get me wrong)

By now, I have ordered your book from Amazon but it takes a while to ship all the way over here.

Shimrit said...
June 27, 2008 at 7:30 am

And thanks for your help

jeff said...
June 27, 2008 at 2:03 pm

It may be that your oven isn’t well-sealed; in that case you can try alternative methods to create the steam environment:

1. Bake in a pre-heated, closed cast-iron pan

2. Cover with an aluminum roasting pan, which also traps the steam.

3. Spray well with water from a food-grade sprayer, at the start of baking and then every couple of minutes, for a total of three sprayings.

Have you checked your oven temperature? Jeff

Shimrit said...
July 1, 2008 at 11:20 am

Hi Jeff.
I’m pretty sure the oven was hot enough, but will certainly pay extra attention next time. It hasn’t occurred to me that the oven could not be sealed well – that’s a good point. Thanks for all of your tips, I appreciate it. Can’t wait to look at your book up close and personal!

jeff said...
July 1, 2008 at 11:38 am

Great, let us know how this turns out. Jeff

Holly Harrel said...
November 23, 2008 at 10:14 pm

I’m just wondering if your recipe can be adapted for gluten-free diets.
Thanks

jeff said...
November 24, 2008 at 5:45 am

Holly: Welcome to our site! Great minds think alike. Our next book, “Healthy Bread in Five Minutes a Day,” will be released in 12/09 and will have a chapter on gluten-free breads. The material isn’t ready to be excerpted on the website at the moment, so hang in there with us… Jeff

Heike Burnett said...
January 30, 2009 at 9:03 am

Hi,
I just came across your book and had to order it right away!I’m german so the hardest part about living in the States is finding good bread.Although I have found good bread by now, there’s nothing like good bread right out of the oven.One thing I haven’t been able to find is “Broetchen” I don’t know if either of you has ever been in Germany to taste one of the many versions,I’d be happy with just the plain basic version, nice& crusty outside and soft inside.Any ideas on how to make it with your dough?Or should I have waited to get the book before posting this?I’m very excited so I hope the book gets here quickly.Thanks for any help,
Heike

jeff said...
January 30, 2009 at 9:34 am

Heike: We don’t have a Broetchen recipe in the book, but it sounds like you’d be happy with a lightly enriched dough like the buttermilk dough, then form into rolls and bake. See what you think when the book arrives. Is this the shape you’re looking for: http://www.artisanbreadinfive.com/?p=392

Money Rules, Debt Stinks! » Blog Archive » The BYOB Challenge said...
March 5, 2009 at 1:18 pm

[...] which will give you lots of information, pictures, directions, advanced options, plus the basic Master Recipe.  Check it out but I recommend you plan on getting the [...]

Andrea said...
March 8, 2009 at 8:58 am

Greetings! I just ordered your book and am looking forward to it. I have been experimenting w/ baking my own bread for a while now and am intrigued by your method.

I am having a problem getting my bread to brown in my oven though. Does anyone have any idea why that would be? The loaf will be cooked through just not browned on top.

jeff said...
March 8, 2009 at 7:13 pm

Are you using a stone? And a water bath? Both make for a the great brown crust. And test your oven temp too… May be too cool.

Andrea said...
March 10, 2009 at 4:58 pm

Thanks Jeff. I’ll be sure to try all those things. Just got my copy of the book today and look forward to trying this.

Jan C said...
March 11, 2009 at 5:54 am

found your website through DPL and have never, ever baked bread, mainly because I thought I would need a lot of time, which I don’t have. I am going out to get the pail and your book and will try this over the weekend. I’ll let you know how it turns out.
thanks

Beth said...
April 6, 2009 at 5:38 pm

Hi!

I found your recipe this weekend and had to try it right away. I’ve never baked before though, and I think my inexperience may have gotten the better of me.

When I combined the warm water and flour, the resulting mixture was so dry and flaky that quite a bit of dry, unabsorbed flour was left. (I think I may have added the flour too slowly? Or possibly the water temp was wrong?)

I went ahead with the process anyway, and it seemed that after refrigerating, the mixture became more dough-like and much of the excess flour was absorbed (everywhere but the exposed surface).

After baking, the result was promising, but not quite perfect. I’m going to try again later this week, and I plan to buy the book soon to try my luck with other variations, but I was wondering if you had any suggestions as to what I may have done wrong? I’m determined to get it right!

Thank you!

zoe said...
April 6, 2009 at 9:37 pm

Hi Beth,

It sounds like your dough may have been too dry, and therefore you can just add a couple tablespoons more water. What kind of flour did you use? Some brands have more protein and absorb more water than others.

it may also be that you just didn’t mix it all together well enough. If mixing with a spoon seems like too much work you can certainly do it in a stand mixer.

You should just dump all of the flour in at once and stir it up. If you add it a little at a time that last addition of flour will be very hard to mix in.

Thank you for trying the bread. Happy baking! Zoë

Beth said...
April 11, 2009 at 11:24 am

Okay, I did exactly what you said – measured all the flour first and dumped it in at once – and it worked perfectly!

Thanks so much for the advice, I can’t wait to start trying out other recipes in the book!

zoe said...
April 11, 2009 at 10:19 pm

Great Beth,

Thanks for letting us know that it worked out!

Enjoy all the bread!

Zoë

Kathy in Eugene OR said...
May 5, 2009 at 4:15 pm

Tasted your fabulous bread this past weekend by a friend in Philly. As a weekend bread maker, your recipe will free up my weekends and give my family fresh hot bread during the week! I can’t wait until my own book arrive.

Pam on Vashon Island, WA said...
May 7, 2009 at 6:00 pm

I made my first boule loaf and it is divine but too small for my family of two. WIll it take twice as long to bake if I double it? thanks so much!

jeff said...
May 8, 2009 at 9:10 am

Pam: not 2x as long, more like 20-30% longer, but it depends on your oven so do trial and error.

Carol said...
May 11, 2009 at 9:15 am

Am ordering your book but don’t want to wait to try the recipe. What temperature do I bake at and how long? This sounds like it could be my budget saver.

zoe said...
May 11, 2009 at 9:08 pm

Hi Carol,

Bake the loaf at 450 degrees on a preheated baking stone for about 30 minutes.

Enjoy! Zoë

Joan Glenn said...
May 16, 2009 at 4:50 pm

how does your bread rise with out sugar?

zoe said...
May 16, 2009 at 5:45 pm

Hi Joan,

The sugar does feed the yeast and may make the initial rise go faster, but it isn’t essential to the process. The yeast will get plenty of food from the flour itself.

Thank you, Zoë

Ann said...
May 17, 2009 at 10:13 pm

I have heard that instead of spending $15 of $20 on a baking stone, you can use an unglazed Saltillo quarry tile at about $1 for a square foot tile. Do you agree?

jeff said...
May 18, 2009 at 5:43 am

Ann: James Beard advocated it in Beard on Bread, now a very old book. Many people do it; my problem is that I can’t vouch for the food safety of an industrial product.

The other problem is that it’s small… tends to be messy because cornmeal or flour goes off the ends and onto the oven floor, where it burns.

Denise said...
May 18, 2009 at 7:58 am

I saw this on “Everyday Cheapskate and I’m dying to try it. New to baking bread, so I do have a nice pizza stone, but what is a “Pizza Peel” also, I have Sea Salt, is this OK, or do you recommend the Kosher? thanks. I’ll let you know how it goes,
Denise – Massachusetts

Linda Smith said...
May 18, 2009 at 8:14 am

We only eat whole wheat bread. How does that affect your recipe and rising time? Do I need to use half white flour and half whole wheat?

Connie said...
May 18, 2009 at 9:29 am

Could I use a gluten free flour mix(Tom Sawyer or similar) in place of wheat flour?

Wendy Thomas said...
May 18, 2009 at 10:40 am

as a mother of 6 kids and a writer on all things thrifty – I appreciate any recipe that can save both time and money, this recipe looks like it does both. Look forward to trying it and will report results.

jeff said...
May 18, 2009 at 10:49 am

Denise: Pizza peel, see the picture at http://tinyurl.com/czpque. Sea salt’s fine, but is sometimes less coarse than Moreton Kosher (which we tested with). You may need a lower volume. See what you think of the saltiness and see our post on salt: http://www.artisanbreadinfive.com/?p=139

Linda: Major changes if you go with whole wheat. See our 100% whole wheat recipe in the book, and the posts on this at http://www.artisanbreadinfive.com/?p=142. Our 2nd book is really going to focus on whole grains, to be published on 10/27/09.

Connie: Gluten-free is a completely different ball game, and you can’t just substitute. We’re working on it; there’ll be a dozen or so GF recipes in the new book (stay tuned for 10/27/09 release date).

Wendy: Let us know! 40 cents per loaf for the ingredients…

Louella said...
May 18, 2009 at 4:21 pm

Jeff and Zoe, I want to tell you how happy you made about 100 people today. I’m running a free soup and bread lunch program on Mondays and we feed about 100 people a week. We’ve had great bread bakers but they’re unpredictable.

Today I tried your bread (the wwheat) and it was FABulous. Even though I just mixed up the dough yesterday. I’m about to mix another batch so it has some time to get good and sassy before next Monday’s lunch. (And this time I’ll make a double batch!)

I thought you were probably stretching the truth with the 5 minute claim, but it took me about 5 minutes to make ALL 4 loaves!!! It generally takes me more time than that to find my keys.

Thank you, thank you, thank you!!!

zoe said...
May 18, 2009 at 10:47 pm

Hi Louella,

Thank you for the wonderful note and all of the great work you are doing. I’m so pleased that the bread can play a part and ease some of your time!

Thank you! Zoë

Dot said...
May 19, 2009 at 4:10 am

Thanks for promoting homemade bread! I’m a bread baker from way back, but have ordered your book.

Michelle said...
May 19, 2009 at 6:56 am

Would this method work to make the Ezekiel 4:9 type bread? I’m allergic to flour.

Thanks.

jeff said...
May 19, 2009 at 8:53 am

Ezekiel 4:9 mentions wheat, barley, beans, lentils, millet, and emmer. From that list, only wheat and emmer have gluten, which is neccesary for bread to rise. You can certainly use these kinds of ingredients in our method. Check our post on whole grains and the use of vital wheat gluten (http://www.artisanbreadinfive.com/?p=142); Ezekiel-type ingredients can weigh down a loaf. We’ll be making bread like this in our next book— “Healthy Bread in Five Minutes a Day,” scheduled for release 10/27/09.

When you say “allergic,” if you mean wheat allergy, be careful with blends labeled “Ezekiel” because my guess is that most of them have some wheat. And obviously don’t use vital wheat gluten if you’re gluten allergic. Jeff

Will Blog For Shoes said...
May 21, 2009 at 8:04 am

I just read about this on Mary Hunt’s blog. I cannot wait to pick up the book and try it!

Judith said...
May 25, 2009 at 2:56 am

Jeff,
Mary Hunt’s e-mail about your bread could not have been more timely. Sunday night, I tryed for the third time making bread from a recipe I found. Needless to say, it came out awful. Early monday morning, I recieved her e-mail on yor book; I ordered it right away. I can’t wait for it to come in…

zoe said...
May 25, 2009 at 6:24 am

Hi WBFS and Judith,

Welcome and we hope you enjoy all the bread you will be baking!

Happy Baking! Zoë

missy said...
June 2, 2009 at 6:30 pm

i just made my first batch of the basic recipe, and i did not put the lid on right away. is that going to make a big difference in how it bakes up later?

i am so excited, because this was so extremely easy!

jeff said...
June 5, 2009 at 6:32 am

Won’t matter!

Beth said...
June 6, 2009 at 8:20 pm

I’ve been baking the 5-minute way for a few months now. I really like the 100% whole wheat loaf. Any tips on how to get a taller loaf? I can’t find a smaller loaf pan (I guess I have the standard size), but wondered if it would work to simply use more dough and make something like a 2-lb. loaf.

jeff said...
June 7, 2009 at 6:25 am

Yes, just use more dough. The so-called “one-pound” loaf pans make a taller loaf when you use 1.5 to 2.0 pounds of dough in them.

Watch for longer baking times, but it will work well, check out our post on WW breads at http://www.artisanbreadinfive.com/?p=142, and check out our new book on whole grains and other healthy inredients, now available for pre-order at http://tinyurl.com/pe8yr9 Jeff

dale said...
June 13, 2009 at 10:44 am

My wife has been making wonderful bread for 30 years. I on the other hand have been making bread, using your book, for a day.

My wife is astonished and also dismayed
over how easy I made some of the best bread we’ve ever eaten .

Thanks for bringing fresh bread on a daily basis into our home.

Dale Pero

Teresa said...
July 15, 2009 at 12:15 pm

I love your book! I live in the boonies in California and it takes me about an hour to get to a decent grocery store. Your book has allowed me to use the items I stock up on in my pantry to make delicious bread, breakfast treats and deserts whenever I want. I have even been baking loaves for my husband to take to work at his station to share with the other firefighters. They love it! Thanks for making my life a little more simpler!

Teresa

zoe said...
July 15, 2009 at 4:42 pm

Hi Teresa,

So glad you are enjoying the bread you are baking! How wonderful that your husband is sharing with the other firefighters!

Thanks, Zoë

Melinda said...
July 18, 2009 at 3:25 am

I’ve just made my first loaf of this and it is wonderful! Impatiently waiting for my book to arrive, it should be here next week. Yum!

Thank you! :-)

Sugarcrafter » Calzones said...
July 20, 2009 at 7:15 am

[...] Last week for dinner, I made these calzones since they were cheap and since I usually have some kind of bread dough in the fridge. This time I had the master boule dough from Artisan Bread in Five Minutes a Day on hand, the same dough I used to make my pepperoni bread. I believe you can find the recipe for the master boule on their blog here. [...]

Katherine said...
July 22, 2009 at 10:12 am

Can you use whole wheat flour?

jeff said...
July 22, 2009 at 10:20 am

Whole wheat is great, but keep in mind that it takes more water, you cannot just swap the flours. That’s what our second book is all about http://tinyurl.com/pe8yr9. Since the book won’t be out till 10/27 (you can only pre-order now at that site I just gave you), check out our post on this subject http://www.artisanbreadinfive.com/?p=142. Jeff

Sugarcrafter » Artisan Bread in 5 Minutes a Day said...
July 23, 2009 at 7:47 am

[...] that). I’ll end this post with some photos of one of my favorite breads to make using their master recipe: pepperoni [...]

dana said...
July 23, 2009 at 8:21 pm

Just a quick question before I get started, do I cover the dough at all?? While it sits for 2-5 hours or even in the fridge for the 2 weeks??

jeff said...
July 24, 2009 at 2:16 pm

Cover it, but not airtight. Plastic wrap or a non-airtight lid is fine, so are vented lids. Jeff

Brenda Hall said...
July 26, 2009 at 12:14 pm

1. After rise, “to fridge for two weeks” – do u have to wait for 2 weeks to use or does it last 2 weeks? also 2. How long to bake and on what temp?

zoe said...
July 27, 2009 at 7:03 am

Hi Brenda,

You can use the dough after the initial 2 hour rise.

For the basic boule you want to shape a 1-pound ball, let it rest for 40 min – 1 hour, bake at 450 with steam for 30 minutes. We go into way more detail on page 25 of our book.

Enjoy! Zoë

Mary K said...
August 2, 2009 at 2:23 pm

I just amde my first loaf, following your Master Recipe and the instructions in your book. While the interior of the laof was wonderful, the exterior was quite hard and bordered on burnt. I would like to make another, but wonder whether I should simply shorten my baking time, or perhaps lower the temp and keep the time the same – any suggestions?

zoe said...
August 2, 2009 at 9:53 pm

Hi Mary,

Are you using an oven thermometer? It sounds like your oven may be running too hot? I’d test it and then you can adjust the temperature.

Let me know what you find out and we’ll go from there.

Thanks, Zoë

Mary K said...
August 4, 2009 at 7:24 am

Thanks Zoe!

I checked the oven temp – spot on – so, being an adventurous soul, I tried again. Success! (I have a strange feeling that the thermostat on the oven may have gotten bumped with the first loaf!)

The bread came out so well that I had to make up the rest of the dough in order to have enough bread for dinner! There really is something about fresh bread that draws the family to the kitchen (” …just a little piece? Please?”)

Thanks for the opportunity to provide wonderful things for my family. I can’t wait to try more of the recipes in your book (and to show off!).

michele waller said...
August 6, 2009 at 4:15 pm

in the bread recipe you said to put in the refrig for 2weeks… is that wait 2weeks before you use it or it is good to use for up to 2weeks?

jeff said...
August 7, 2009 at 5:05 am

Good for up to two weeks…

gregh said...
August 9, 2009 at 5:18 am

after taking a grapefrut sized piece from the fridge, do you squeeze all the air out of the loaf or knead it at all? I am working from the aritcle in Mother Earth News and the instructions were confusing about ezactly how much to knead or squeeze it down after the flour/boule sat overnight in the fridge
thanks greg

jeff said...
August 9, 2009 at 7:26 am

Gregh: No, don’t squeeze air out– handle it gently and DON’T KNEAD. Otherwise it will be dense and unappetizing. Just briefly shape for less than a minute as we do in our videos at http://www.artisanbreadinfive.com/?page_id=63. Jeff

jeannaMO said...
August 10, 2009 at 8:25 am

I am so EXCITED about your recipe! I have been making it at home for about 6 months and now I am starting a high school age class at Sunday School for bread baking/devotional . Your recipe makes all this possible, especially for beginners! My only question would be about slicing the bread. I personally use an electric knife, but since the loaf is so “crusty”, what is your preferred method as far as slicing?

Thanks again for all this wisdom! It is now my standard go-to for pizza crust as well as eating with dinner! Can’t wait for winter soups (bread bowls!)

jeff said...
August 10, 2009 at 8:34 am

Jeanna: I think a traditional serrated bread knife works well, otherwise you don’t easily go through the crust and that compresses the slice, deforming it. If you’re not happy with your electric knife, try this Henckel’s bread knife, actually very inexpensive from Amazon, at http://tinyurl.com/lmvk5q.

Colette said...
August 20, 2009 at 1:46 pm

Hi Zoe & Jeff, my son (chef) & I opened a cafe in a small village in Tasmania, Australia, last year. We make all our own bread using your bread making method. Our customers love it! Your new book sounds fab…congratulations!

jeff said...
August 20, 2009 at 5:45 pm

Colette: Thanks so much for writing– we love hearing from people all over the world this way. Curious— where did you buy the book, Australians on this website report difficulty finding it. Jeff

Deborah said...
August 22, 2009 at 6:24 am

Hi – I bought your book and had good success w/ my first loaf – but when I went to make the 2nd (2 days later) the dough had somewhat flattened and the baked product was way too dense to eat – please tell me what I did wrong. I love the idea of easy bread. Thanks so much for your help.

jeff said...
August 23, 2009 at 6:47 pm

Deborah: Try all the suggestions related to dense crumb, at our post on the subject: http://www.artisanbreadinfive.com/?p=141. The longer rise may be to your liking— rather than 40 minutes, try 60 to 90. That might be the first thing I’d try.

Please get back to us as to what you think. Jeff

Vicki said...
August 24, 2009 at 2:21 pm

I am baking my first loaf of bread as I send this off to you. My daughter raves about how easy and yet how good it is. I do have one question for you since I don’t have your book yet(am buying it tomorrow). What yeast do you recommend? I never get the rise I expect even thought my yeast is suppose to be fresh.

zoe said...
August 25, 2009 at 7:21 am

Hi Vicki,

Thank you for trying out the bread. We are so happy that you and your daughter are enjoying the loaves you bake!

We have found that it doesn’t matter what kind of yeast you use in the recipe. With the long storing time, they all seem to behave about the same.

I suspect that your issue is that your dough needs to rest a bit longer before you bake it. The dough should no longer feel cold and tight when you slip it into the oven. This will allow it to rise better and it will improve the crumb as well. You can let it rest about 15-30 extra minutes, depending on the temp of your kitchen.

Thanks, Zoë

elena said...
August 25, 2009 at 9:26 am

Just made my first batch of dough (after ordering your book, but I couldn’t wait!)…How soon can I bake with my dough, how large a loaf, how hot and how long? Many thanks and congrats on the new book!

Sadie said...
August 25, 2009 at 1:42 pm

I just got your book and I’m confused about the storage. You keep saying covered but not air-tight. Does this mean tupperware-type containers are not to be used? Can I use a mixing bowl covered with plastic wrap? Or a dutch oven-type container with a lid? Thank you. I’m looking forward to my first loaf!

zoe said...
August 25, 2009 at 10:26 pm

Hi Elena,

So glad you are trying out the bread. The Master recipe in the book goes into great detail about how to bake your first loaf of bread. Without some of those details my description may seem lacking. We cut off a 1 pound loaf, let it rise for about 45-60 minutes on a pizza peel covered in cornmeal, and bake at 450 on a preheated baking stone with steam for about 30 minutes.

If you allow your dough to rest in the refrigerator for a few days while you wait to get the book you will have a lovely dough and more details to guide you through the process.

Thank you and we look forward to hearing about all the bread you bake! Zoë

zoe said...
August 25, 2009 at 10:35 pm

Hi Sadie,

You can use Tupperware, but you don’t want to snap the lid shut. Leave it slightly open. The gas from the yeast needs to be able to escape or you will get too much pressure building up in the bucket and their will be an alcohol smell to your dough. You could also use a bowl and plastic wrap or a dutch oven, but the bucket is easiest for storing and fitting into your refrigerator.

I hope that clears things up? Thanks, Zoë

Sadie said...
August 31, 2009 at 4:08 pm

Thank you so much for your quick response. I have now made three loafs, and I love them. The one problem I had was the bottom being too done and I’ve just moved the rack higher. Now, the only thing I’d like to improve is the denseness of the inside. It can be ‘moist’ in areas, not light and fluffy. Do I need to bake it longer? It sounds hollow when I take it out but maybe it needs more time in the oven…

jeff said...
September 1, 2009 at 7:08 am

Sadie: Check out our post on getting a lighter crumb, at http://www.artisanbreadinfive.com/?p=141. First thing to try is a longer resting time. Rather than 40 minutes, go for 60 or even 90 and I bet that will solve your problem. Let me know how it turns out. I’m pretty sure your problem is not baking time, and we find that thumping for hollowness is unreliable for very wet doughs. Jeff

Arthi said...
September 12, 2009 at 11:57 pm

Hi: After much waiting, I finally got the book. The first thing I tried was the olive oil dough for pizza as that is pretty much the only bread we eat frequently. I found it to be a little more yeasty tasting than I was used to. Can I cut down the yeast amount ? (I used rapid rise since the book said it didn’t matter) Or does the taste mellow out after a few days of resting the dough in the fridge? I used it right after the first 2 hrs.

-thx

zoe said...
September 13, 2009 at 9:28 am

Hi Arthi,

Thank you for trying the recipe. You most certainly can reduce the amount of yeast you use in the recipes. When you do so you will have to increase the resting times for the dough, depending on how much you reduce it by.

Enjoy, Zoë

Carla Harlan said...
October 15, 2009 at 8:08 am

I LOVE this bread making concept and have purchased books for my daughter and all my friends…as well as stones!

You’ve got to try frying the dough….I had a bit of dough left and oil remaining from homemade potato chips… I rolled small balls of dough right out of the fridg and popped them into the hot oil… After they floated to the top and became a pale golden brown..I drained them and tossed in a garlic butter mixture in a large pan. OMG was that good…and the BEST part…..they didn’t get soggy and soft like other fried dough… SO good…
Thanks for a great book…can’t wait for the next one…
Carla

jeff said...
October 15, 2009 at 8:33 am

Thanks for the kind words Carla, we have deep-fried doughuts in the second book. Believe it or not, if you fry at the right temperature, they don’t absorb all that much oil. Jeff

Sue said...
November 19, 2009 at 12:33 pm

Hi, I haven’t purchased ’store bought’ bread of any kind since I discovered your book! My kids ask me if I have any of the ‘good bread’ now when they want toast!

I do have several things I’d like to improve, though, any hints would be appreciated:
1) my bread does not seem to rise as high as the photos. This is pretty consistant with all the recipes have tried. The first batch rises the most, then by the time I make the last batch the dough is more liquid and spreads. (I have yet to let a batch last for more that 5 days, that’s how much I make!)
2) Sometimes (often but not always) the bottom outside edge of the loaf rises up off the bottom of the pan during the cooking process
3) The ‘wet’ nature of the dough makes it hard to shape into anything but a round loaf.

Any ideas would be appreciated. Thanks so much (and my kids and husband thank you too!!)

zoe said...
November 19, 2009 at 8:40 pm

Hi Sue,

Here is a post we did about bread that is a little too dense: http://www.artisanbreadinfive.com/?p=141 Take a look through these tips and let me know if any of it sounds familiar. We can take it from there. You may also want to watch our videos to see if there is anything we are doing differently. http://www.artisanbreadinfive.com/?page_id=63

Thanks, Zoë

D said...
December 3, 2009 at 4:18 pm

You know I gotta say again, you two are fantastic! I just found the link for the youtube video.
I was able to answer almost all of my questions from there. It’s was so awesome. My sons were captivated. They want to do the bread as a science experiment again!
There is still the question of the Gluten… I don’t have to use it, right? And the recipe would be the same, and just as good? Also, if I wanted to add some other ingredients such as cranberries/banana, honey, brown sugar, Vanilla Extract etc.. Do I just add more flour to balance, the moisture? Right? Ha! Thanks for all your patience, really it’s been so wonderful.
I know just found my dream, and it’s finally coming true. Thank you! D.JJJ

zoe said...
December 3, 2009 at 6:51 pm

Hi Dawn,

I’m glad you found the videos. To add other ingredients you will have to experiment with the level of moisture and flour. You will add the gluten to the whole grain doughs from our new book Healthy Bread in Five Minutes a Day: http://www.motherearthnews.com/Real-Food/Healthy-Bread-No-Knead-Bread-Recipes.aspx

Here is the Master recipe from Artisan Bread in Five Minutes a Day in full: http://www.motherearthnews.com/Real-Food/Artisan-Bread-In-Five-Minutes-A-Day.aspx It is taken straight from the book, so you should have all the information you need.

You might also like to watch our videos: http://www.artisanbreadinfive.com/?page_id=63

Thank you for trying the breads and enjoy! Zoë

Valerie said...
December 11, 2009 at 9:54 am

Hi..I’ve got some oat flour I was considering combining with the all purpose flour in your Basic Recipe – anything I would need to change? I’m like everyone else on the list here – excited to try it out! : ) Thanks!

jeff said...
December 11, 2009 at 9:30 pm

Valerie: The Oat Flour bread in chapter 6 of the first book will be just what you’re looking for; yes, there are some changes. We haven’t published that recipe on the web and don’t have any plans to at the moment. Check out our first book at http://tinyurl.com/4as4qd. Jeff

Susan H said...
December 19, 2009 at 3:57 pm

Help..I have made the Anadama bread twice , proofed the yeast with good results. I get a good rise for the first 2 hour rise..but very little during the 90 min rest before baking. No rise during baking. The bread tastes great but is flat..What am I doing wrong? I followed the directions carefully and the dough didnt seem to wet,
Thank you.
Susan

zoe said...
December 19, 2009 at 11:26 pm

Hi Susan,

The Anadama bread is much flatter than most of our other loaves, so much so that we even say so in the introduction of the recipe. It is just the style of this particular loaf, so chances are that you are doing everything just right.

None of our loaves have much of a rise during the 90 minute rest, but most will have a big oven spring. This loaf is different and bakes flatter.

Thanks, Zoë

Ralph said...
December 21, 2009 at 12:49 pm

My wife mixed up a batch and baked a loaf after the first rise using a sheet pan. The bread was very good. Three days later I baked two loaves using a pizza stone. The bread was fabulous. I am concerned about using parchment paper. Paper ignites at 451 deg. F and the oven setting of 450 is, obviously, frighteningly close to that. Does parchment paper have a higher ignition point?
My main question is about pizza. Do you add toppings to the pizza before or after the rest period?

jeff said...
December 21, 2009 at 1:53 pm

The parchment papers come with a temperature rating. I use one rated at 450 degrees F, so check for that– I use the “If You Care” brand, and it carries the 450-rating. Sometimes it scorches, but I’ve never had one catch fire. Jeff

Susan said...
December 27, 2009 at 5:45 pm

Using the master recipe, we don’t get much rise, so the loaf isn’t really usable for sandwiches. We were following the recipe which called for a 40 minute rest; will resting it 90 minutes give us a taller loaf?

zoe said...
December 27, 2009 at 9:49 pm

Hi Susan,

Are you referring to the master recipe in ABin5? Here is a post that may help you get a better texture to your loaf. http://www.artisanbreadinfive.com/?p=141

Let me know if it helps.

It may also just be a matter of the amount you are using in the pan. If so, read this post on Sandwich loaves. http://www.artisanbreadinfive.com/?p=904

Thanks, Zoë

Carol C said...
December 28, 2009 at 6:00 pm

Hello!

I started baking bread some years back and initially used a bread baking machine. Eventually I started baking the dough in the machine, and forming it myself. However, due to time constraints, it was too hard to keep up with the bread and everything else!

I just purchaed your book and it looks like EXACTLY what I have been looking for. THANK YOU!

I do have a couple questions, though….

How wet is “wet” for the dough? I just made my first batch tonight and I guess I’m used to seeing dough in the traditional method. I didn’t know if it was supposed to be as liquid as what was appearing. I used my stand mixer with the dough hook, and I did end up adding one half cup more of the flour. Was this the wrong thing to do? The mixture is stilling rising, so I don’t know how the bread is going to turn out at this point.

Also, regarding the “gluten cloak”, I looked at your pictures, but am still unsure as to how exactly you perform this process.

Hope this email isn’t too long, but I am very excited about trying out more of the receipes and to finally be able to get back to bread making!

Much Thanks.
Carol C.

zoe said...
December 28, 2009 at 10:03 pm

Hi Carol,

I’m thrilled you are enjoying the book. Here are some videos of us making and handling the dough, it may help you get a sense of how wet the dough is supposed to be. http://www.artisanbreadinfive.com/?page_id=63 I find using the paddle attachment is much easier for mixing in a stand mixer.

The videos should also give you a sense of how to gluten cloak the dough. Let me know if you still have questions!

Thanks, Zoë

Carol C said...
December 29, 2009 at 5:45 pm

Hi!

Just wanted to let you know I baked my first loaf tonight from the Master Recipe, and even though a few mistakes were made along the way, it still turned out great. Also I watched some of the videos you referred me to and they really helped alot in regards to the gluten cloak and the correct wetness of the dough. I can’t wait to get another loaf started.

Take Care
Carol

Kay said...
January 5, 2010 at 9:10 pm

Hi – I’ve baked hundreds of loaves of bread the “other” way; now I’ve tried 2 batches the 5 minute way for whole wheat…problem is that the rising before baking doesn’t seem complete after 90 minutes. I’m using SAF instant yeast, which has worked great in the past. Any suggestions? also, we’re at about 6000 ft. here in ABQ, NM- what are effects of high elevation on this method? Looking forward to your reply, since the method is great, and the results are tasty but don’t have the crumb you describe. Thanks, and keep up the good work! – Kay

jeff said...
January 6, 2010 at 6:51 am

Kay: Check out our high-altitude suggestions, that may be your problem, at http://www.artisanbreadinfive.com/?p=144. We also have general suggestions on correcting for dense crumb at http://www.artisanbreadinfive.com/?p=141. If neither of those help, check back with us. Any chance you are over-handling the dough? That’s the problem w/experienced bakers. Don’t punch down. Don’t shape for more than 30 seconds, if that. And of course, don’t knead. All those knock gas out of the dough. Jeff

Lesley said...
January 15, 2010 at 12:25 pm

I want to add a few extra ingredients to light whole wheat recipe right before baking. I want to include some chopped nuts and dried cranberries. If I stretch out the dough into a rectangle, sprinkle on the additions, then rolls up the dough, forming the basic boule shape, will this take out too many air pockets? Is there a different technique rather than this one? I imagine that it would not be a good idea to add nuts/fruit to the initial dough before the long rest in refridgerator because they might start to get soggy? What do you recommend?

jeff said...
January 15, 2010 at 8:50 pm

Lesley: It’s fine, that’s what we usually do, as in http://www.artisanbreadinfive.com/?p=436. I’ve also added at the beginning and it wasn’t a big deal, nothing gets soggy. Jeff

Sherry said...
February 6, 2010 at 5:55 pm

I saw the comments about the cost of stoneware – I started with one stone baking sheet about 10 years ago and now it is all that I will use – I have a whole shelf of stoneware in my pantry – try it and you will love it – definitly worth the $$ – start one piece at a time!!

Beth said...
March 24, 2010 at 8:48 am

See ya later store-bought bread. Thanks so much for sharing your recipes and directions. I have 4 little kids and not much time to bake, but you have changed all this. Sooo delicious. Sooo easy. I mix it up in my food processor, bake one batch ASAP, and then as needed, which is mostly every other day.

One question: I do not get the yield suggested, more like 3 loaves from the gpfrt sized ball. Any ideas?

jeff said...
March 24, 2010 at 10:42 am

Beth: It’s not you. Our original Master from book one makes 3.6 pounds of dough; we say to make 1-pound loaves, but that’s really 0.9 pounds per loaf. Or, as you found, 3 more generously-sized loaves.

I frequently double that recipe anyway… Jeff

Ron said...
March 28, 2010 at 7:17 pm

Hi, Just read the entire blog, and ordered both books.
Can’t wait to get started, your books are to bread making what Rachael Ray is to Italian Cooking.. I love her recipes, and have made many of them.
Decades ago, I used to make pan bread on the camp fire, and baked crude whole wheat loaves in the ashes of the campfire, but I had the luxury of time then.
I’m really excited to explore the recipes in your books, and I’m in love with the simplicity and efficiency of them.
Have you experimented with freezing the dough?

zoe said...
March 28, 2010 at 8:07 pm

Hi Ron,

Thanks so much, we look forward to hearing from you when you are baking the bread! We do talk about freezing the dough in the books.

Thank you! Zoë

Lou Horowitz said...
March 29, 2010 at 6:37 am

Zoe , can you please send me your recipe for the ciabatta bread ,as I watch the video tried to hear the recipe to write down but I don’t hear good~ Thank You , Lou

jeff said...
March 29, 2010 at 10:13 am

Lou: We haven’t posted our ciabatta recipe as a free resource on the website, but it’s available in our first book; here’s the Amazon link to purchase: http://bit.ly/cNtfJI

Our publisher would be very unhappy with us if we provided all recipes here on the site. But I can tell you that the dough we used for ciabatta is the one in this posting above. The difference is the way we handle the dough for this particular bread. Jeff

Kathy said...
March 29, 2010 at 3:01 pm

Hi, any suggestions for using a convection oven for baking as far as reducing the bake time? Thank you so much!

zoe said...
March 29, 2010 at 6:17 pm

Hi Kathy,

The rule of thumb with convection ovens is that you need to reduce the temperature by 20-25 degrees and I’d check it about 2/3 of the way to make sure the front and back of the loaf are coloring evenly. If not, rotate the loaf.

Thanks, Zoë

JC said...
March 30, 2010 at 1:27 pm

I want to try and make pizza using this method. I have had the dough in the refrigerator since Sunday. If I pull it out out a week later how long should I rest the dough at room temp before I stretch the dough for pizza. Thanks!

jeff said...
March 30, 2010 at 2:48 pm

JC: Just follow the directions in the books… no rest period needed for flatbreads

Ron said...
April 1, 2010 at 4:19 pm

Well, I got my books and plastic pail from UPS today, and promptly mixed my first master batch.
Well, at first it was too dry, drier than pie dough, so I kept adding water, until it got too wet and sticky.
I had to drop the project, and get back to work, and now several hours later, it’s risen nicely, more than doubled, so I put it in the fridge.
Problem is, if I touch it, it sticks like glue to my finger.
Do I need to adjust it?

zoe said...
April 1, 2010 at 7:49 pm

Hi Ron,

When it stuck like glue to your fingers had you refrigerated it already or was it still fresh?

Here are a few posts that might be of use to you:

Perfecting the master recipe: http://www.artisanbreadinfive.com/?p=1616

Shaping wet dough: http://www.artisanbreadinfive.com/?p=1715

Hope that helps! Zoë

debra said...
April 9, 2010 at 7:13 am

hey there – i’ve made my first batch of dough, and am currently baking my second loaf after letting the dough live in the fridge for two days. the first was really tasty but VERY ugly(brutto ma buono was what we called it) – seems to be rising unevenly when baking? as in the center split and it looks like it has a tumor : ( the second is doing the same, but not as badly – i did slash more deeply on the second loaf… anyway, do you have any thoughts as to why this might be happening?

thanks in advance!
debra

jeff said...
April 9, 2010 at 6:42 pm

Debra: Try a longer rest time, let’s say 60 or even 90 minutes, and keep slashing deep. See what you think, probably will handle the problem.

Rhena Melancon said...
May 20, 2010 at 1:16 pm

I can’t find the gluten you refer to in your recipe. Can I order from you or someone else. Thanks, Rhena , I’m dying to try it.

zoe said...
May 21, 2010 at 5:36 am

Hi Rhena,

If you read this post you will find a link to the Vital Wheat Gluten: http://www.artisanbreadinfive.com/?p=1087

Thanks and enjoy! Zoë

Roxanne said...
June 9, 2010 at 8:22 am

How should I adjust the master recipe if I am using King Arthur unbleached, all-purpose flour?

jeff said...
June 9, 2010 at 9:35 am

Roxanne: Have a look at our FAQs page above, and click on the second entry.

Celena said...
July 30, 2010 at 1:48 pm

I just made the basic boule… the bread turned out fine… but the cornmeal burned all over in my oven! My poor 18 month old woke up in a panic to all the smoke detectors in the house going off. lol. Any ideas? It’s a propane stove. Also, my oven only takes 15 minutes to get to temperature, should I put the bread in early instead of letting it preheat for 20 minutes, since you say to put the bread in before the oven is fully preheated?

jeff said...
July 30, 2010 at 2:18 pm

Celena: Cornmeal is a smoky product. There are a couple of things you can do:

1. Try to decrease the amount of cornmeal you use. That’s tricky– decrease it too much and it won’t slide off the peel
2. Switch to parchment paper, like this one on amazon (http://tinyurl.com/bctz2c peeling off the parchment for the last one-third of the baking time. You get zero smoke this way– no cornmeal needed.
3. Consider baking on silicone pads like this one on amazon: http://amzn.to/aHDSmM Again, you’ll get no smoking.
4. If you have an exhaust fan, that will help.
5. Consider baking in non-stick loaf pans, which are greased and you don’t get this smoking problem

Jeff

Write a comment