The world’s freshest watercress for savory watercress flatbread

I picked the world’s freshest watercress from a chilly Minnesota river last week, and baked it into fantastic savory flatbread, all out in the wild (everything tastes better outdoors). This camping-trip method blends two favorite techniques from our book: rolling in something that wasn’t originally mixed in the dough, like our raisin challah on page 183, and baking in a skillet on the stovetop (like our naan on page 173).
Family camping trips are a great time to make sure we all stay connected with each other. There are no distractions (from each other!) so this is nothing like the “real” life of work, running a household, and schoolwork. My family is addicted to it and though we only go once a year, none of us can imagine doing without it. We camp in the blufflands of Southern Minnesota, a unique and beautiful part of the state. It’s actually quite a rolling terrain, not like the flat prairie that most people associate with the Upper Midwest. This year, we camped 30 steps from an chilly stream, and it was teeming with wild watercress, growing all along the shallows at the stream’s edge. Bingo!
After the park ranger assured me that yes, it was edible watercress, and that it was legal to pick, I started to think about using it in bread. Watercress has a sharp, peppery, flavor that goes well in all kinds of salads and savory dishes. I love it, but it’s often very difficult to find in supermarkets. So this was really a gold mine. If you can’t find watercress, this recipe would work with any kind of savory green. Arugula comes to mind if I were to buy something for this from the supermarket.
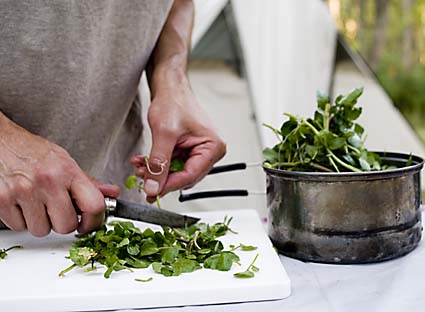
We were a bit squeamish about eating the greens raw in salad (the river water isn’t considered drinkable), but sauteed watercress, when nicely salted and garlicked up, makes a fantastic savory addition to bread, along the lines of our Spinach Feta Bread (page 110 in the book). After I got some help harvesting a bunch with a kitchen shears (above), I cut away the tough stems and roughly chopped the cress with an Opinel folding picnic knife (everyone who goes to France seems to buy for one of these for rustic picnics, but I have to admit that my wife got our Opinel from Amazon). It’s an old-fashioned knife, made of a relatively soft carbon steel that is very easy to sharpen, so this thing is always razor-sharp for camping trips:
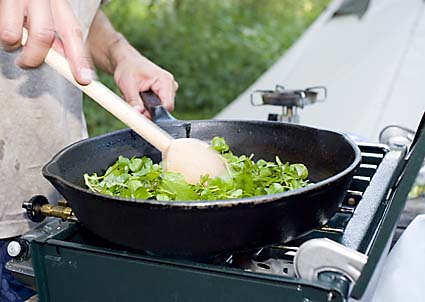
Then fire up a Coleman camping stove , liquid-fueled or propane (or whatever brand you like, so long as it provides a strong heat source that’s comparable to your home stove). Saute a clove or two of chopped garlic in about a tablespoon of olive oil until fragrant and just beginning to turn color. Add a big bunch of chopped watercress and saute over medium-high heat until wilted. Salt to taste and remove from heat. I like a cast-iron skillet for this job.
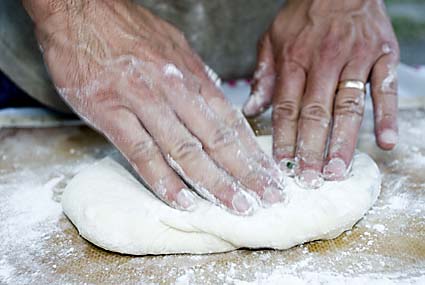
Now, cut off a chunk of pre-mixed stored dough–enough to cover the bottom of your skillet when you roll it out to 1/8 to 1/4-inch thickness (it may take some trial and error, but it’s usually about the size of a peach for a pan this size). On the camping trip, we store basic dough from the Master Recipe in a cooler packed with ice that we stow in the car at night (OK, we had a lapse and left it out in the open for “a while” and a racoon stole our organic watermelon out of it. Could have happened to anyone. We’ve been camping for years and never did this. Some subtle recipe advice: DON’T LEAVE YOUR COOLER OUTSIDE UNATTENDED IN THE WOODS!
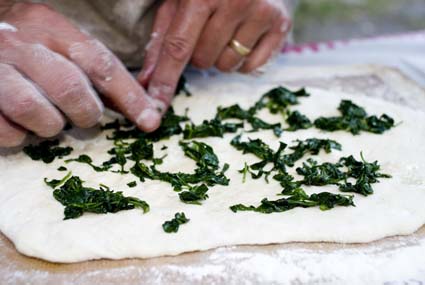
Anyway, roll, stretch, or flatten the dough into a round; for this trip I just brought along a silicon mat and used that as my work surface with a little flour and my hands. No rolling pin on this trip. Which would have come in handy when I tried to intimidate the racoon using nothing but a flashlight. Once the dough is flat and round, scatter the surface with your sauteed watercress:
Then roll up the whole thing into a cylinder like so:
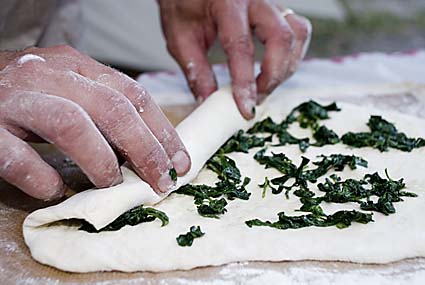
I love this method, because it allows you to use a very basic dough and add in something that radically changes the nature of the bread, just for this one loaf (you can go back to plain bread next time). This technique works well with greens, nuts, raisins, or just about anything. Chocolate, for example. But I digress.
Form the rolled-up cylinder into a ball by tucking the ends underneath, shape the ball briefly and then flatten it again with your hands and/or a rolling pin to form a flat round:
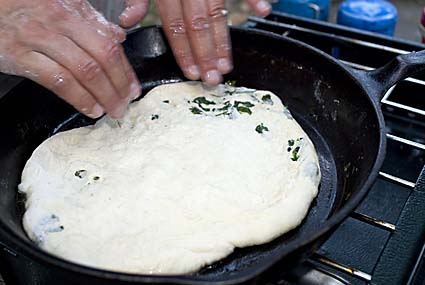
Pre-heat your skillet over medium-high heat with about a tablespoon of oil, add your dough round and then lower the heat to medium-low and cover closely to trap steam. The heat setting you want will take some trial and error; if it’s too high the bottom will burn before the flatbread is set, if it’s too low it takes forever and you get an unappetizing pale result.
If you’ve set the heat right and keep the lid on the skillet, you should get good caramelization like this with about five minutes on a side (flip the flatbread using a spatula when the underside is browned to your liking), but this all depends on the thickness of the dough and the power of your camping stove:
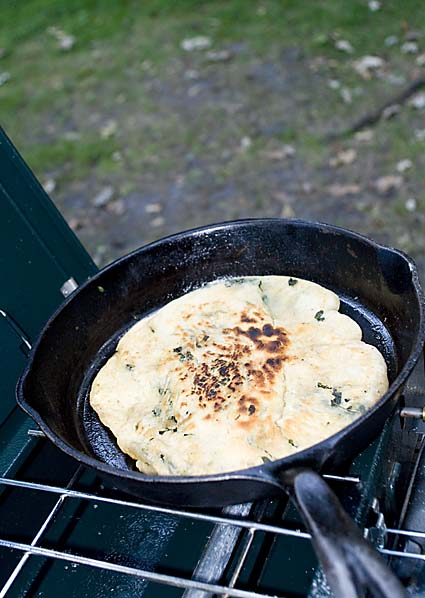
We devoured this thing after cutting it up with the kitchen shears– we used the pieces as improvised hamburger buns. They split well, even though this method doesn’t encourage puffing.
Camping season is rapidly drawing to a close here in the great North– wherever you are, your season is probably longer than ours, so enjoy, and consider having fresh bread every night in your campsite with your family. And of course, if you’re not a camper, you can do this on your kitchen range. If you like that sort of thing.
Note: BreadIn5.com is reader supported. When you buy through links on the site, BreadIn5 LLC earns commissions.
Oh wow. This looks delectable! I will have to try the naan recipe soon. I baked the master recipe into loaf pans last night for a casual little party in which I served tomato, basil and mozz sandwiches on your bread. People raved!
Also, I thought of you b/c I wen to Slow Food Nation last weekend and learned how to build an adobe oven in one day. It’s a long term item on my to-do list, but I think it would be so fun to could this bread in that kind of an oven.
Thanks for checking in Alexandra! Please keep us posted as to how our dough works in the adobe oven. We’ve tried it in a wood-fired oven and the result was terrific. Jeff
I made a modified version of this using the Healthy bread rye dough, (that’s what was in the frig), and the abundance of arugula growing in my garden. I further modified by cooking it straight on the gas grill with a little olive oil. Oh my, fabulous! Thank you Jeff and Zoe for not just teaching us all not just how to bake bread, but for teaching us how to eat well.
Hi Pam,
That sounds wonderful!
Thanks, Zoë
FYI, your cooler link above is broken.
Thanks so much for pointing out the broken link (I’ve ditched it)… I’m very curious to hear how you do with the Coleman oven. I’m going to post a video version on campsite bread this weekend so stay tuned. Jeff
A number of years ago (long before ABin5) I baked fresh bread over an open fire (okay, actually hot coals) using a 9″ stoneware pie plate and a folding camp oven made to fit over a Coleman stove. The bread took a long time to cook because the weather was cold and rainy and the coals were past prime when I started, but the bread was delicious and disappeared rapidly. I can’t wait to try this again with the ABin5 method. Crisp crusts were the bane of my bread-baking experience until I discovered your book. Now I know it’s okay to use very high heat, and I understand the importance of creating steam (which may be a challenge in my little folding oven, but I’ll find a way!).
Enjoy all the bread WoodsyGirl and happy camping!
Thanks, Zoë
I baked in the Coleman oven last weekend. I had intended to bake one loaf in the Coleman oven and one in the Dutch oven, but discovered that the Dutch oven did not get cleaned out from the spring camp out and needs to be sand-blasted. So…I baked twice in the Coleman oven. The results were mixed.
I mixed the dough Thursday afternoon and packed it in the back of the Jeep to rise on the drive to the campground. Since it was cool last weekend, I didn’t bother to put it in the ice box for the night (but I did leave it in the Jeep to keep the critters away from the yummy-smelling yeast!).
Friday after lunch, I pinched off two softball sized pieces of dough, shaped them, and put them in my stoneware pie pan to rise (covered with plastic wrap). About 3 hours later (since it was so cool, it took a long time to rise) I started some charcoal briquettes in the starter chimney. Half an hour later, they were ready.
The campground requires all fires to be contained in their fire rings, which have a built-in grill area, so I used that, but it turned out it was too far away from the coals to make a good crust. But the bread cooked…after about 2 hours (I did have to add extra coals about half way through). I was surprised the bread was not dried out. However, it was quite moist and tasty; just not crusty.
Saturday, I determined to have a hotter fire and cook closer to the fire for a shorter period of time. Silly me.
I did have a hotter fire (more coals), but I ended up with more dough than I expected (unknowingly used less than half the day before). I set the oven on a low folding grill over my large pile of coals. But since there was so much dough, it took extra time to cook…and ended up taking about the same amount of time as the night before. And as it turned out, was still a tad under-done (although I like that flavor, others don’t). However, I got an awesome crust…on the bottom, LOL. The top was still quite pale, though. We tasted it, but I ended up taking it home and baking it again to finish it off. I have pictures, but haven’t pulled them off the camera yet. Will post a link as soon as I do.
Hi WoodsyGirl,
Sounds like quite an adventure in bread making, can’t wait to see the pictures! Thanks for sharing, you will be an inspiration to many!
Cheers, Zoë
I have tried this method ( iron skillet on stove) over the summer as a quick go-to, bread at the last minute method. I love it! I have been making FMD bread from an article in MotherEarth News off and on for a couple years….this has hooked me….bought you book. Thnaks! Love the blog too.
Thanks Lara!