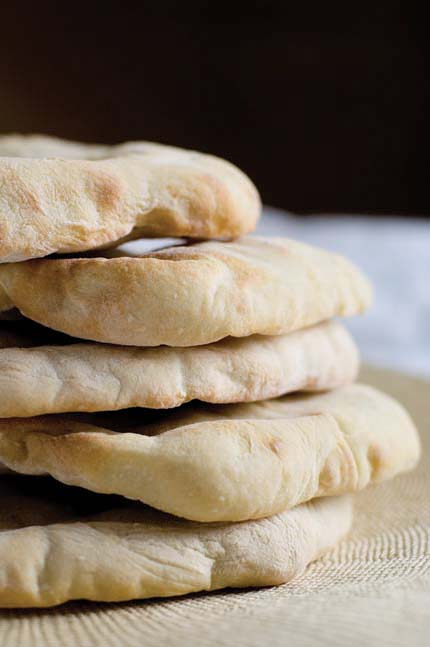
Fresh Pita – the fastest bread in the land!
(photo by Mark Luinenburg)
Pita bread is a simple, unadorned flatbread that dates back to antiquity. You simply roll out your favorite non-enriched dough as thin as possible and bake it on a hot stone. There is no resting time or other ingredients to prepare, so you can have it in a matter of moments. Despite its simplicity pita is one of the tastiest breads around. Perhaps it is all of the surface area and the soft chewy crumb? During the winter, this is great on a hot baking stone in the oven (without steam), but in the summer you can do it on the grill, directly on the grate.
Preheat oven to 500°F.
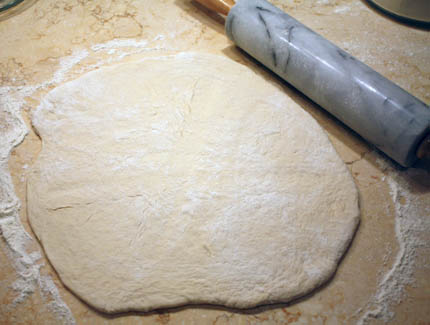
Roll out a 1/2-pound piece of dough as thin as you can get it, using a rolling pin. If the dough is springing back when you try to roll it out, just step away from it for a moment or two. When you return the gluten in the dough will have relaxed and the dough will roll out easily. The thinner you roll the dough the more likely it is to puff.
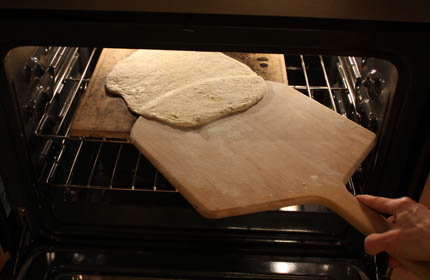
Transfer the dough to a flour covered pizza peel and slip the dough quickly onto the preheated baking stone. No steam is required for baking pita.

The dough will begin to puff within minutes and is finished when it just begins to take on a little color. Traditional pita is very pale and soft so don’t let it go much more than 8 minutes.
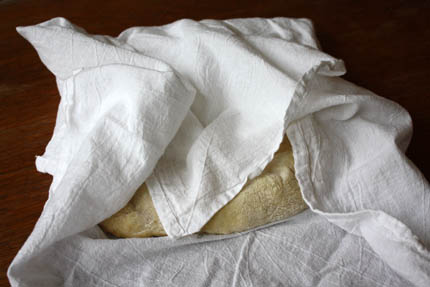
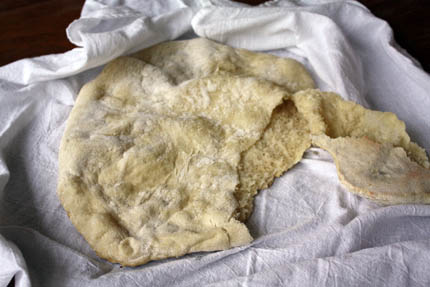
Remove from oven and immediately wrap the pita in a clean kitchen towel. This traps the steam and keeps the pita soft. If you do not wrap the pita in a cloth it will be crisp.
You can stuff the pita for sandwiches or cut into wedges to dip in to hummus. Because of the thinness of the bread it is best eaten fresh. You can make them ahead and freeze them as soon as they cool. The left over pita is also wonderful in our fattoush salad on page 252 of The New Artisan Bread in Five Minutes a Day (click here to purchase the book).
Note: BreadIn5.com is reader supported–when you buy through links on the site, BreadIn5 LLC earns commissions.
Zoe, as to how to store the bread, I live alone so baking just enough for me for one day would be impractical, so I finally gave in and put it in a Zip-Lock bag for storage for a couple of days. It works in this humid climate. The lack of oil lets it dry out too much, but if I want a crisper crust, I can always pop it in the toaster oven. Otherwise, I’d have too many bread crumbs or moldy bread.
I’ve been dissatisfied with commercially available bread for a long time, thankyou for your book. My family and friends thank you too!
Bed Bath & Beyond has a 14x15x1/2 stone for $20.00. I don’t know how nation-wide they are.
Since my main interest is baguettes, I made two simple peels of 1/4″ luaun plywood 6″x18″, just rectangles w/rounded corners – no handles needed.
I tried two baguettes on one peel once, what a nightmare! One long teardrop & one boule!
For a 50% whole wheat loaf try your light whole wheat recipe by using 3 1/4 cups ea. of unbl. all-p and ww flour + 2 T honey.
Honey is easier to deal with if you take the cap off the jar and microwave for one min. once or twice first.
Jeff B: A lot of people are touting that BBB stone– not warranted against cracking (or at least, not for very long). But no one’s complained about it.
I’d think you’d have needed a little more water with your WW modification, but sounds like you didn’t…
Two things:
1. I LOVE your book. I agonized at the book store between your book and one that had a DVD in it, and am so happy I chose yours. Plus with watching you on YouTube, I don’t need the DVD anyway.
2. Tried this with your basic dough: Took a peach sized ball, patted it out into a circle on my silpat, put some finely chopped deli meat, turkey pepperoni, bit of cheese, and a microwave pre-cooked spoonful of chopped onion and red pepper onto the center of the circle. Brought the edges up and around it and pinch-sealed them all shut. Put it seam side down onto cornmeal covered peel, with a little sea salt on the top. Let it rest about 40 min. or so (our kitchen is cold) and then slid it into the pre-heated oven. 25 min. later, took them out, brushed lightly with butter, and we had a wonderful hot sandwich for lunch. These would be great for me to do in the summer, and just give the little kids a portable sandwich so that they can sit out on the grass to eat. LOVE your book.
Hi Jane,
What a fantastic meal! You could even bake them on the grill in the heat of the summer!
thanks, Zoë
In the book, you say to use a 1 lb. piece but after trying it I think 1/2 lb. like in this post makes more sense (although our pita was great, just a little too thick, but it still puffed and we wanted it for wedges anyway). Any other suggestions for incorporating more WW flour other than using the 100% WW recipe? I love whole wheat pitas.
Smaller pitas are a little easier to deal with, it’s true.
Check out our post on WW https://artisanbreadinfive.com/?p=142, and see our new book on whole grains and other healthy ingredients coming out in the fall– we’re excited!
The most divine breakfast bread I have ever eaten was when I was visiting Beirut and ate Manoushe (with Zaatara or cheese). It is sold from mom and pop bakeries in every neighbourhood. Has anyone tried making it? It looks a bit like pita bread with topping. I did see some recipes on the internet for the dough which included olive oil but was thinking of just using the master recipe.
Hi Estelle,
We have a Za’atar flatbread on page 161 that sounds very similar to what you are describing. Check it out and let me know if it is the same as you remember.
Thanks, Zoë
Hi Jeff and Zoe,
I love the extra thick pita bread that I always had in Los Angeles. I was dissappointed when I moved and thought, “where’s the decent pita bread?” Now I see that I always ate a thicker bread. I bought a pack on my last trip–9 loaves weigh 2 pounds!
You mention that we should keep the pitas thin, about 1/8″. But how can I make it thick, the way I want it. And could I make it thick with the light whole wheat dough too? I want to bring some for a Shavuot dinner tomorrow eve. Thanks, Happy Shavuot.
The light whole wheat dough works nicely for pitas, or even the 100% WW– though that has a hard time puffing.
And you can definitely make them thicker. See what you think of a 1/4-inch thick rollout.
My latest discovery is that I can use my Sandwich press (like a George Foreman Grill only with flat plates) to make Pita bread. I put the rolled out pita on the bottom plate, and leave the top plate sitting about 1 inch above the bottom plate, and the pita rises up to the top plate, and cooks perfectly in about 6-7 minutes. We are in the middle of winter her (New Zealand) so it’s not a problem to heat the oven, but when you only want 3 pitas for the kids lunches, this is so much quicker and the results are great! Also thought some of you in the middle of summer may be interested in this method, as I fondly remember days too hot to use the oven…..
yet again, this book amazes me. I made the pita for the first time today….amazing.
Best club sandwich ever 🙂
It’s not everyday you can wow a 14 1/2 yr old h.s. freshman, but I did it this morning with your pita. My son came home from h.s. yesterday raving about his friend’s pita sandwich. And I said, oh, I can make that. When he woke up this morning it was ready and he was incredibly impressed. How’d you get that perfect pocket? he asked. Our little secret! thanks so much for the book and to everyone on the board who asks my questions before I have to!
Hi Leslie,
Jeff and I take it as the highest of compliments when teenagers like the bread. They tend to be the most honest and willing critics! 😉
Thank you and enjoy all the pita pockets! Zoë
I live in Japan, where ovens are not the norm, and I have a little toaster oven. It goes up to 1300 watts (there are no temperature listings).
Do you think a toaster oven would be able to handle your recipes, and if modifications are available?
Thanks!
We know that toaster ovens work for our method, and in fact, you can buy small baking stones for them (https://www.amazon.com/gp/product/B000QJBNHY?ie=UTF8&tag=arbrinfimiada-20&linkCode=as2&camp=1789&creative=9325&creativeASIN=B000QJBNHY“>Kitchen Supply Old Stone Oven Toaster Oven Pizza Stone 7-inch by 10-inch<img src=”https://www.assoc-amazon.com/e/ir?t=arbrinfimiada-20&l=as2&o=1&a=B000QJBNHY” width=”1″ height=”1″ border=”0″ alt=”” style=”border:none !important; margin:0px !important;).
Problem is that I don’t know how to convert your wattage ratings to temperatures– we’re assuming it has a thermostat, which you need. Best to check with the company. Jeff
I made some pita for our New Years Eve Party from the whole wheat master recipe. It was so easy and fun!!! I liked the big size. The kids loved the way it looked coming out of the oven, they said it was just like the Mantas from Super Mario Galaxy!
I just made this pita bread recipe – got your book as a Christmas gift. It is so easy, and it really is fun to have it start out so flat, and come out of the oven so puffed! We ate it with homemade hummus, and a dish called Shakshoukah. It was absolutely the best pita bread we’ve had. Love your book, and have bookmarks all over for recipes to try next.
Michele: No substitute for truly fresh pita, eh? Cannot be bought like this…
Can I use the Master Recipe in Healthy Bread to make Pita bread? Please let me know, I’ve been wanting to try it for a long time. Thanks you. Love the books!
Yasmine: Absolutely, that makes a terrific pita. White pitas puff more exuberantly, just be aware of that. Jeff
I love your breads, but the pita method is my favorite. I just pop downstairs in the AM to turn the oven on and we have egg, sausage and cheese pitas for breakfast! My sons’ favorite.
I do have a dilemma. I am going on vacation for a week and planning on bringing pre-measured ingredients to make dough at the unit since we have a full kitchen. I am not, however, bringing my baking stone. Have you had any success with pitas not using the stone or on the gril? I use the Euorpean peasant bread recipe modified to be about 50% whole wheat with a little VWG added if that makes a difference.
Thanks!
Cara: The problem you might run into is that the pitas won’t puff– they depend on sudden heating for that and there’s nothing like the thermal mass of the stone. A heavy-weight baking sheet like these on Amazon: https://www.amazon.com/gp/product/B0000VLH1U?ie=UTF8&tag=arbrinfimiada-20&linkCode=as2&camp=1789&creative=9325&creativeASIN=B0000VLH1U“>Chicago Metallic Commercial Cookie/Jelly Roll Pans, Set of 2<img src=”https://www.assoc-amazon.com/e/ir?t=arbrinfimiada-20&l=as2&o=1&a=B0000VLH1U” width=”1″ height=”1″ border=”0″ alt=”” style=”border:none !important; margin:0px !important;
They’re much lighter to carry with you than the stone, but pre-heated, you may get decent puffing (can’t guarantee it). Also will need to grease these, they’re not non-stick.
can’t wait to try this one. made an olive oil dough today for the first time. can i use that for the pita or just the master recipe?
also, can i freeze any of the doughs? i’m not sure i’ll be able to use all of the olive oil dough in time. if so, how do i freeze it?
Hi Elana,
Yes, you can use the olive oil dough for the pita. Just roll it out nice and thin.
To freeze we usually cut off a 1 to 2-pound piece of dough and wrap it really well in plastic wrap or ziplock bags. It can freeze for a few weeks. To use just defrost and treat it as though it just came out of the bucket.
Thanks, Zoë
I’ve been making bread using the recipes in your book for about 10 months now and just made pita bread for the first time this morning to go with some avocado cilantro hummus I bought yesterday at the Farmers’ Market…why did I wait so long to try this?!?! Super easy, yummy, and the kids (2 and 3) loved being able to dip their bread…Mommy also liked that pita resulted in far fewer crumbs on my floor. 🙂 Thanks!
Hi Melissa,
So glad you tried the pita, it is one of our all time favorites!
Thanks, Zoë
I made pita last night from the HBin5 Master recipe and it turned out fabulous. I liked it so well I made more today already. Thanks for another great recipe and technique.
Lisa: The pita makes great hamburger buns when you make them small. Or hot-dog if you make them as smallish ovals. Glad the recipe’s working for you.
Thanks Jeff. I’ll definitely try the hot dog/hamburger bun tip!
Made pitas for the first time today, and they came out great! I made them with the flaxseed bread recipe from HBin5, but I subbed out 1/2 cup of water for agave syrup. The dough was about 12 days old, but my pitas puffed up just like they should. I made mini-pitas (about 4 inches in diameter), and I didn’t use a baking stone. I actually don’t own one, but I make breads all the time on cookie sheets and they came out great so I thought I’d try the pitas that way too. I never let the cookie sheet heat up before baking either. I just plopped the pitas on the cookie sheet and stuck them in a 500 degree oven for about 8 minutes, and they puffed up perfectly. 🙂 I love that your recipes are so forgiving and easy to modify! Thanks 🙂
Hi Corinne,
Thank you for sharing this with us. I honestly have not tried a pita on anything but a stone, so this is quite exciting to know!
Thanks, Zoë
Hi again; re the pitas that went hard immediately on me and never regained consciousness (and they puffed beautifully) but HARD: it seems from reading all the comments, and your book (like a bible) I followed instructions to the nth degree; so could I have overcooked them? I saw mention of “getting altitude right” and wonder if being at 5000 feet is an issue?
PS I made the baquette tonight and it went into the oven looking HORRIBLE…flat and wet and my knife made a mockery of the diagonal slashes but … IT CAME OUT BEAUTIFULLY .. my amazement was 100%. Your book is SUCH fun! If I can only master the PITAS! Thanks again.
Doro: Hmm, the pitas are usually a lot easier than baguettes! It does sound like you overbaked– take them out when still soft and barely browned. Any chance you oven’s running cool? Use a thermometer like https://bit.ly/czmco2
Hi! I can’t wait to try your recipes. However, I only have a small toaster oven. It works well and is a convection oven too, but I don’t have a bottom rack for the broiler pan filled with water. What would you recommend I do? Would placing a small metal pan *next* to the baking stone work?
Thanks!! 🙂
Hi Lori,
Yes, that is a great solution and will do the trick just as well.
Thanks and enjoy the bread, Zoë
I spray a little water on the pita bread before putting it in the oven. I believe that also helps it puff up.
Can I use one of gluten free dough recipes for making these pita’s?
Thank you!
Karen: You sure can, though it won’t develop much of a pocket.
Which GF dough recipe do you recommend? I have your book “Healthy Bread in Five Minutes a Day.”
Hi JJ,
I have made this with the g-f crusty boule recipe.
Enjoy! Zoë
Would the European peasant bread recipe from the first book work for this as a pita (though I should note that I sub an extra two cups of WW for the unbleached white – it is easily our favorite bread!)
Hi Julia,
Yes, it makes a great pita!
Enjoy, Zoë
Just baked a great-looking pouffy pita using the semolina recipe – it’s going to take some willpower to save it for dinner!
resist!
These look great! What is the hydration level of the dough?
Depends on which of our doughs you decided to use, this post gave leeway. Which of our books are you using, what page number is the recipe you’re interested in?
In your book, you suggest cooking under the broiler if you don’t have a stone. Could I use parchment paper when cooking under the broiler?
How about just a heavy gauge baking sheet? I’d be nervous about the parchment paper catching fire.
Would this work with your gluten free mix? I’m going to be ordering your GF book, and would really want to make pita.
Yes! There’s pita in that book