Einkorn bread, from stored dough: Some differences, but still delicious

Readers have been asking me about using einkorn flour in my Master Recipe, and since it’s basically winter in Minnesota (see Halloween picture below), it’s time to bake.

Einkorn is a variety of wheat that’s been available in the U.S. for a while. Its flour makes a delicious loaf, and some of you have told me here on the site that einkorn bread is easier to digest than other breads. I can’t make any medical claims about this because there’s no reliable data. To be clear: if you have celiac disease or otherwise can’t eat gluten, you can’t eat einkorn either, because einkorn is a variety of wheat, and wheat contains gluten. It has less gluten than standard wheat flour, and that may account for why some people prefer it. For the same reason, it yields “weaker” (less stretchy, and softer) dough, has a little less rise, and spreads more (in free-form loaves). But I can vouch for this: it makes delicious bread.
I wondered if I could store dough made from einkorn, and whether it would work in my high-moisture method, with adequate dough strength. Short answer: yes, and I was able to use the same 75% hydration as I use in my Master Recipe. The basic formula is: 24 ounces of water by weight, 32 ounces flour by weight, or 750 grams water/1,000 grams flour. But because the gluten is lower, the rise was less exuberant, the resting loaf spread sideways, and the result was denser than what I get with white all-purpose flour. That said, it makes a delicious loaf with an attractive yellow-brown crumb. I’d strongly recommend that you measure flour and water by weight for this recipe rather than using cup-measures. Measurement by volume introduces the possibility for errors that will be particularly problematic for einkorn doughs, which can be heavy if you’re off on the hydration.
Because it was the only brand I could find in supermarkets near me, I tested with the Jovial All-Purpose Einkorn flour product. It’s not entirely white flour; there’s a little of the bran and germ left in. I didn’t test with Jovial’s whole grain einkorn flour.
I used the same hydration as I always do–the dough looked about as wet as my usual dough from the standard Master Recipe when einkorn was simply swapped in for regular all-purpose (by weight). Note that if you use a different brand of einkorn, the water requirement may change.
Ingredients
24 ounces, or 750 grams lukewarm water (you can use cold water, but it will take the dough longer to rise. Don’t use hot water, which can kill yeast). I know that the ounces and grams aren’t identical quantities, but they both represent 75% hydration–it’s the weighed ratio of water to flour that matters. The yeast and salt don’t need to appreciably change for the metric version. The metric recipe makes a little more dough (6 ounces more).
1 tablespoon granulated yeast ( any type, including instant, quick, rapid rise, bread machine, or active dry)
1 to 1 1/2 tablespoons Morton Kosher Salt (adjust to suit your taste; more information here)
32 ounces, or 1,000 grams by weight, all-purpose einkorn flour
Mixing the dough:
In a 5- or 6-quart bowl, pot, or lidded dough bucket (the lid is sold separately), dump in the water, and add the yeast and salt.
My recipes violate the old dictum that yeast shouldn’t be in contact with salty water in the absence of flour (the fear was that this would inhibit the rise). If you’re worried about this, whisk the salt into the flour instead of putting it into the water.

Dump in the flour all at once and stir with a long-handled wooden spoon or a Danish Dough Whisk, a tool that makes hand mixing much easier. So does a stand mixer if you have one (here’s a post on using a stand mixer with my method).

Stir it until all of the flour is incorporated into the dough; the result will be very moist and rough-looking.

Put the lid on the container, but do not snap it shut, which allows gas from the yeast to escape (you can put a little hole in the top of the lid so that you can close the lid and still allow the gas to escape. A pinhole will work.

Allow the dough to sit at room temperature for about 2 hours to rise (it may take longer). When you first mix the dough it will not occupy much of the container.

After the initial 2 hour rise it will look like this. (If you have decreased the yeast you will have to let it go longer than 2 hours.) DO NOT PUNCH DOWN THE DOUGH!

The dough will be flat on the top and some of the bubbles may even appear to be popping. (If you intend to refrigerate the dough after this stage it can be placed in the refrigerator even if the dough is not perfectly flat. The yeast will continue to work even in the refrigerator.) The dough can be used right after the initial 2-hour rise, but it is much easier to handle when it is chilled. It is intended for refrigeration and use over the next week, ready for you anytime (doughs made with regular flour can go for 2 weeks). For the first two days of storage, be sure to leave the lid open a crack, to allow gasses to escape. After that, you can usually snap down the lid on plastic contains without problems, because they’re usually not entirely airtight. BUT, DON’T SEAL GLASS CONTAINERS OR THEY MIGHT SHATTER. The flavor will deepen over that time, developing sourdough characteristics.
If the dough develops a hard crust, you can usually fold that into the next loaf, but it may create a hard area in the crumb. If you want to prevent this, scrape off the crust before using. Transfer the dough into smaller containers as you deplete it to prevent the crust from forming, and close the non-airtight container after two days.

The next day when you pull the dough out of the refrigerator you will notice that it has collapsed and this is totally normal for my dough. It will never rise up again in the container.

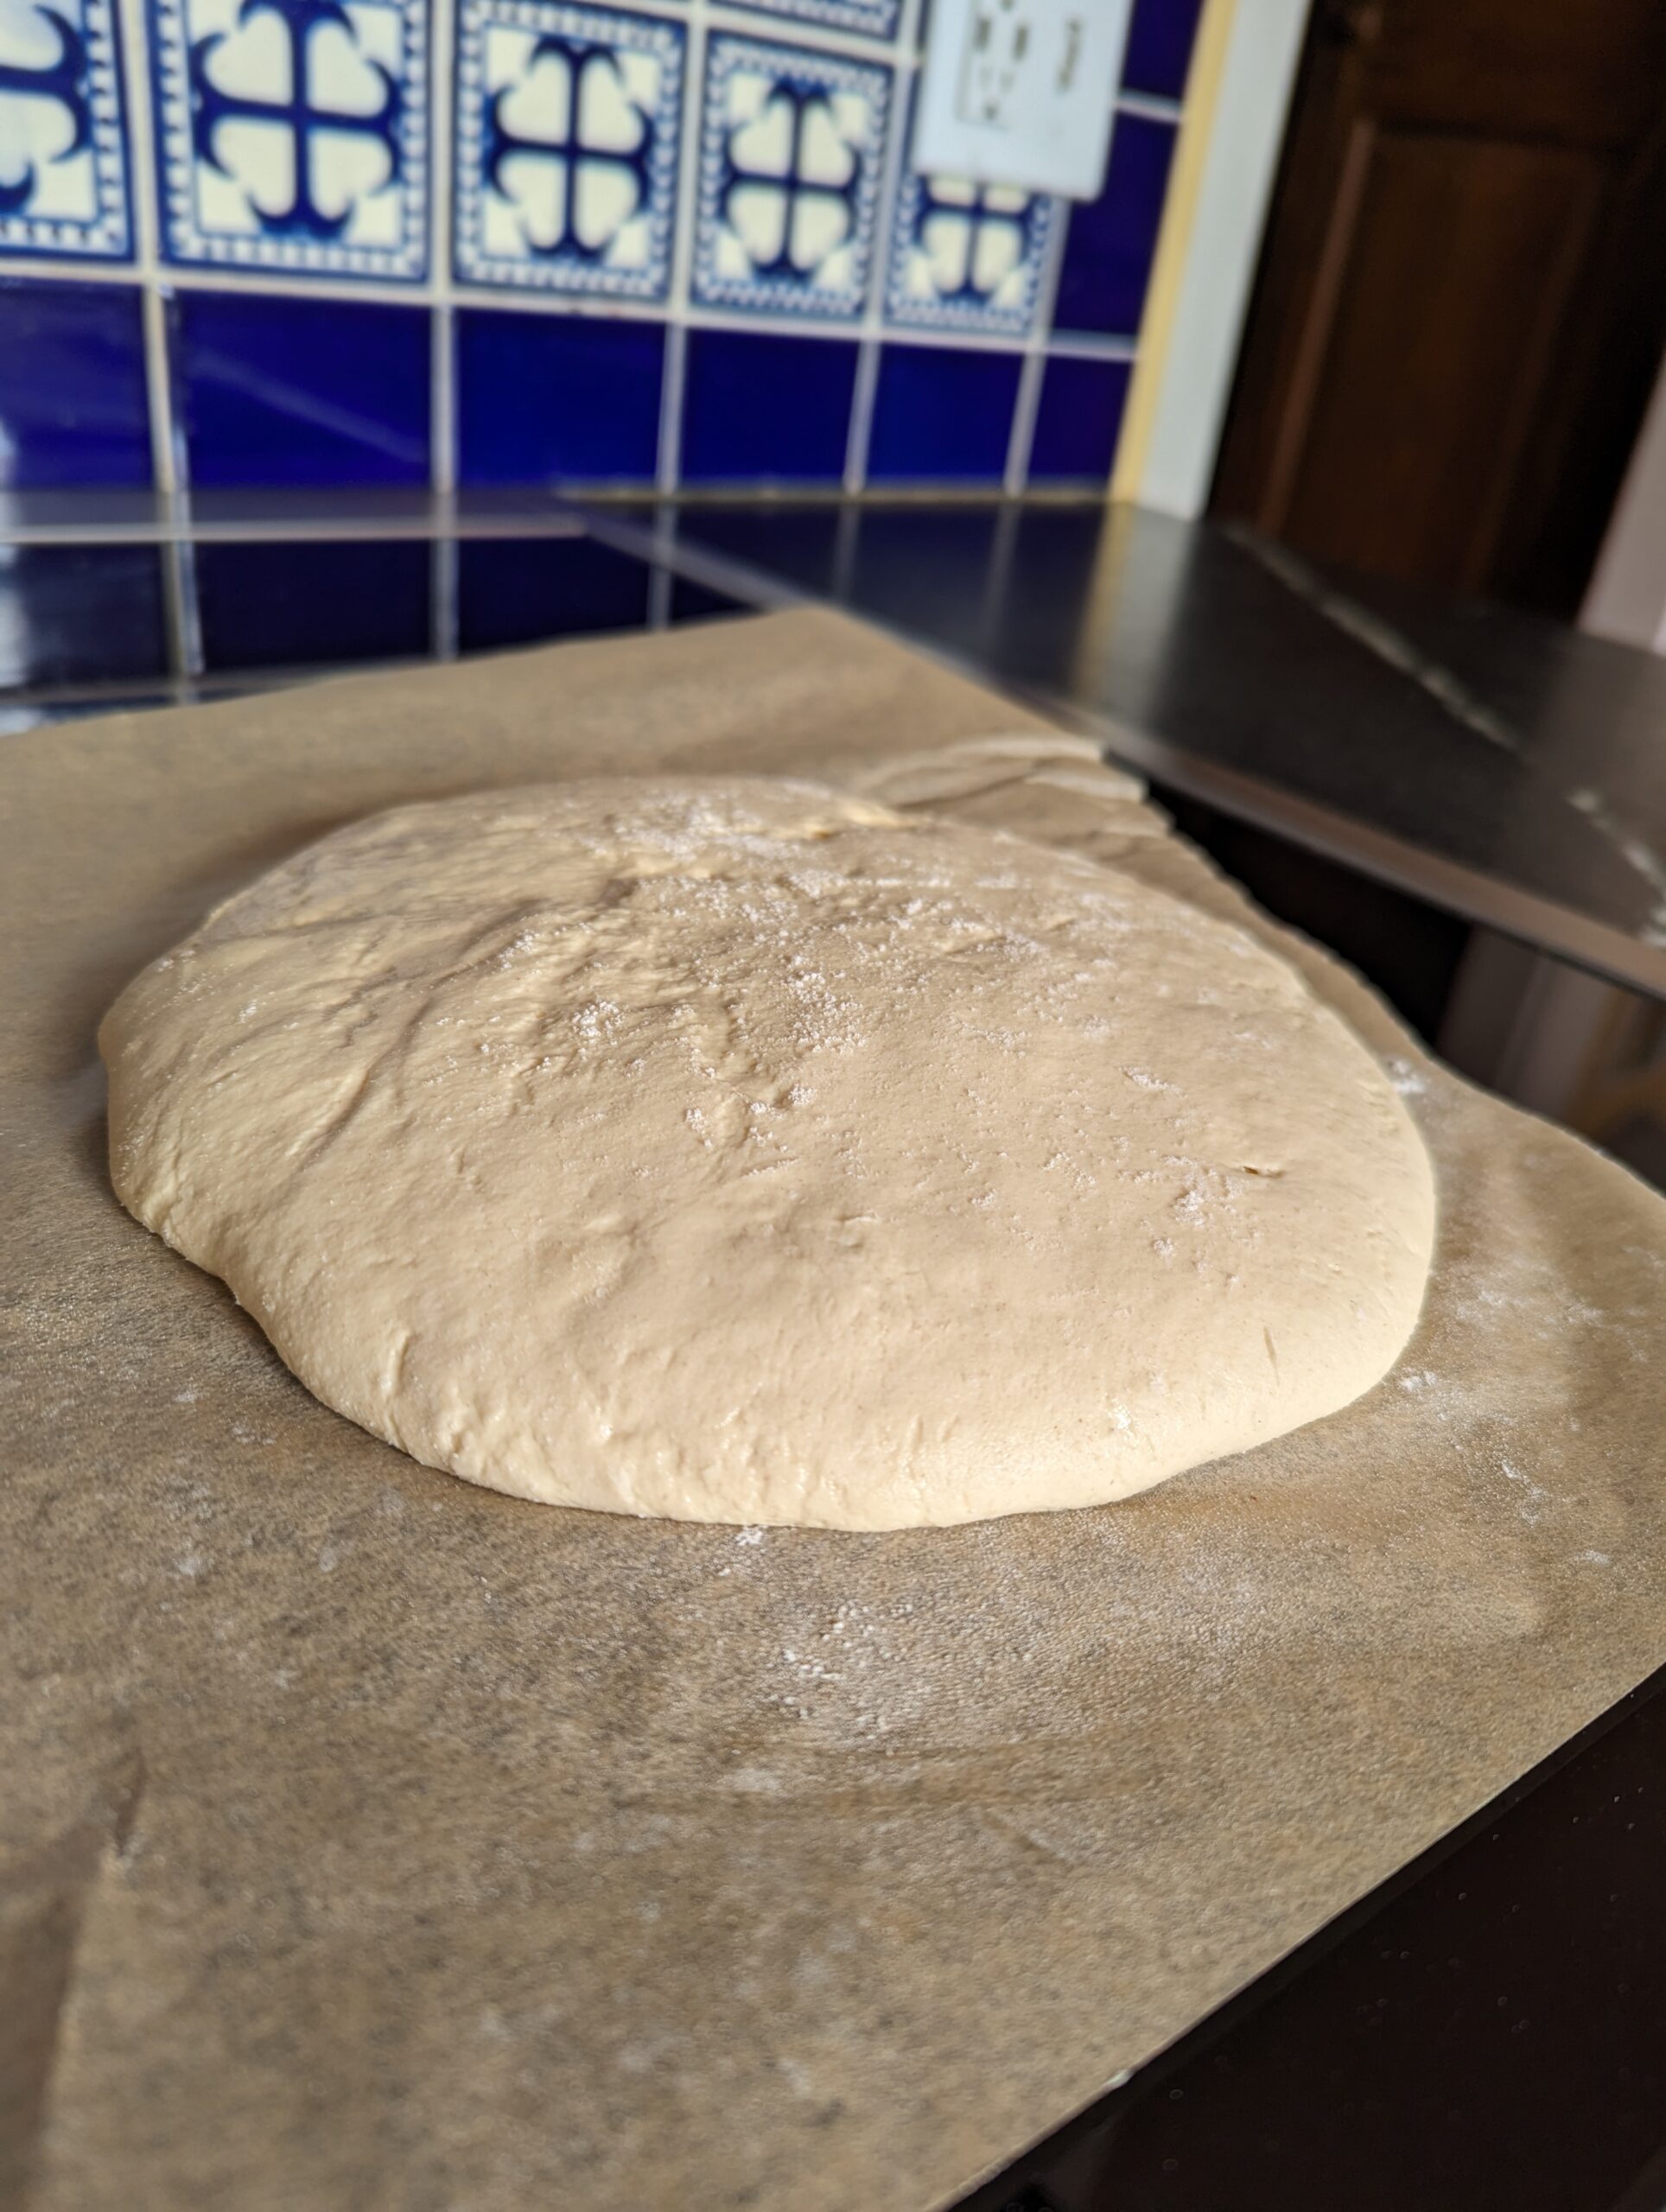
Dust the surface of the dough with a little flour, just enough to prevent it from sticking to your hands when you reach in to pull a piece out. On Day 1, this is how the einkorn dough looked:
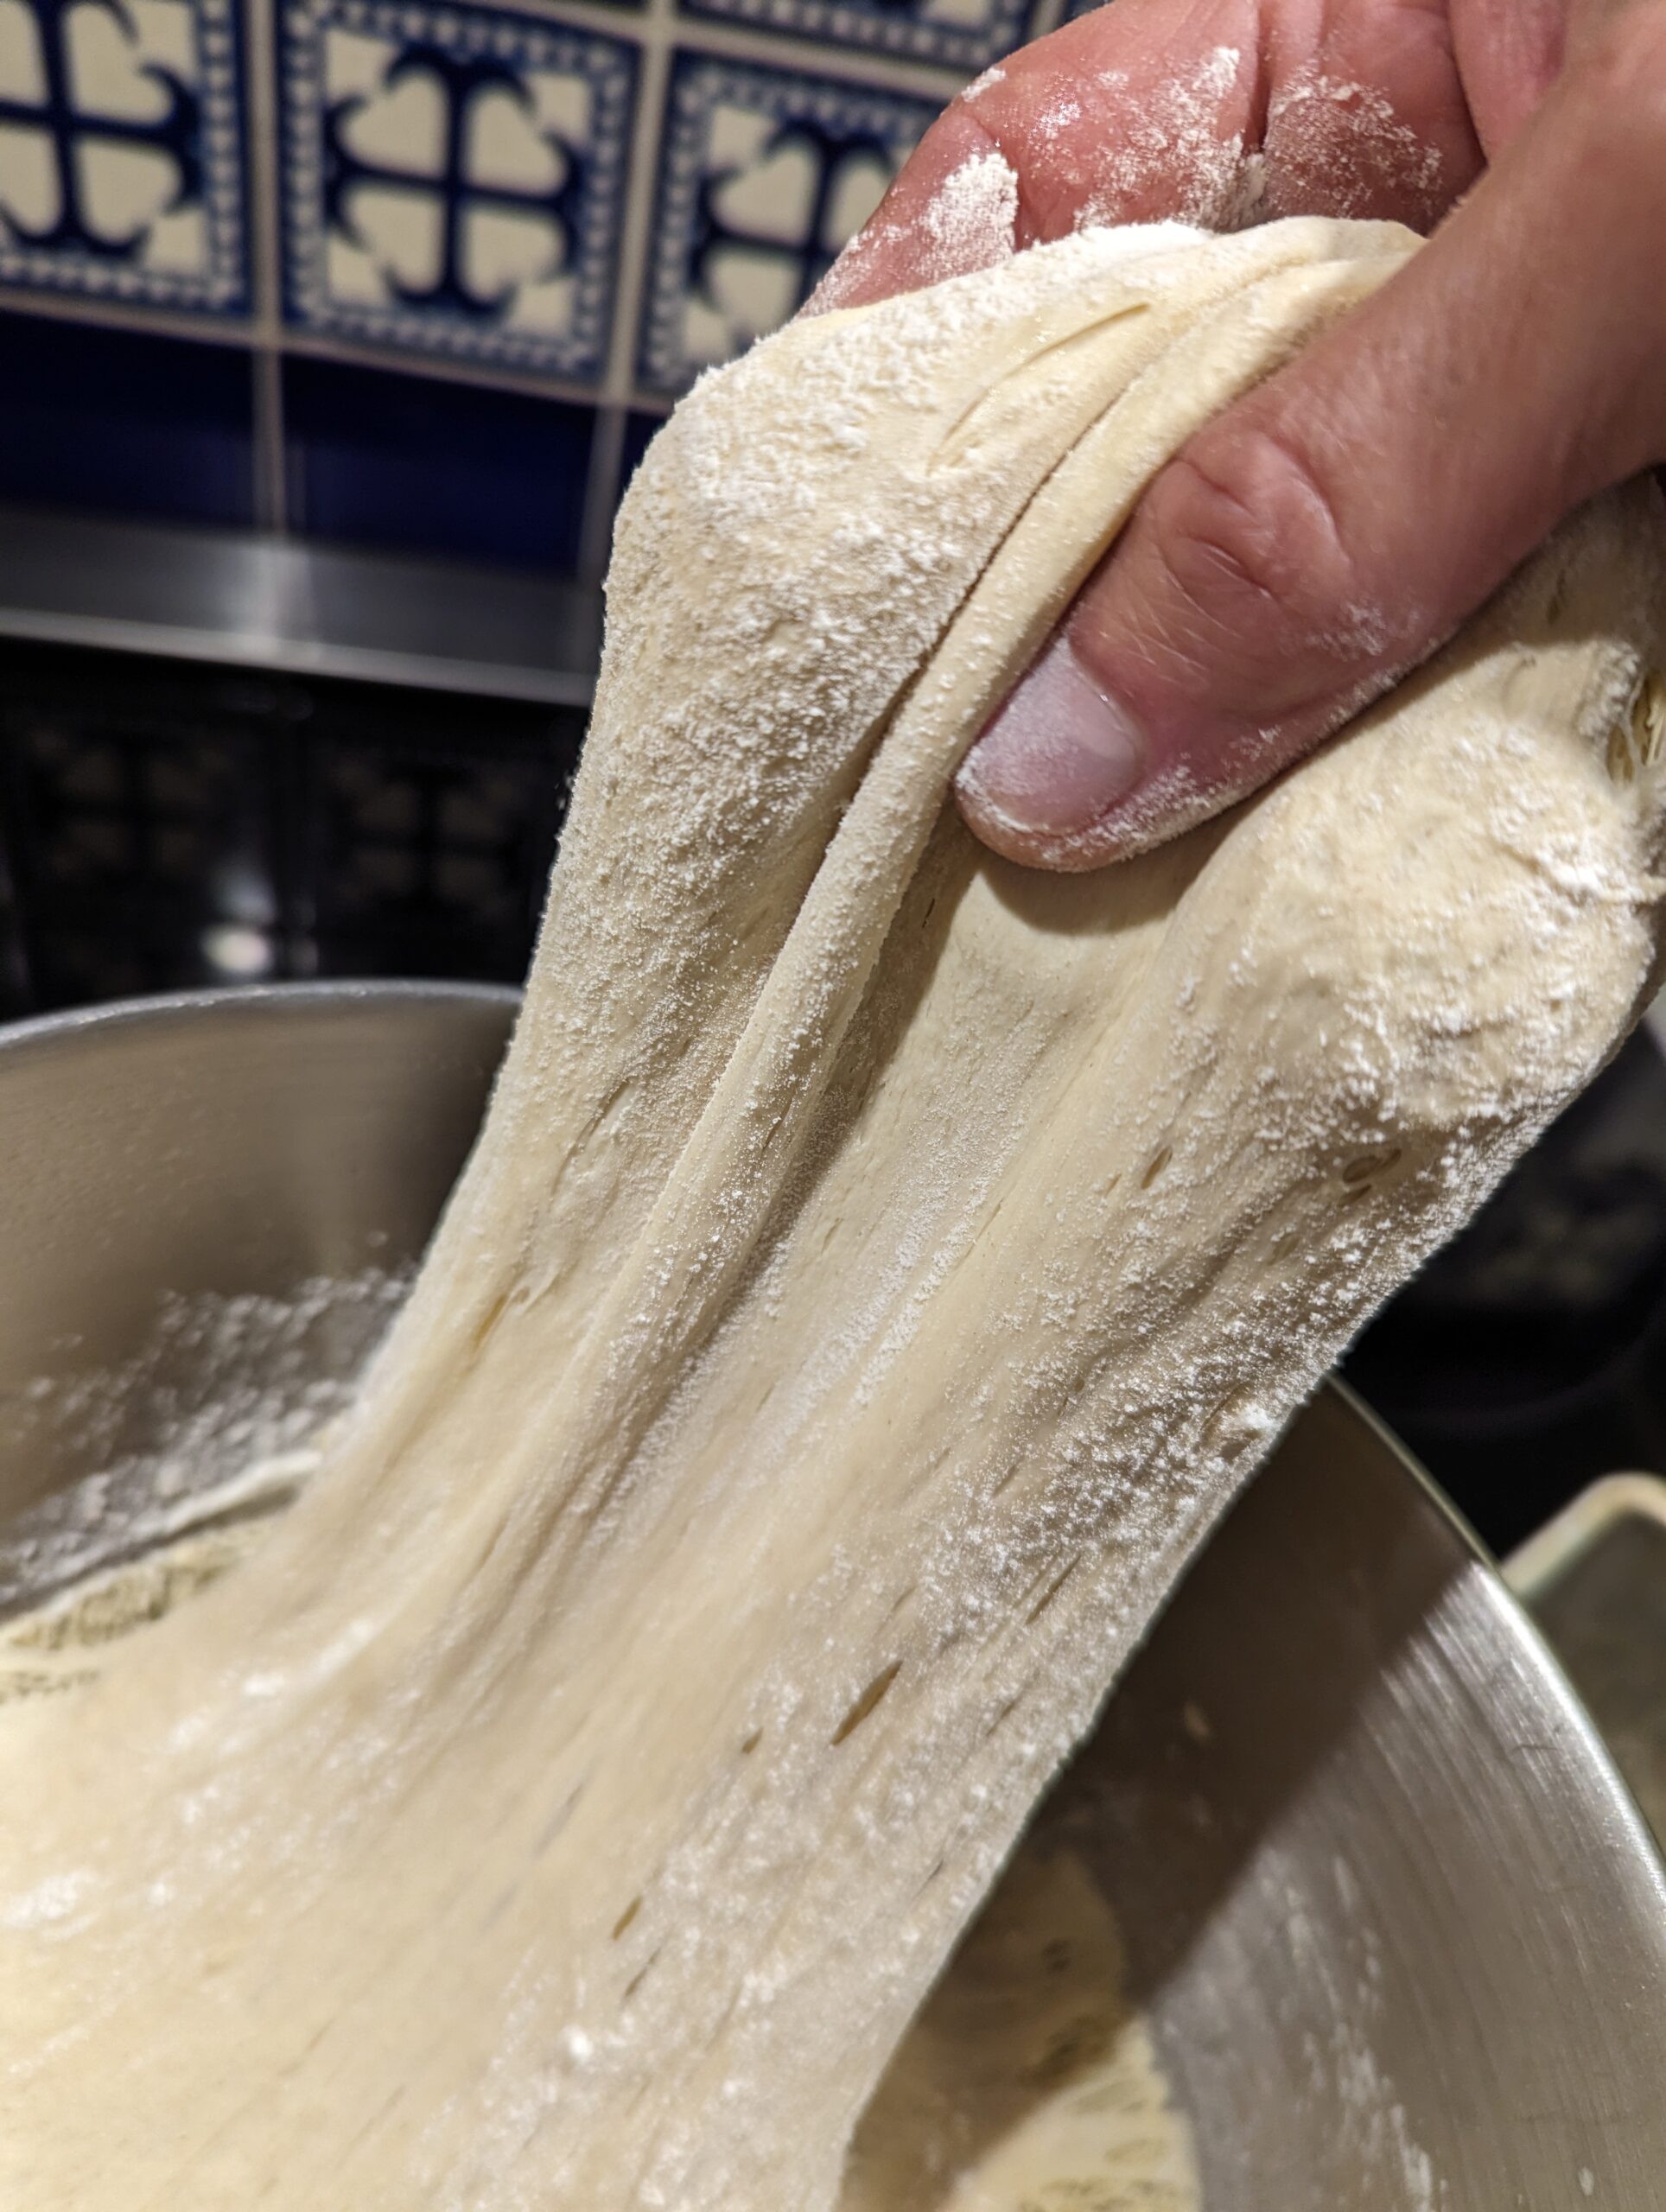
It had adequate stretch, but I could tell that the “dough strength” wasn’t at the level of dough made with higher-gluten flours like all-purpose. It didn’t take as much force to stretch it. I decided to bake a loaf-pan bread on Day 1, then compare the results when the dough had a week’s storage.
I cut off a 1.5-pound piece of dough using kitchen shears or a knife and formed it into a ball, elongated it, and dropped it into a well-greased 9 x 4 x 4 loaf pan. Shaping wet doughs like this one’s a little different; this video shows the technique for shaping this very wet dough (more on loaf pan breads at this link). Allow the dough to rest in the pan at room temperature for 90 minutes, then place in an oven preheated to 450F, with a metal broiler tray on the bottom, which will be used to produce steam (never use a glass vessel for this or it will shatter). Pour a cup of hot water into the broiler tray before closing the oven door (if you have an older oven without tempered glass in its window, cover the glass with a towel and remove it before closing the oven door). It baked for about 50 minutes, and it looked great:
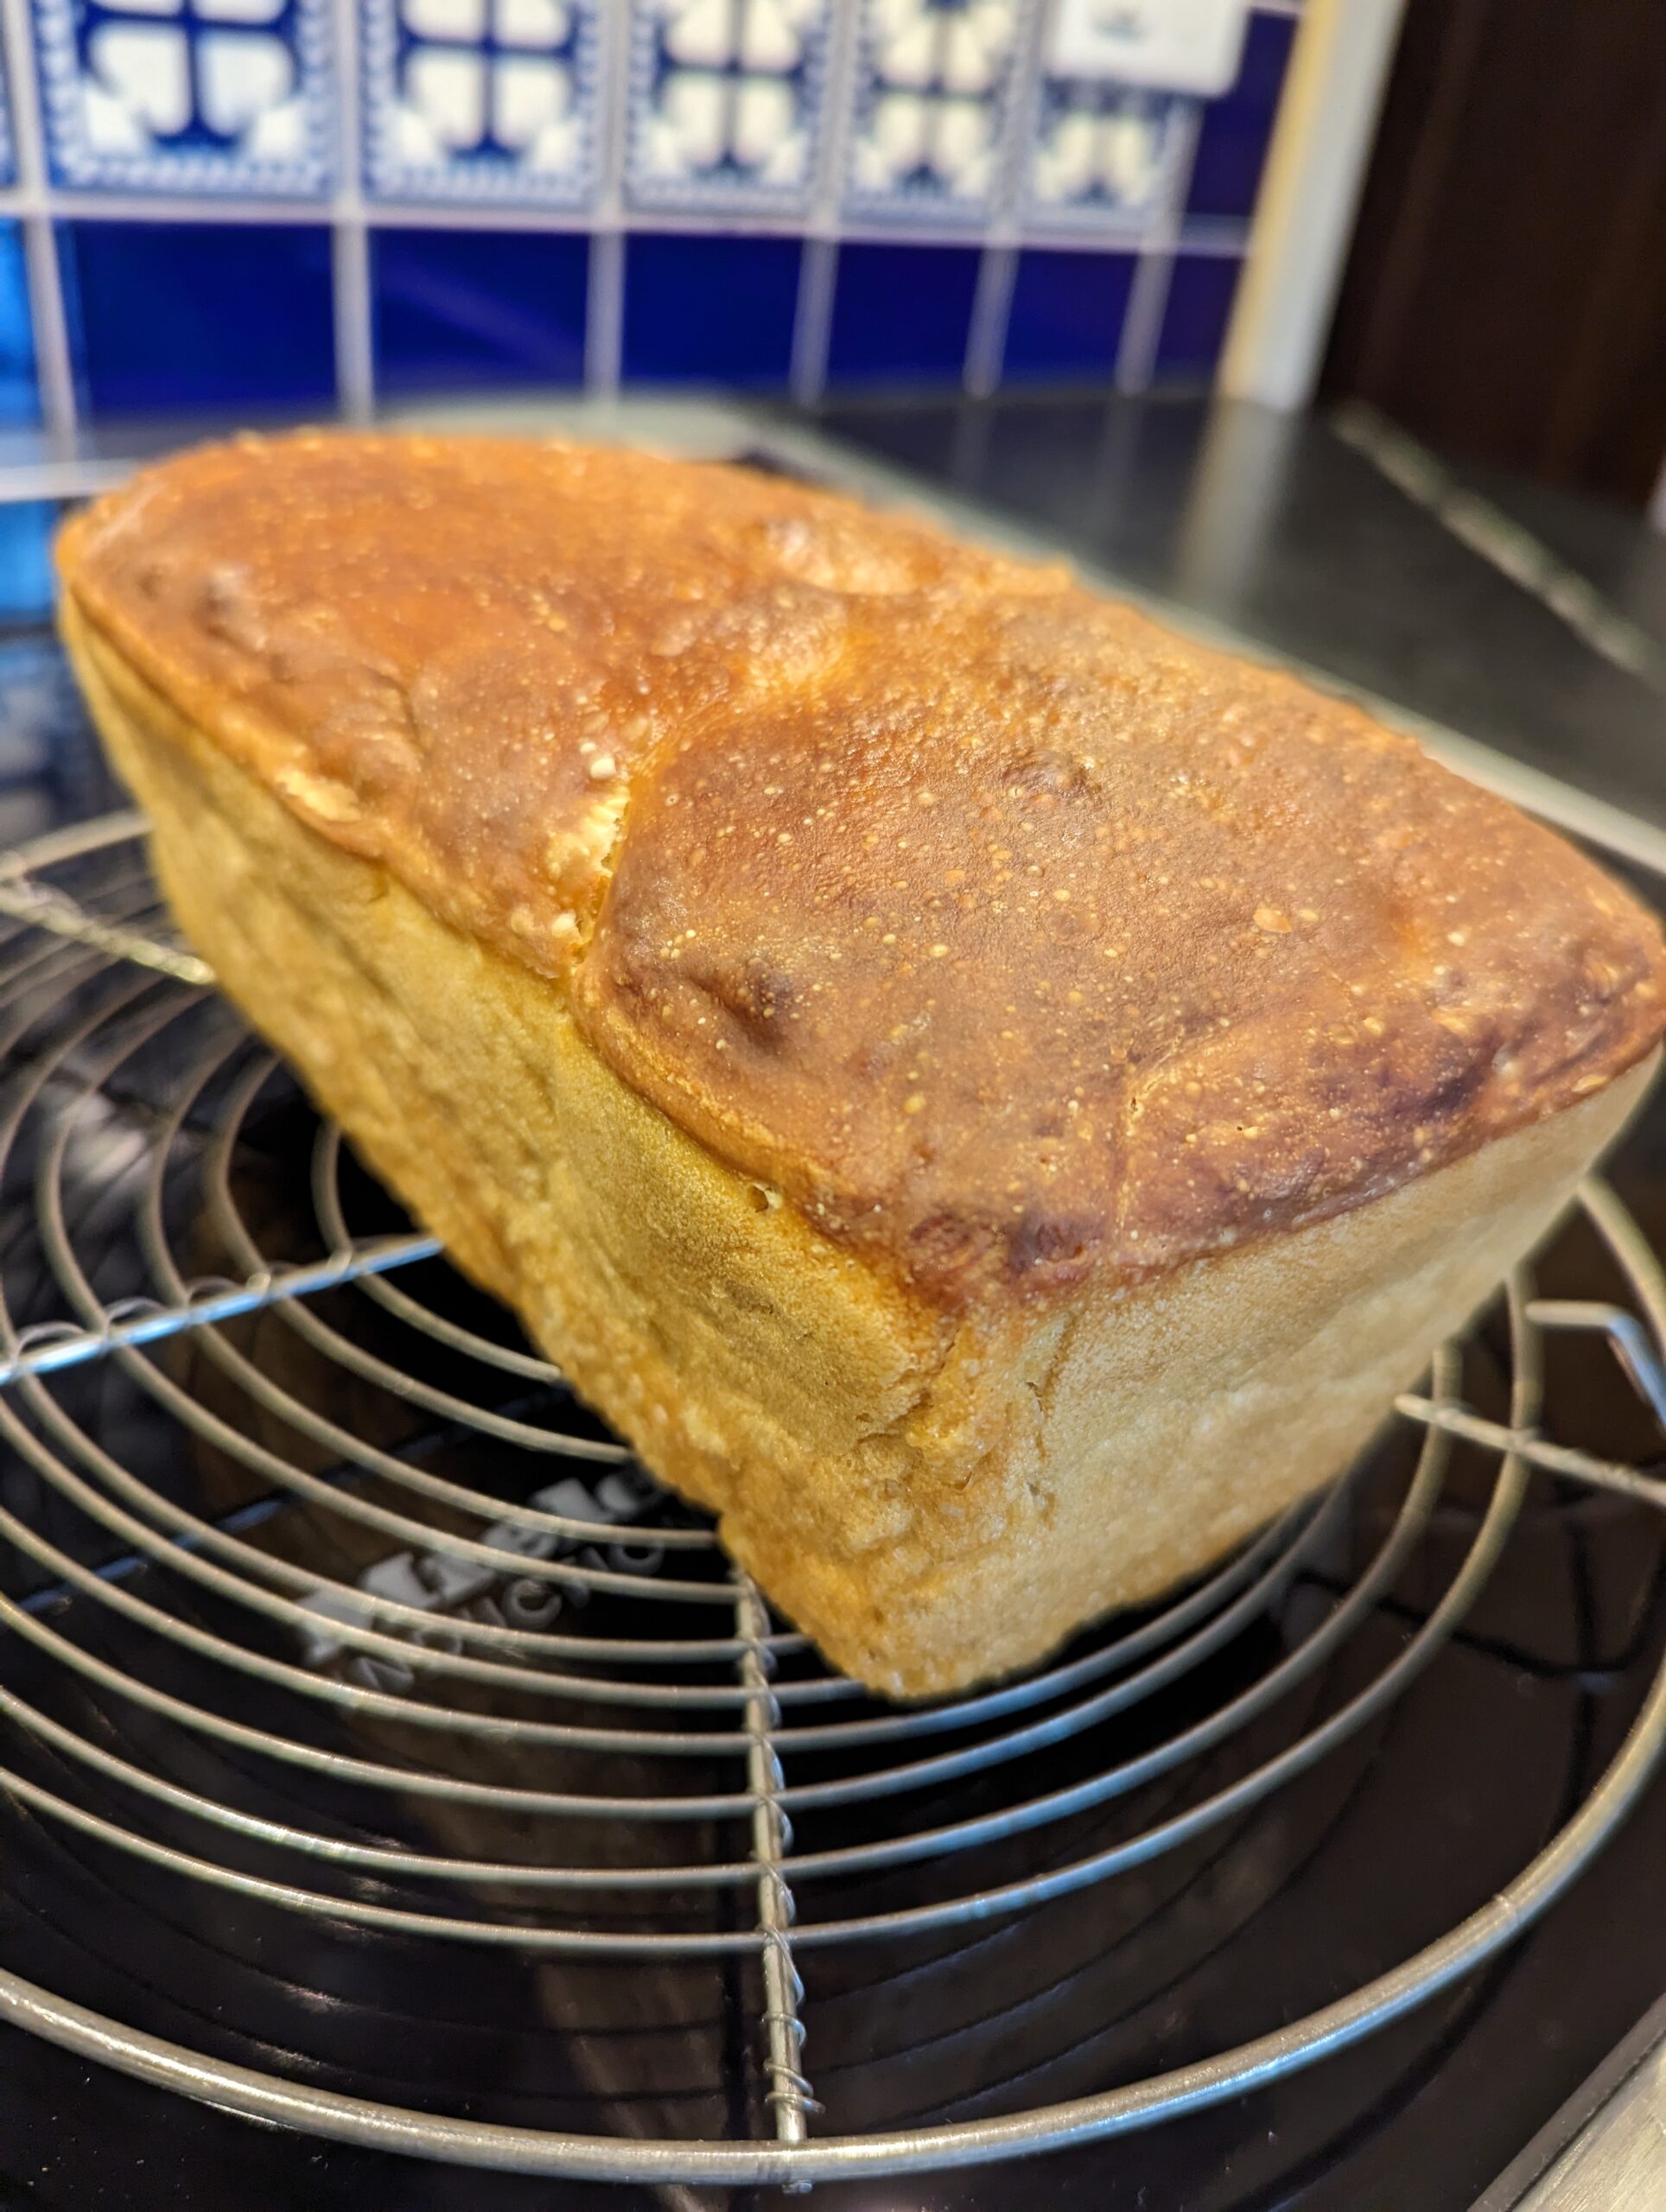
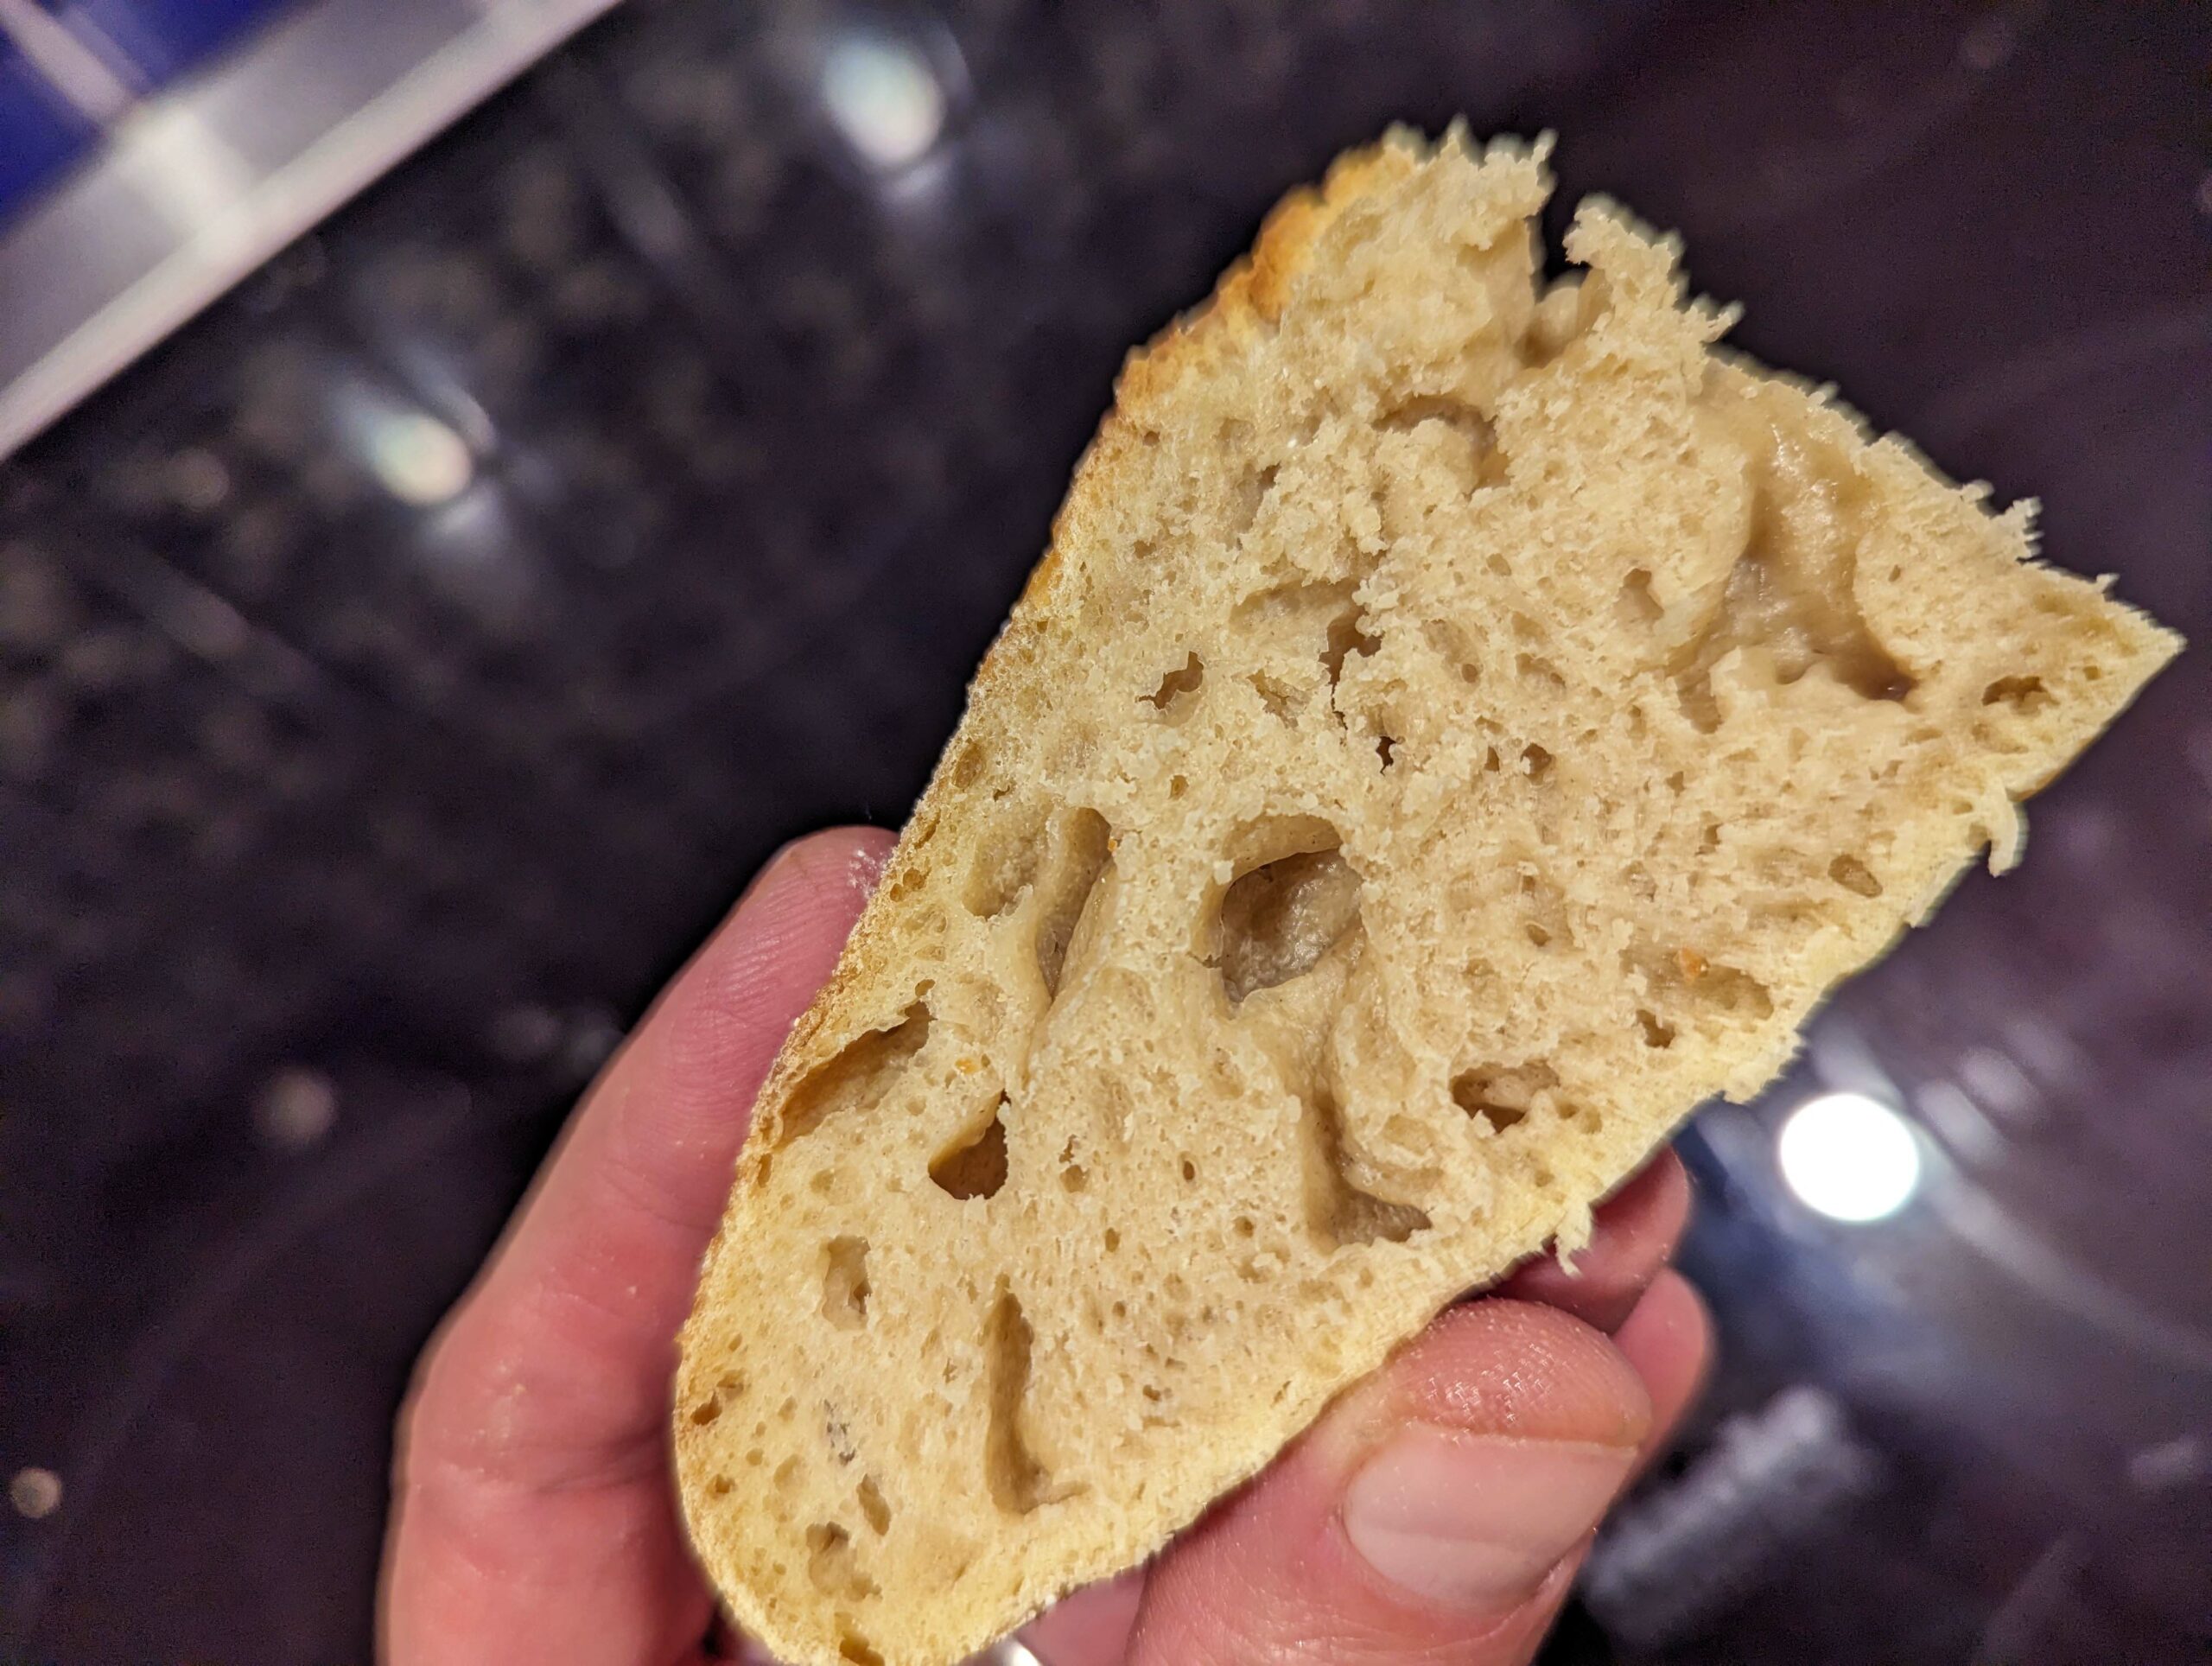
The crumb was nice, but there were small holes–this dough doesn’t have the dough strength to support large holes (OK, there’s one):
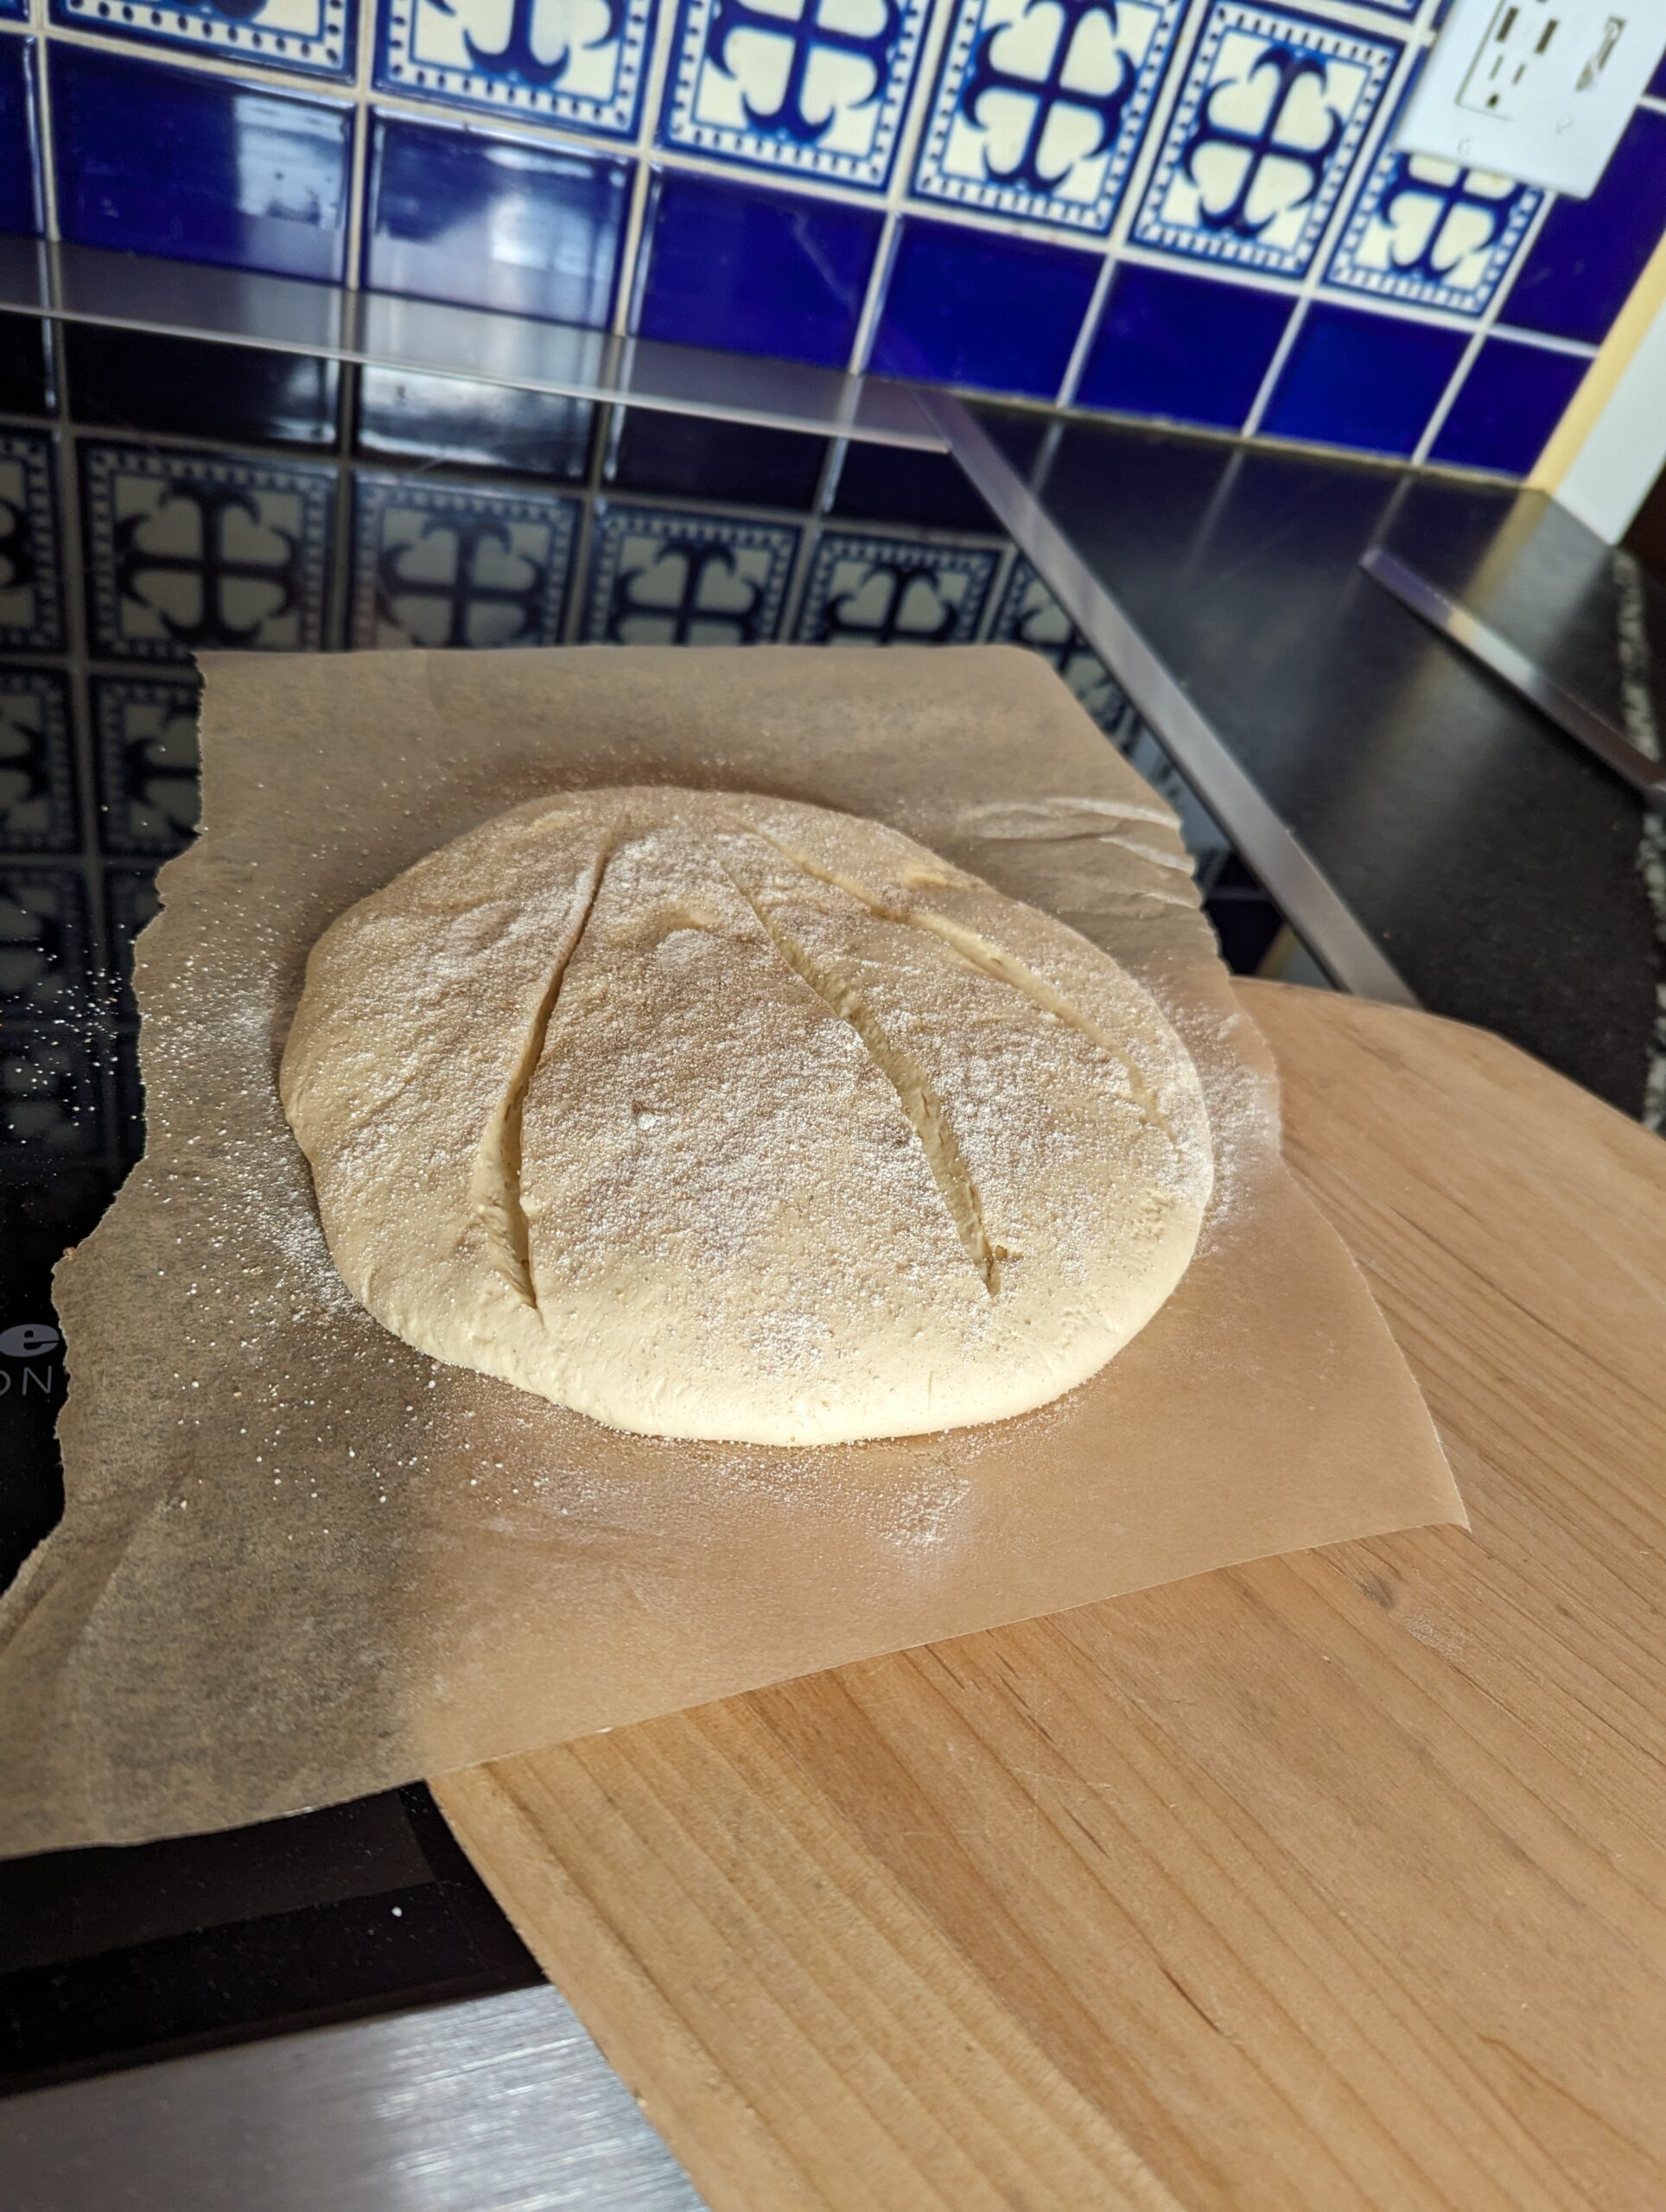
The flavor was terrific, but I wanted to see if the flavor would deepen or if the hole structure might improve with a week’s storage. So seven days later, I followed the shaping and baking directions for the Master Recipe (click for the link). Here’s how it looked through the process. First, I noticed that the dough was a bit weaker than a week before–note the hole developing as I stretched a piece to cut off:

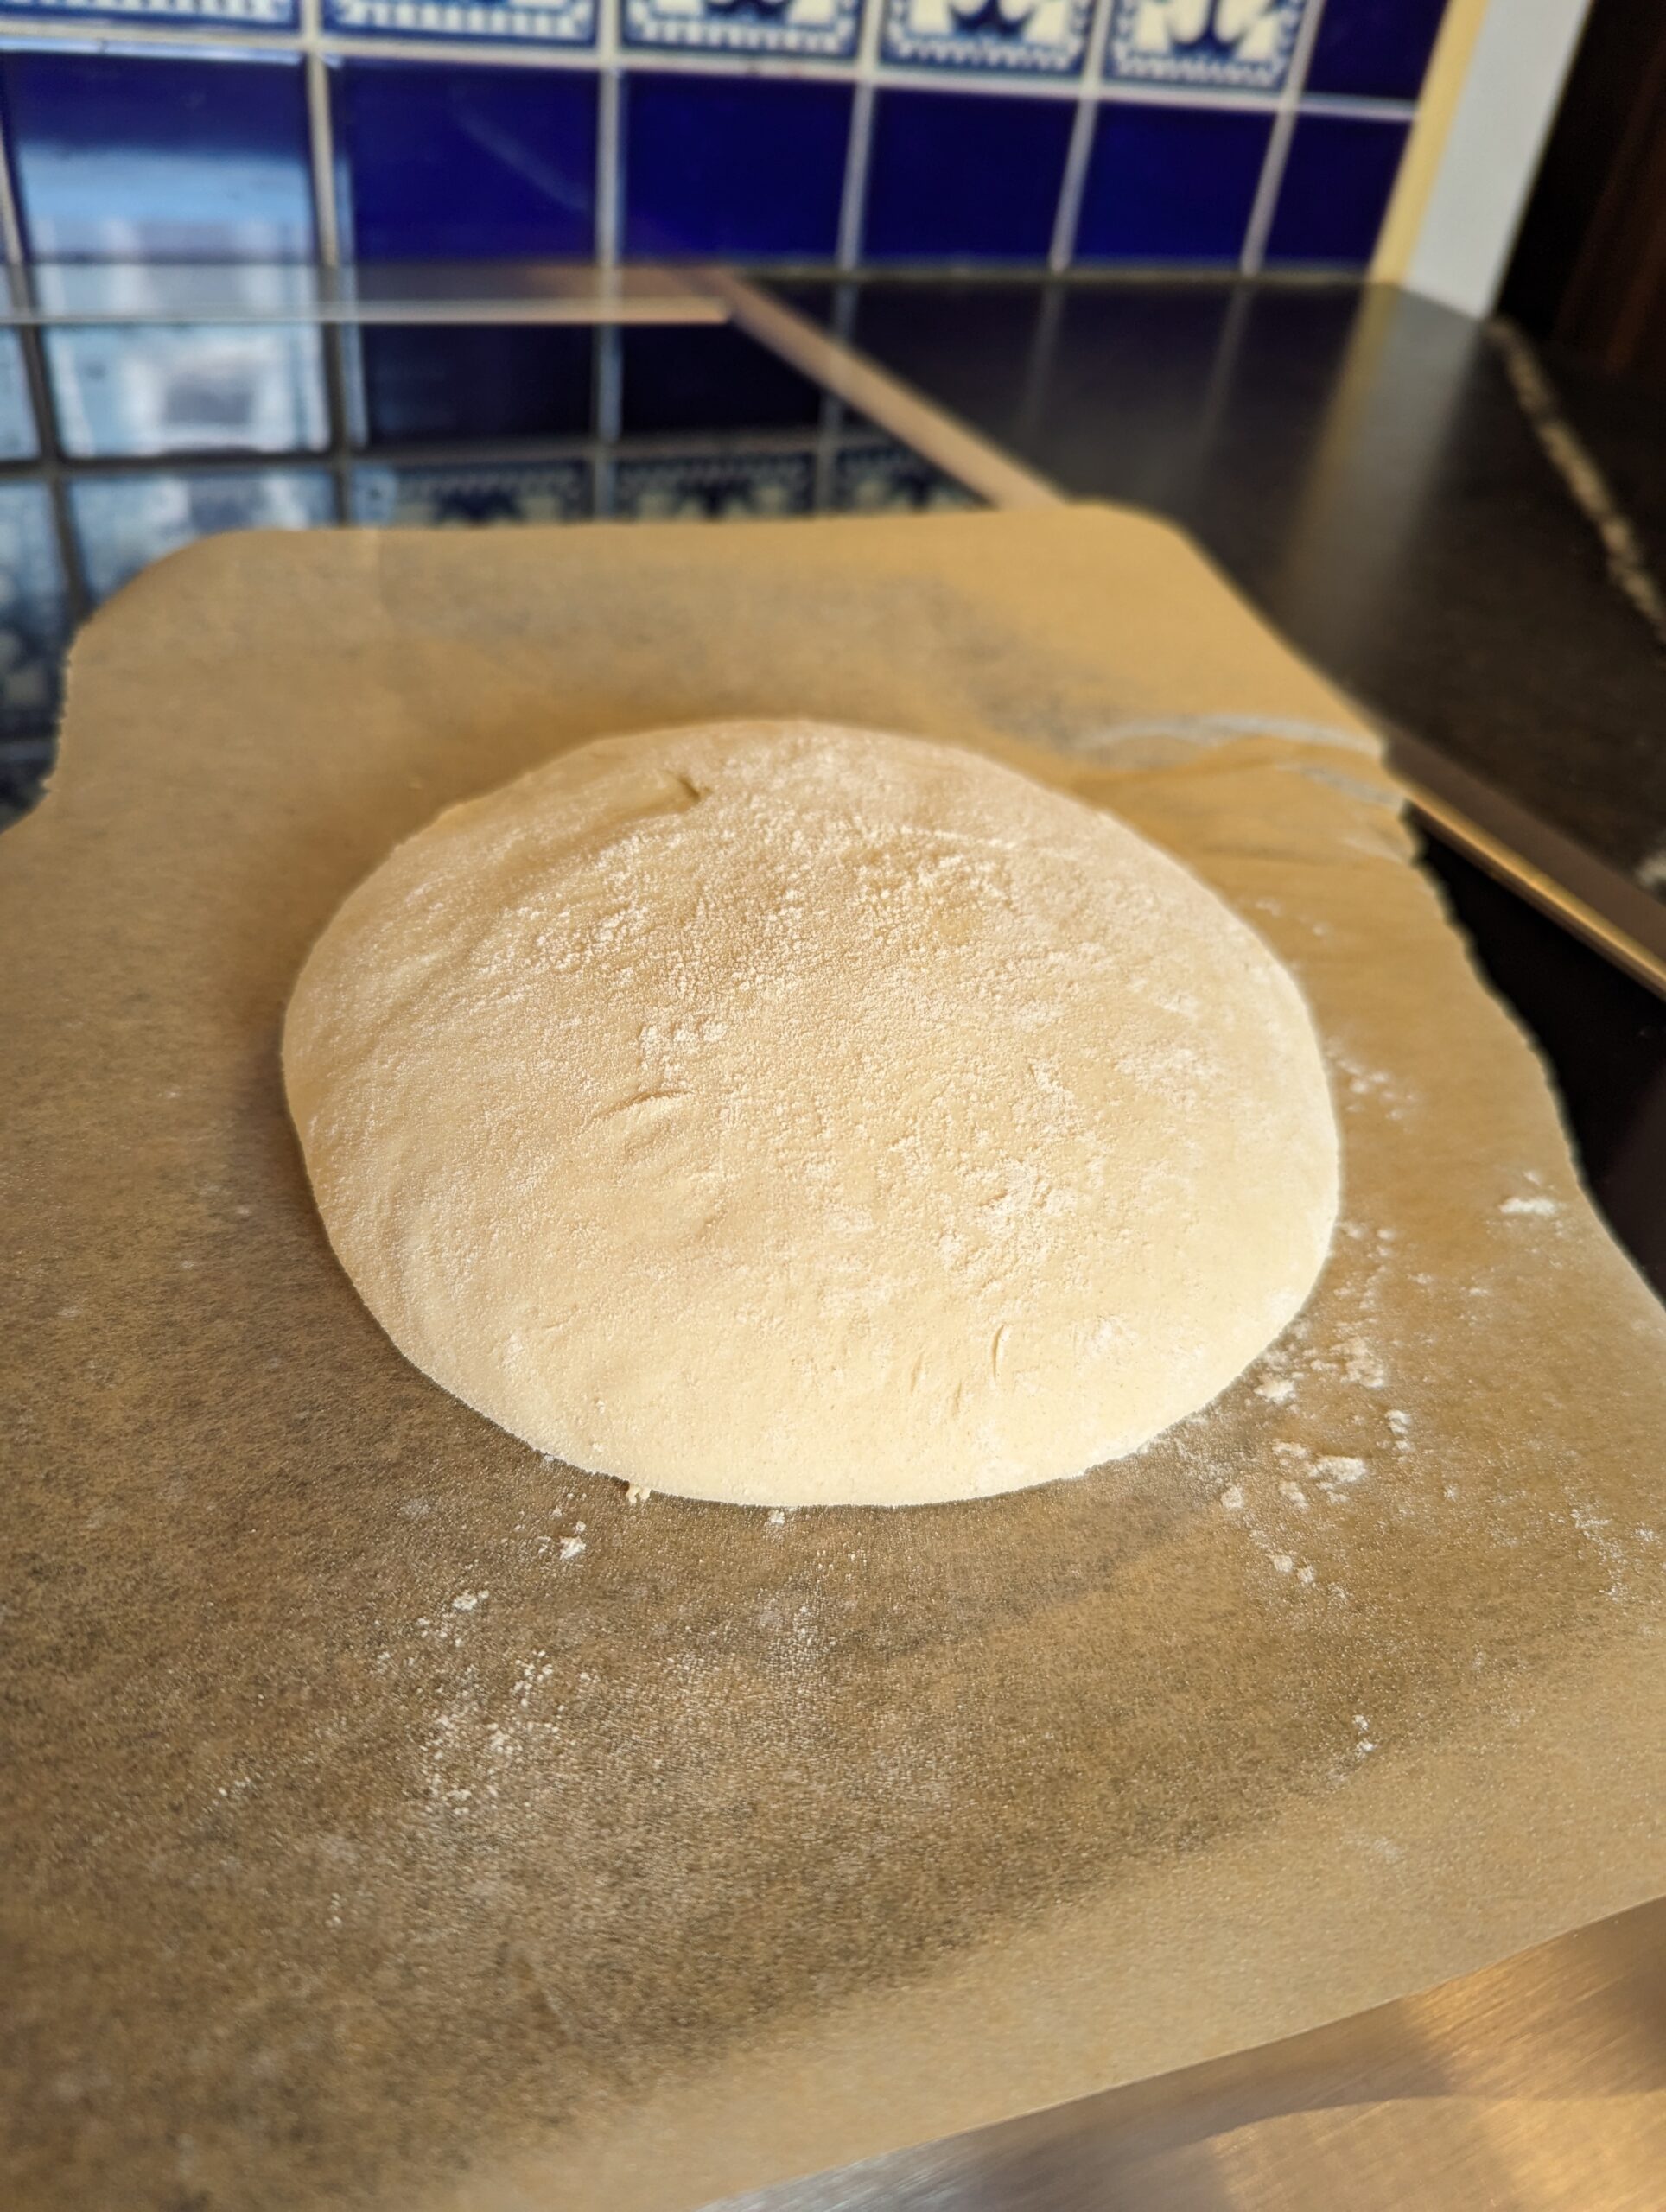
It shaped fine as a boule (ball-shaped loaf) to sit for a 90 minute rest on parchment paper (you can place it on a cornmeal-covered pizza peel instead). I preheated the oven, with a baking stone near the middle of the oven, to 450F, for the last 45 minutes of the rest time.
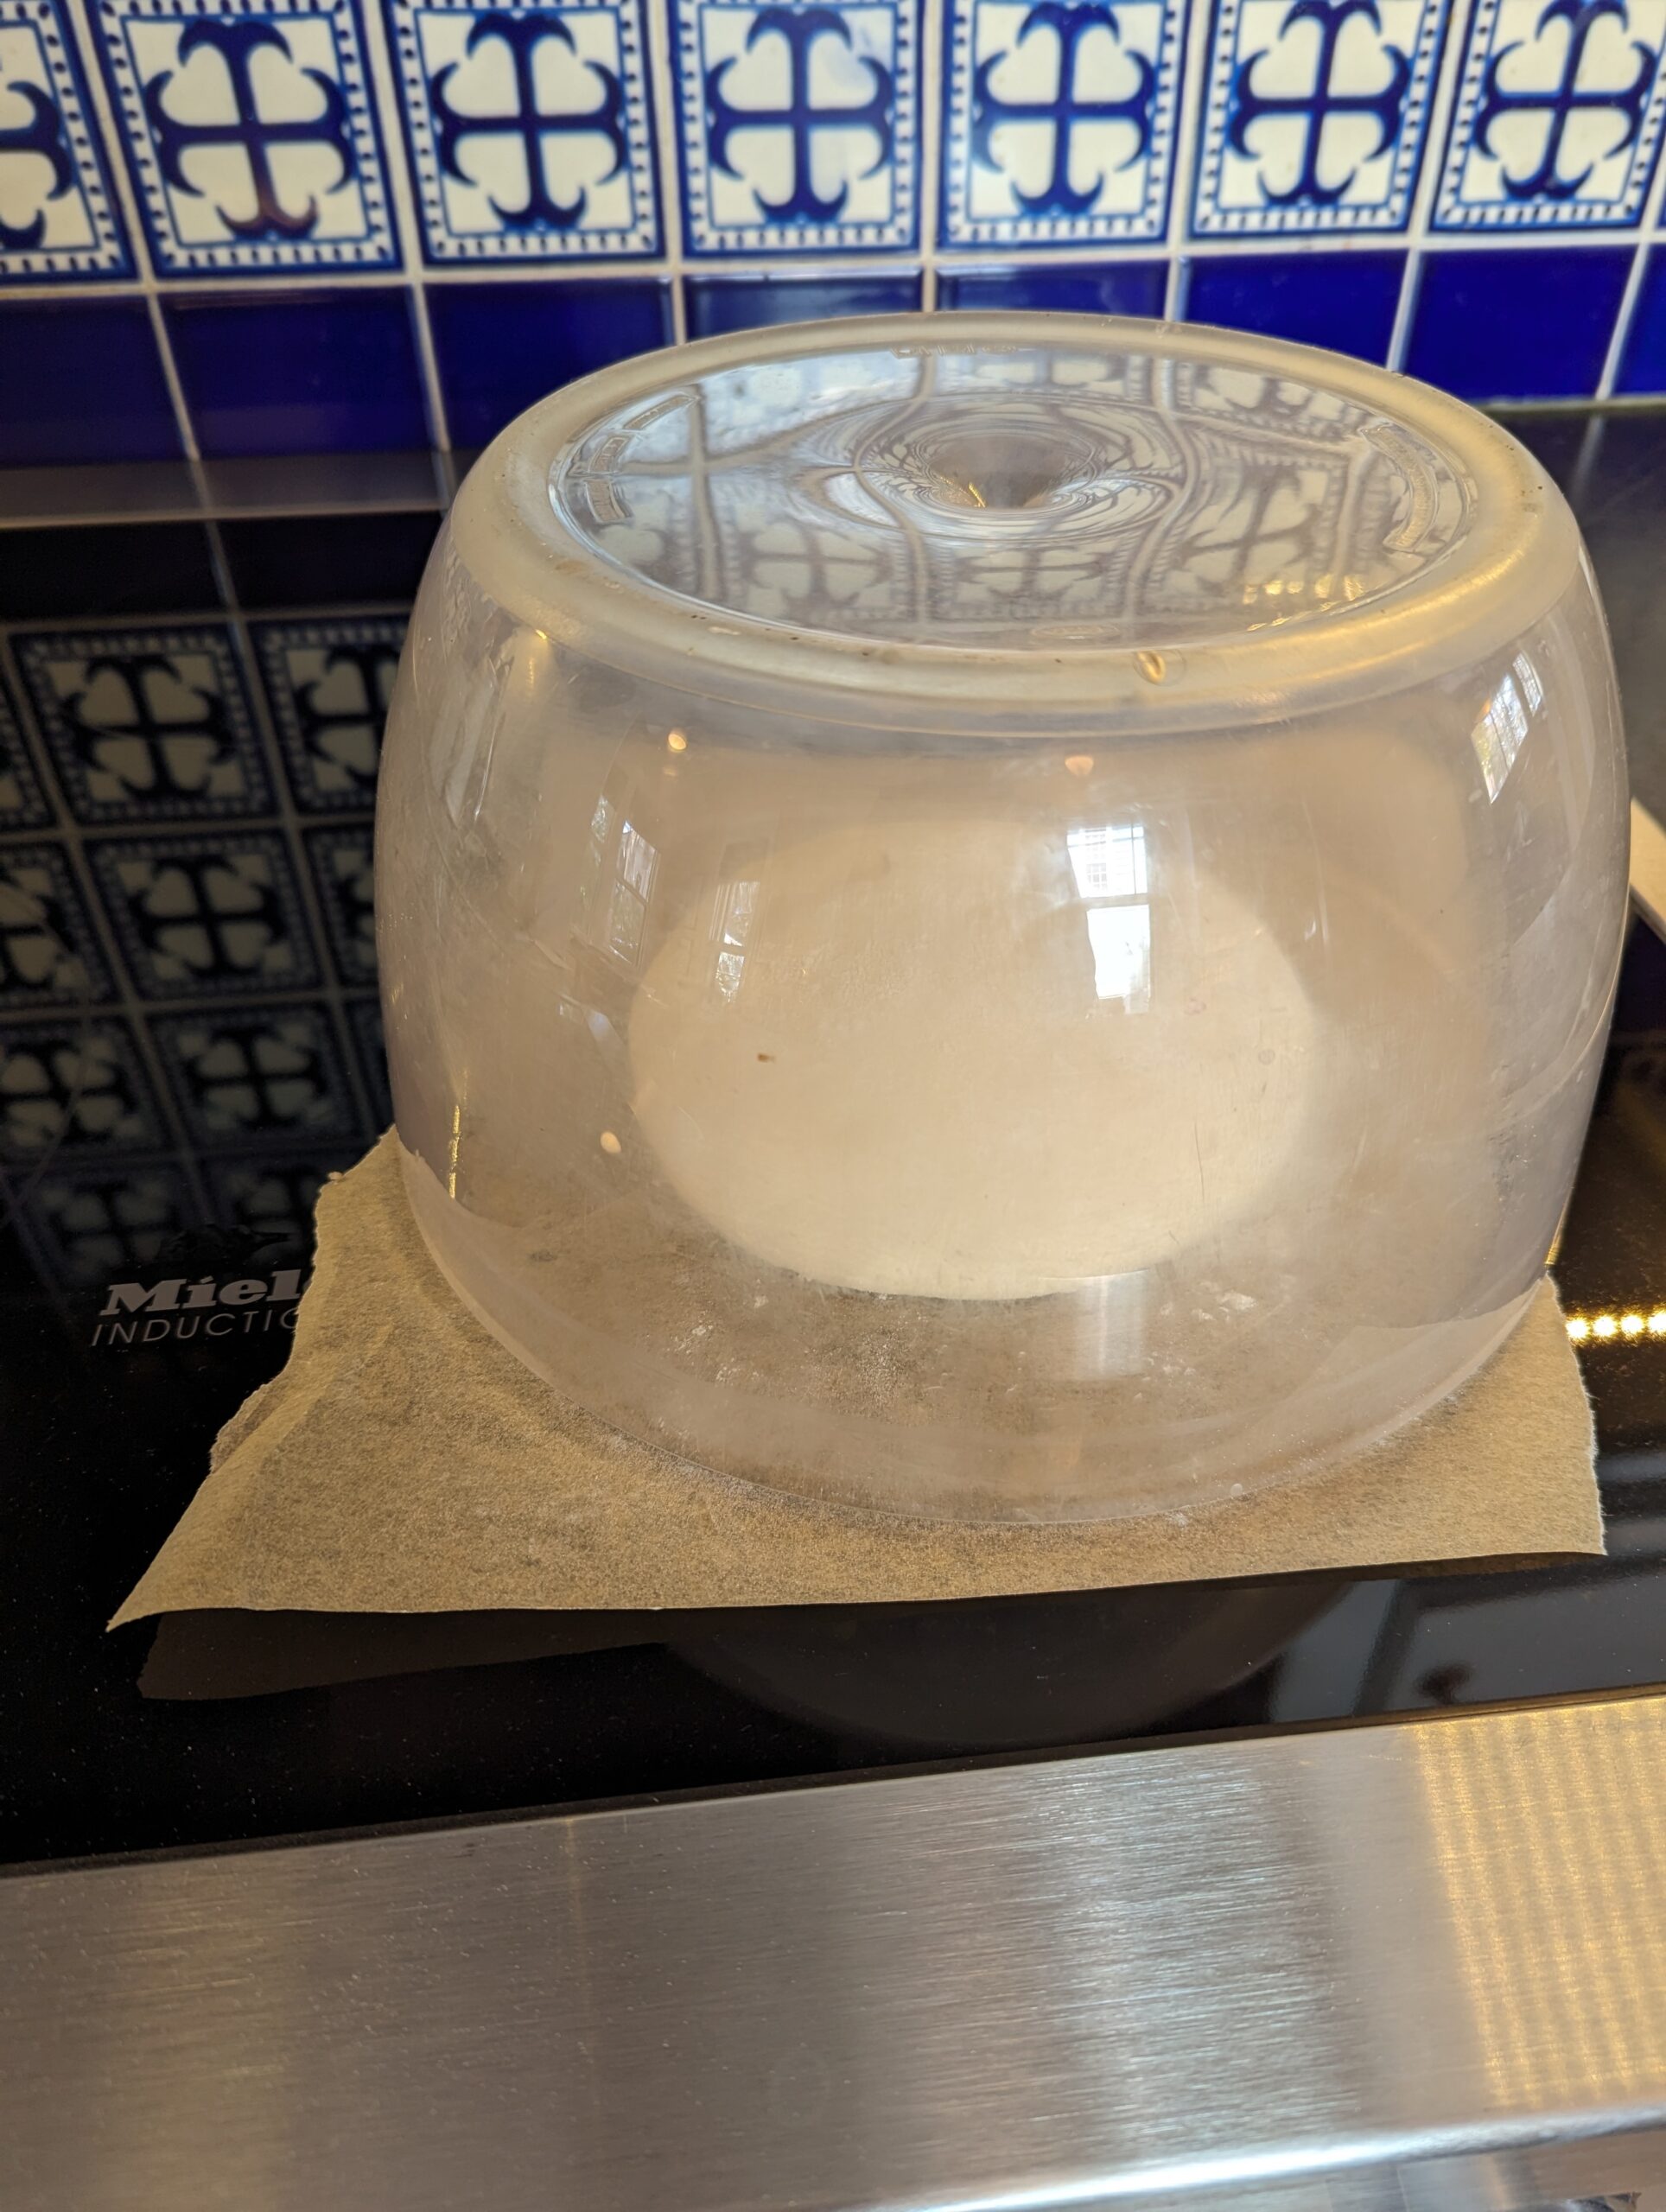
I’ve been covering the resting dough with the plastic bowl from a salad spinner. This really helps in dry environments (like cold weather when heating systems dry the air):
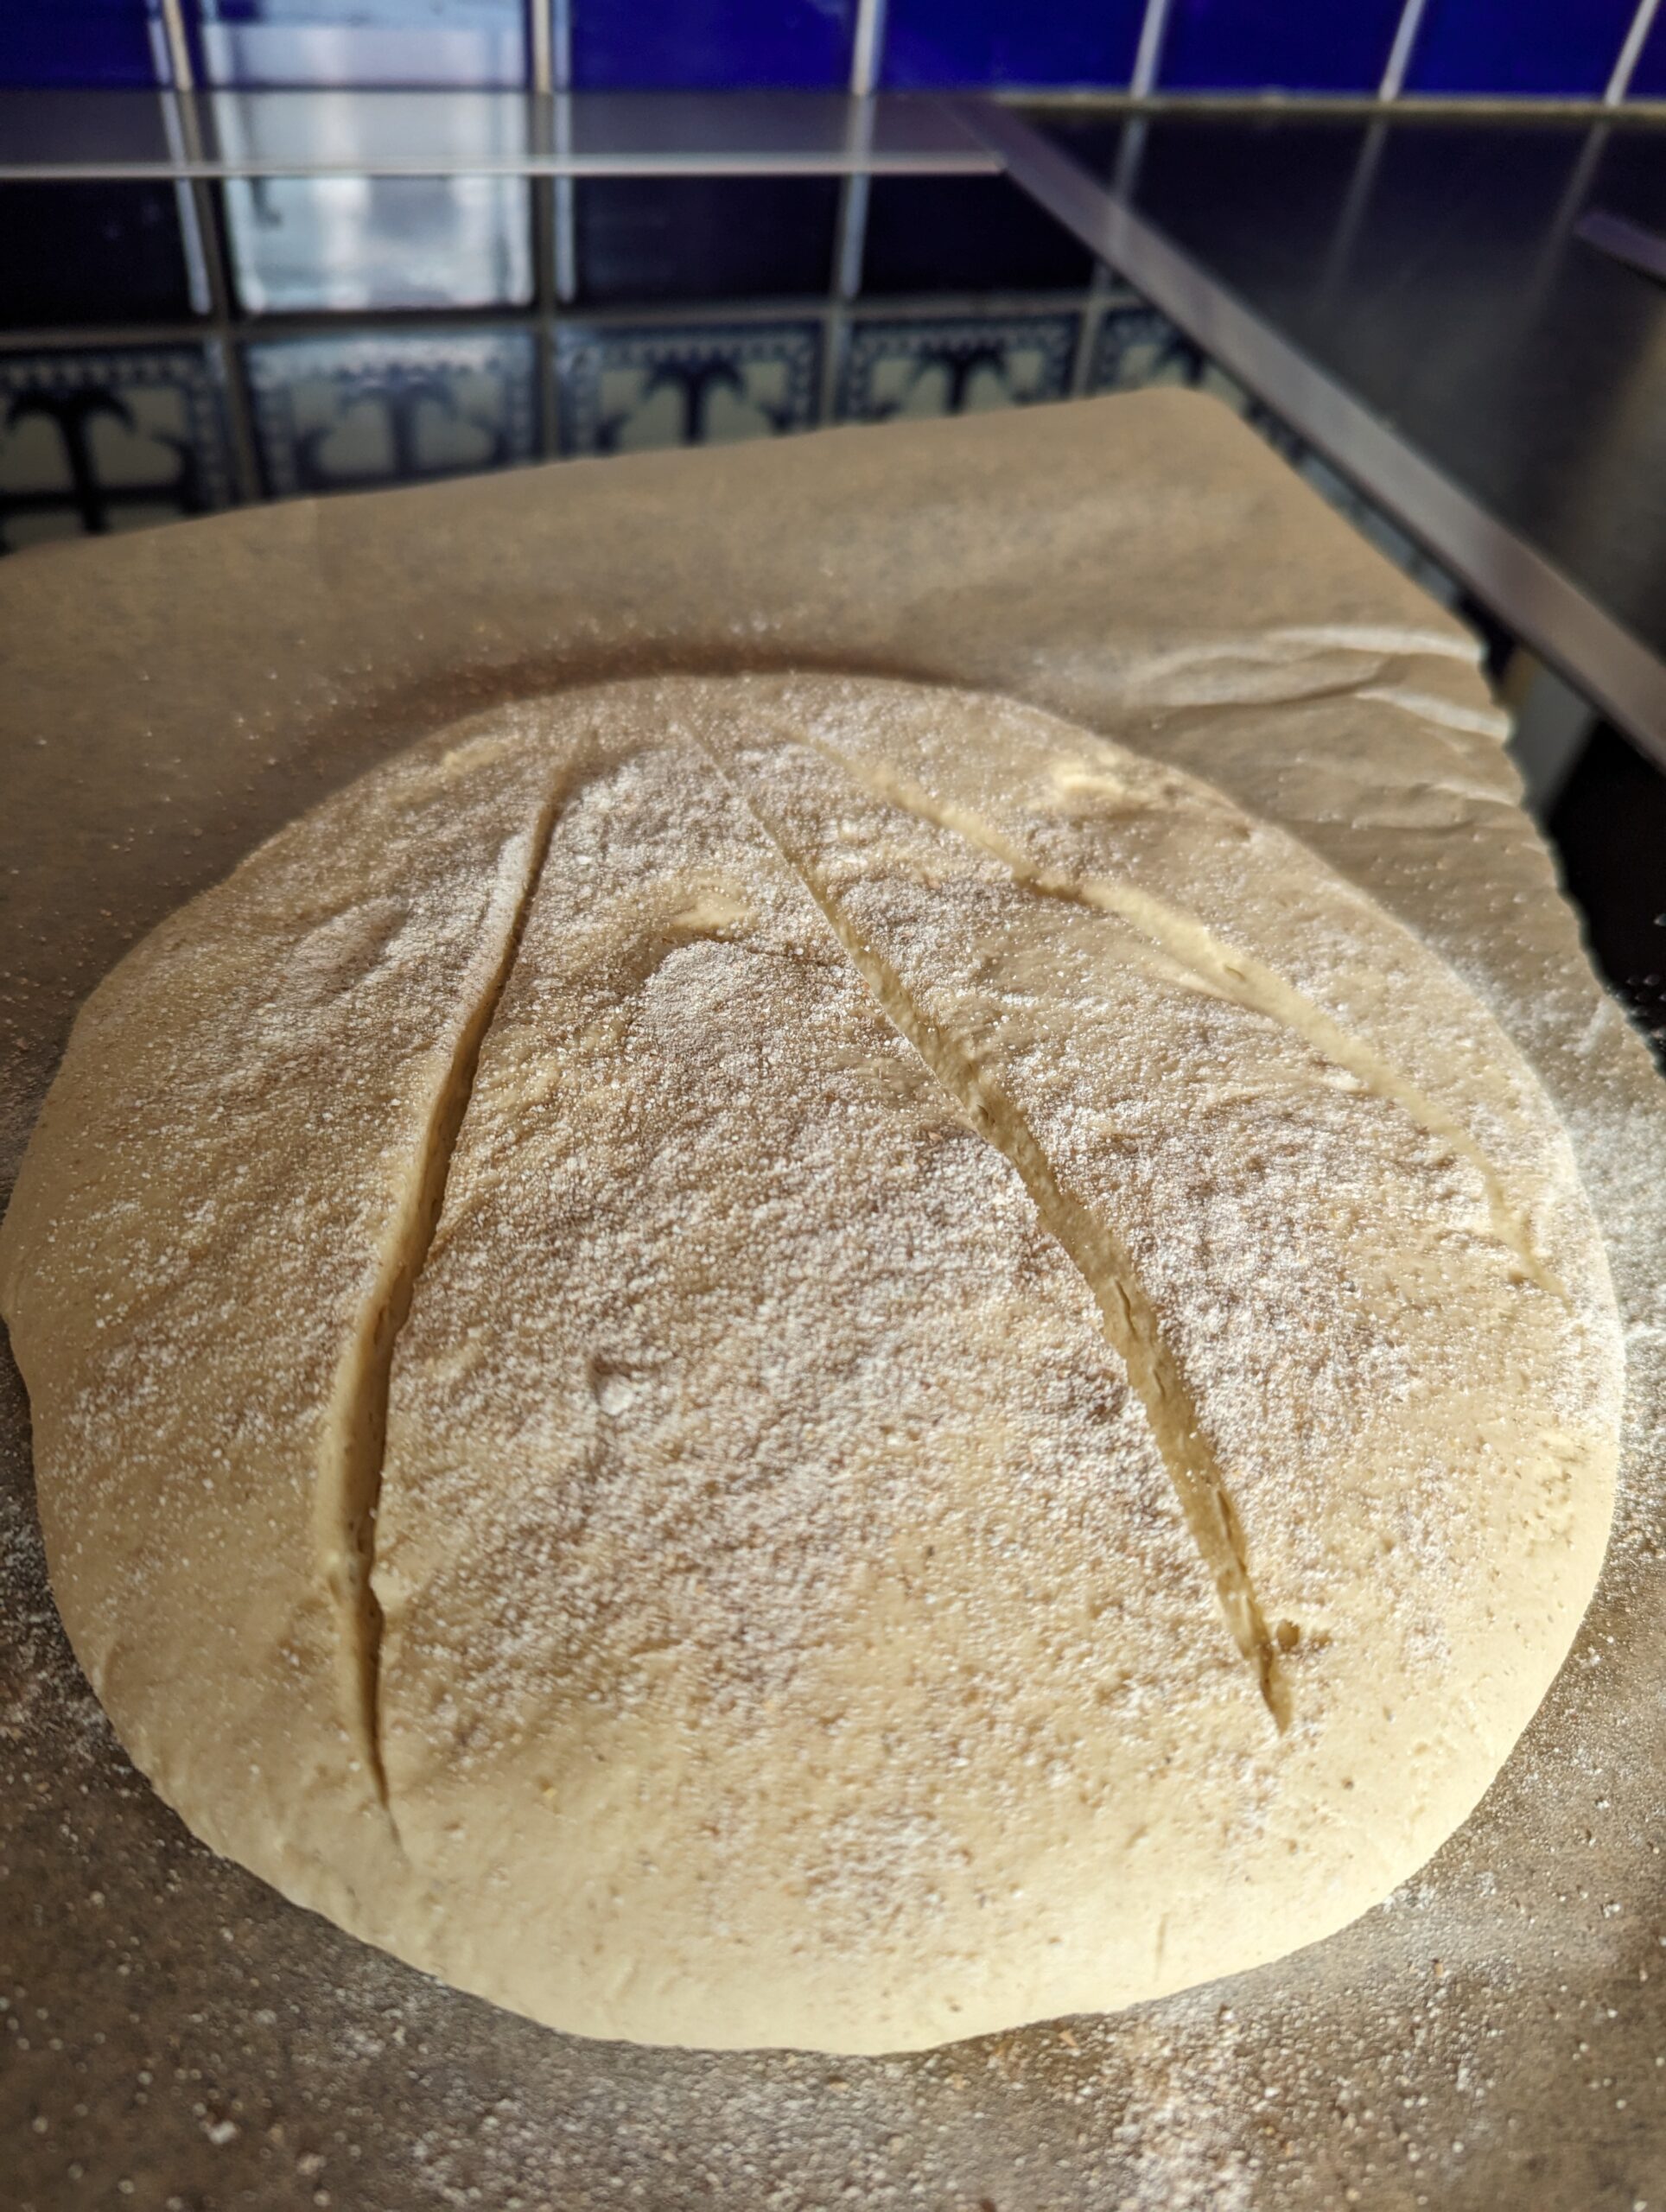
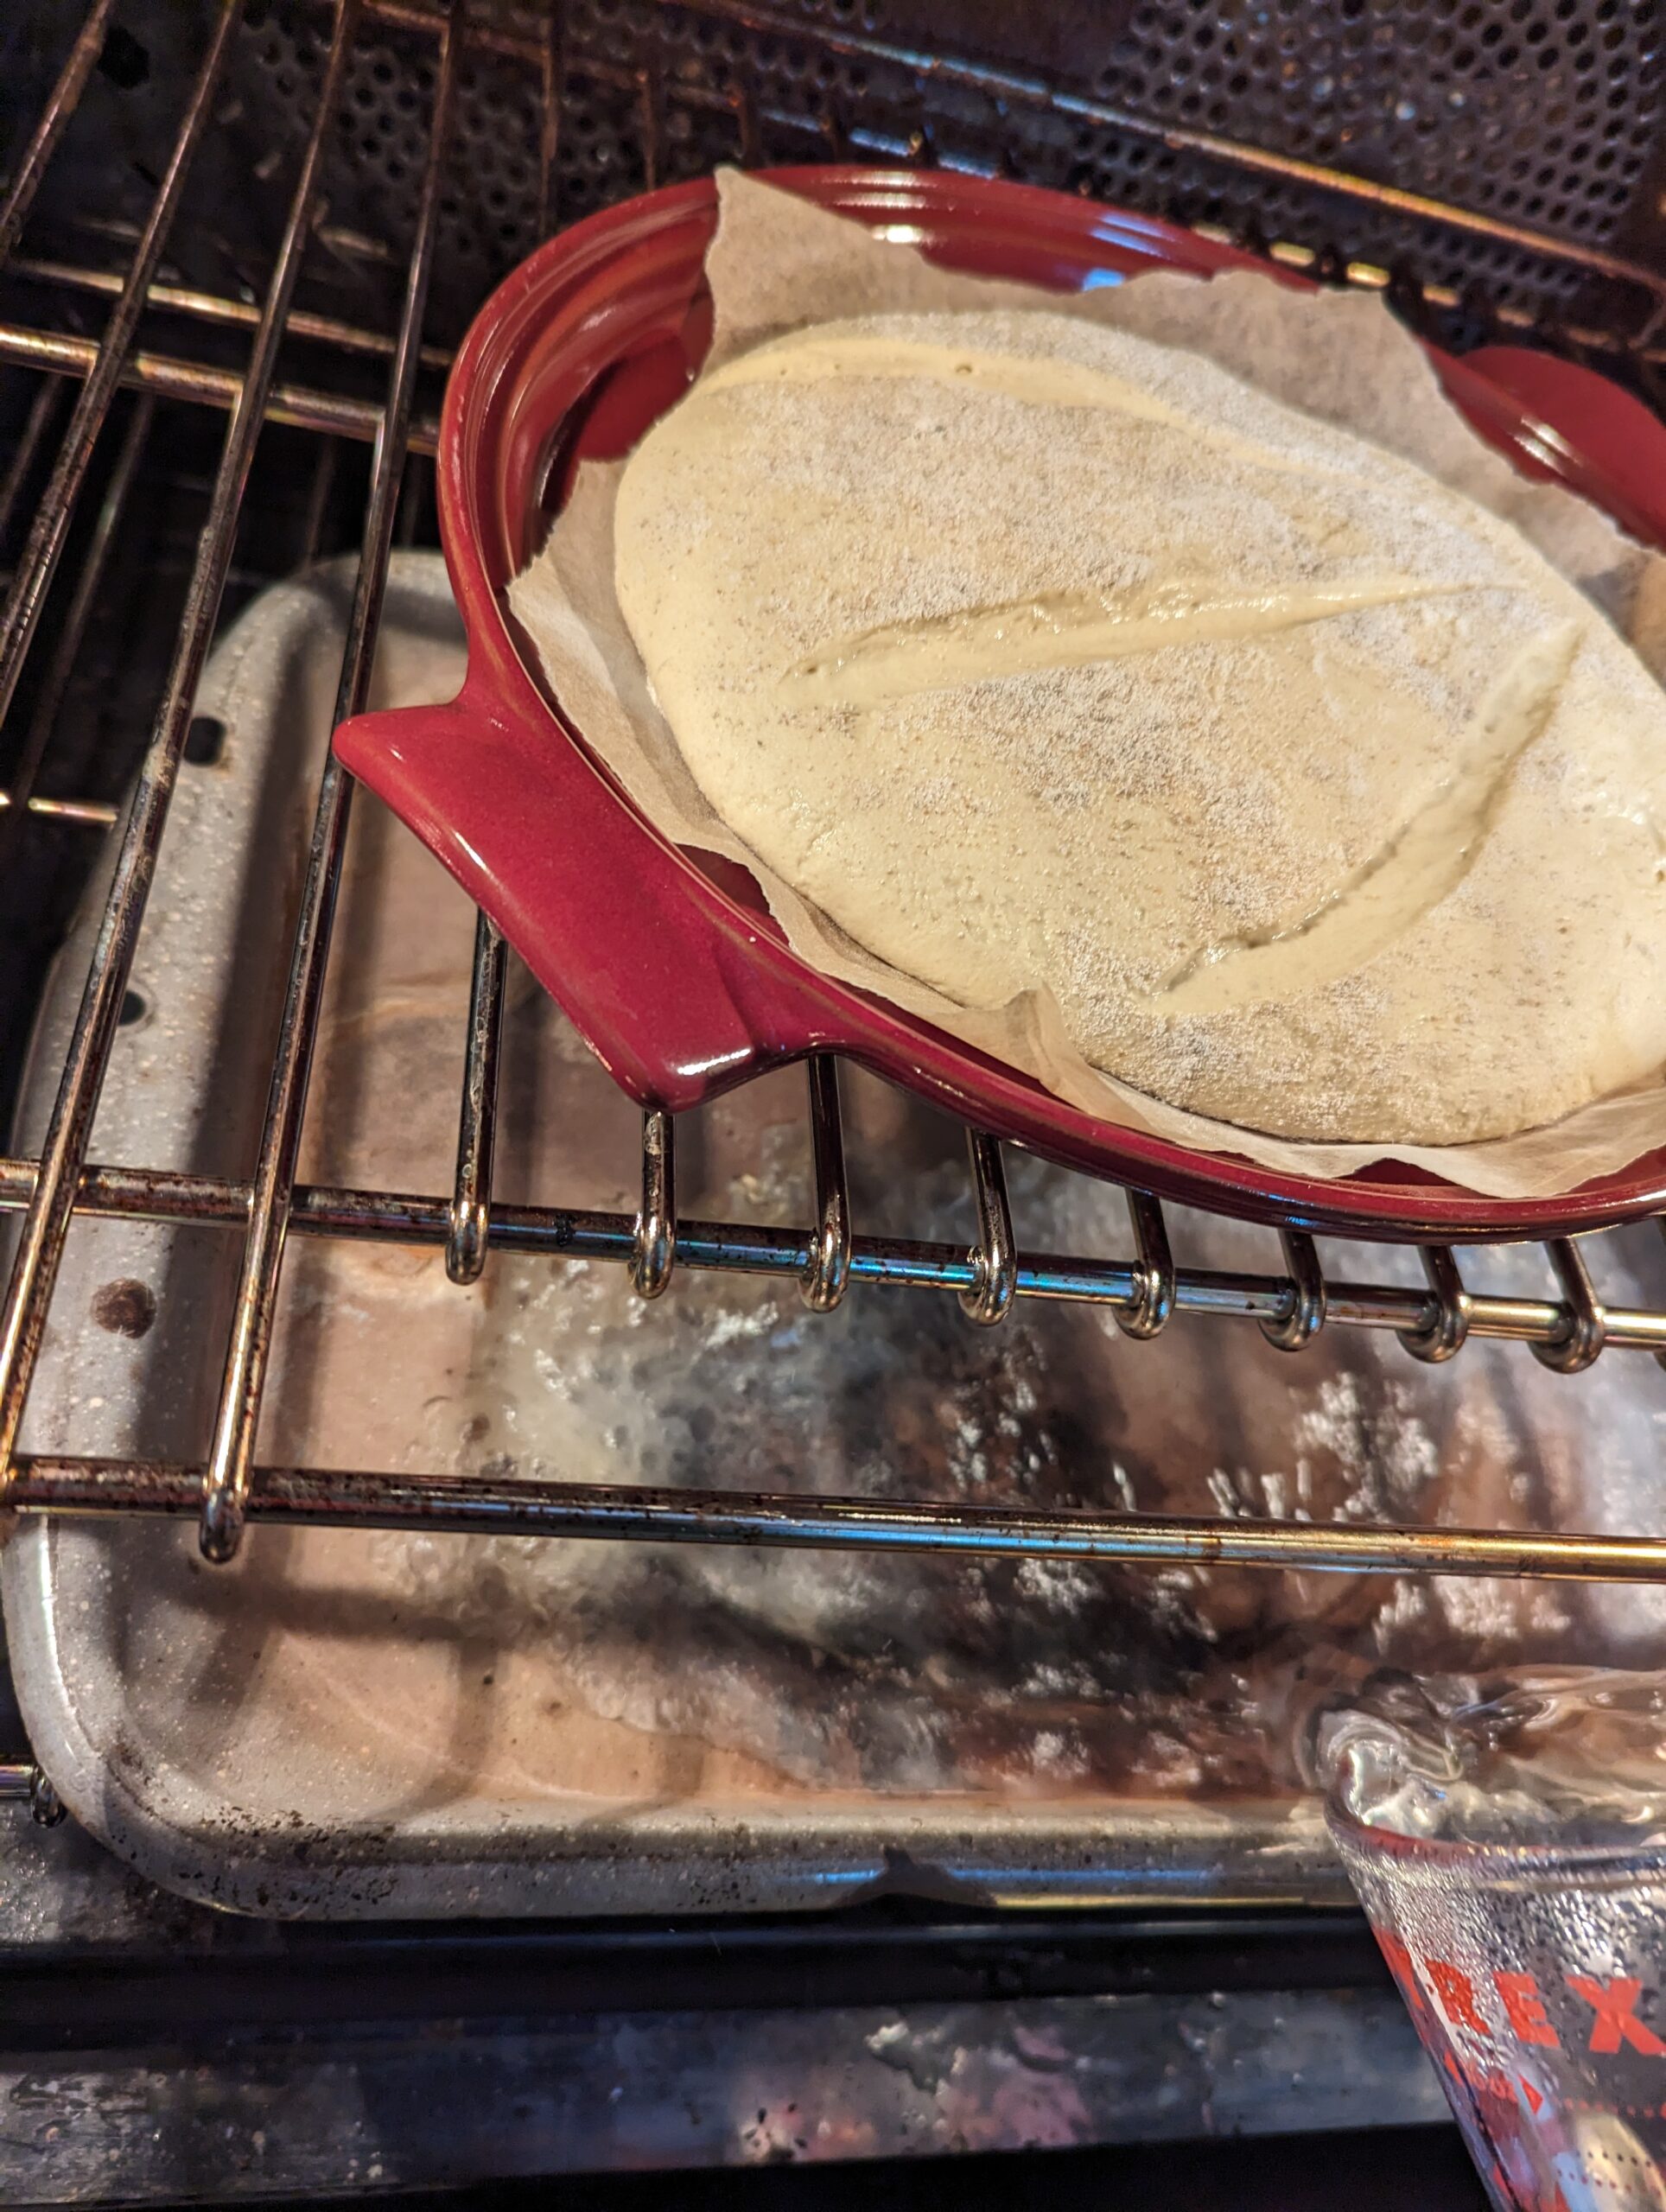
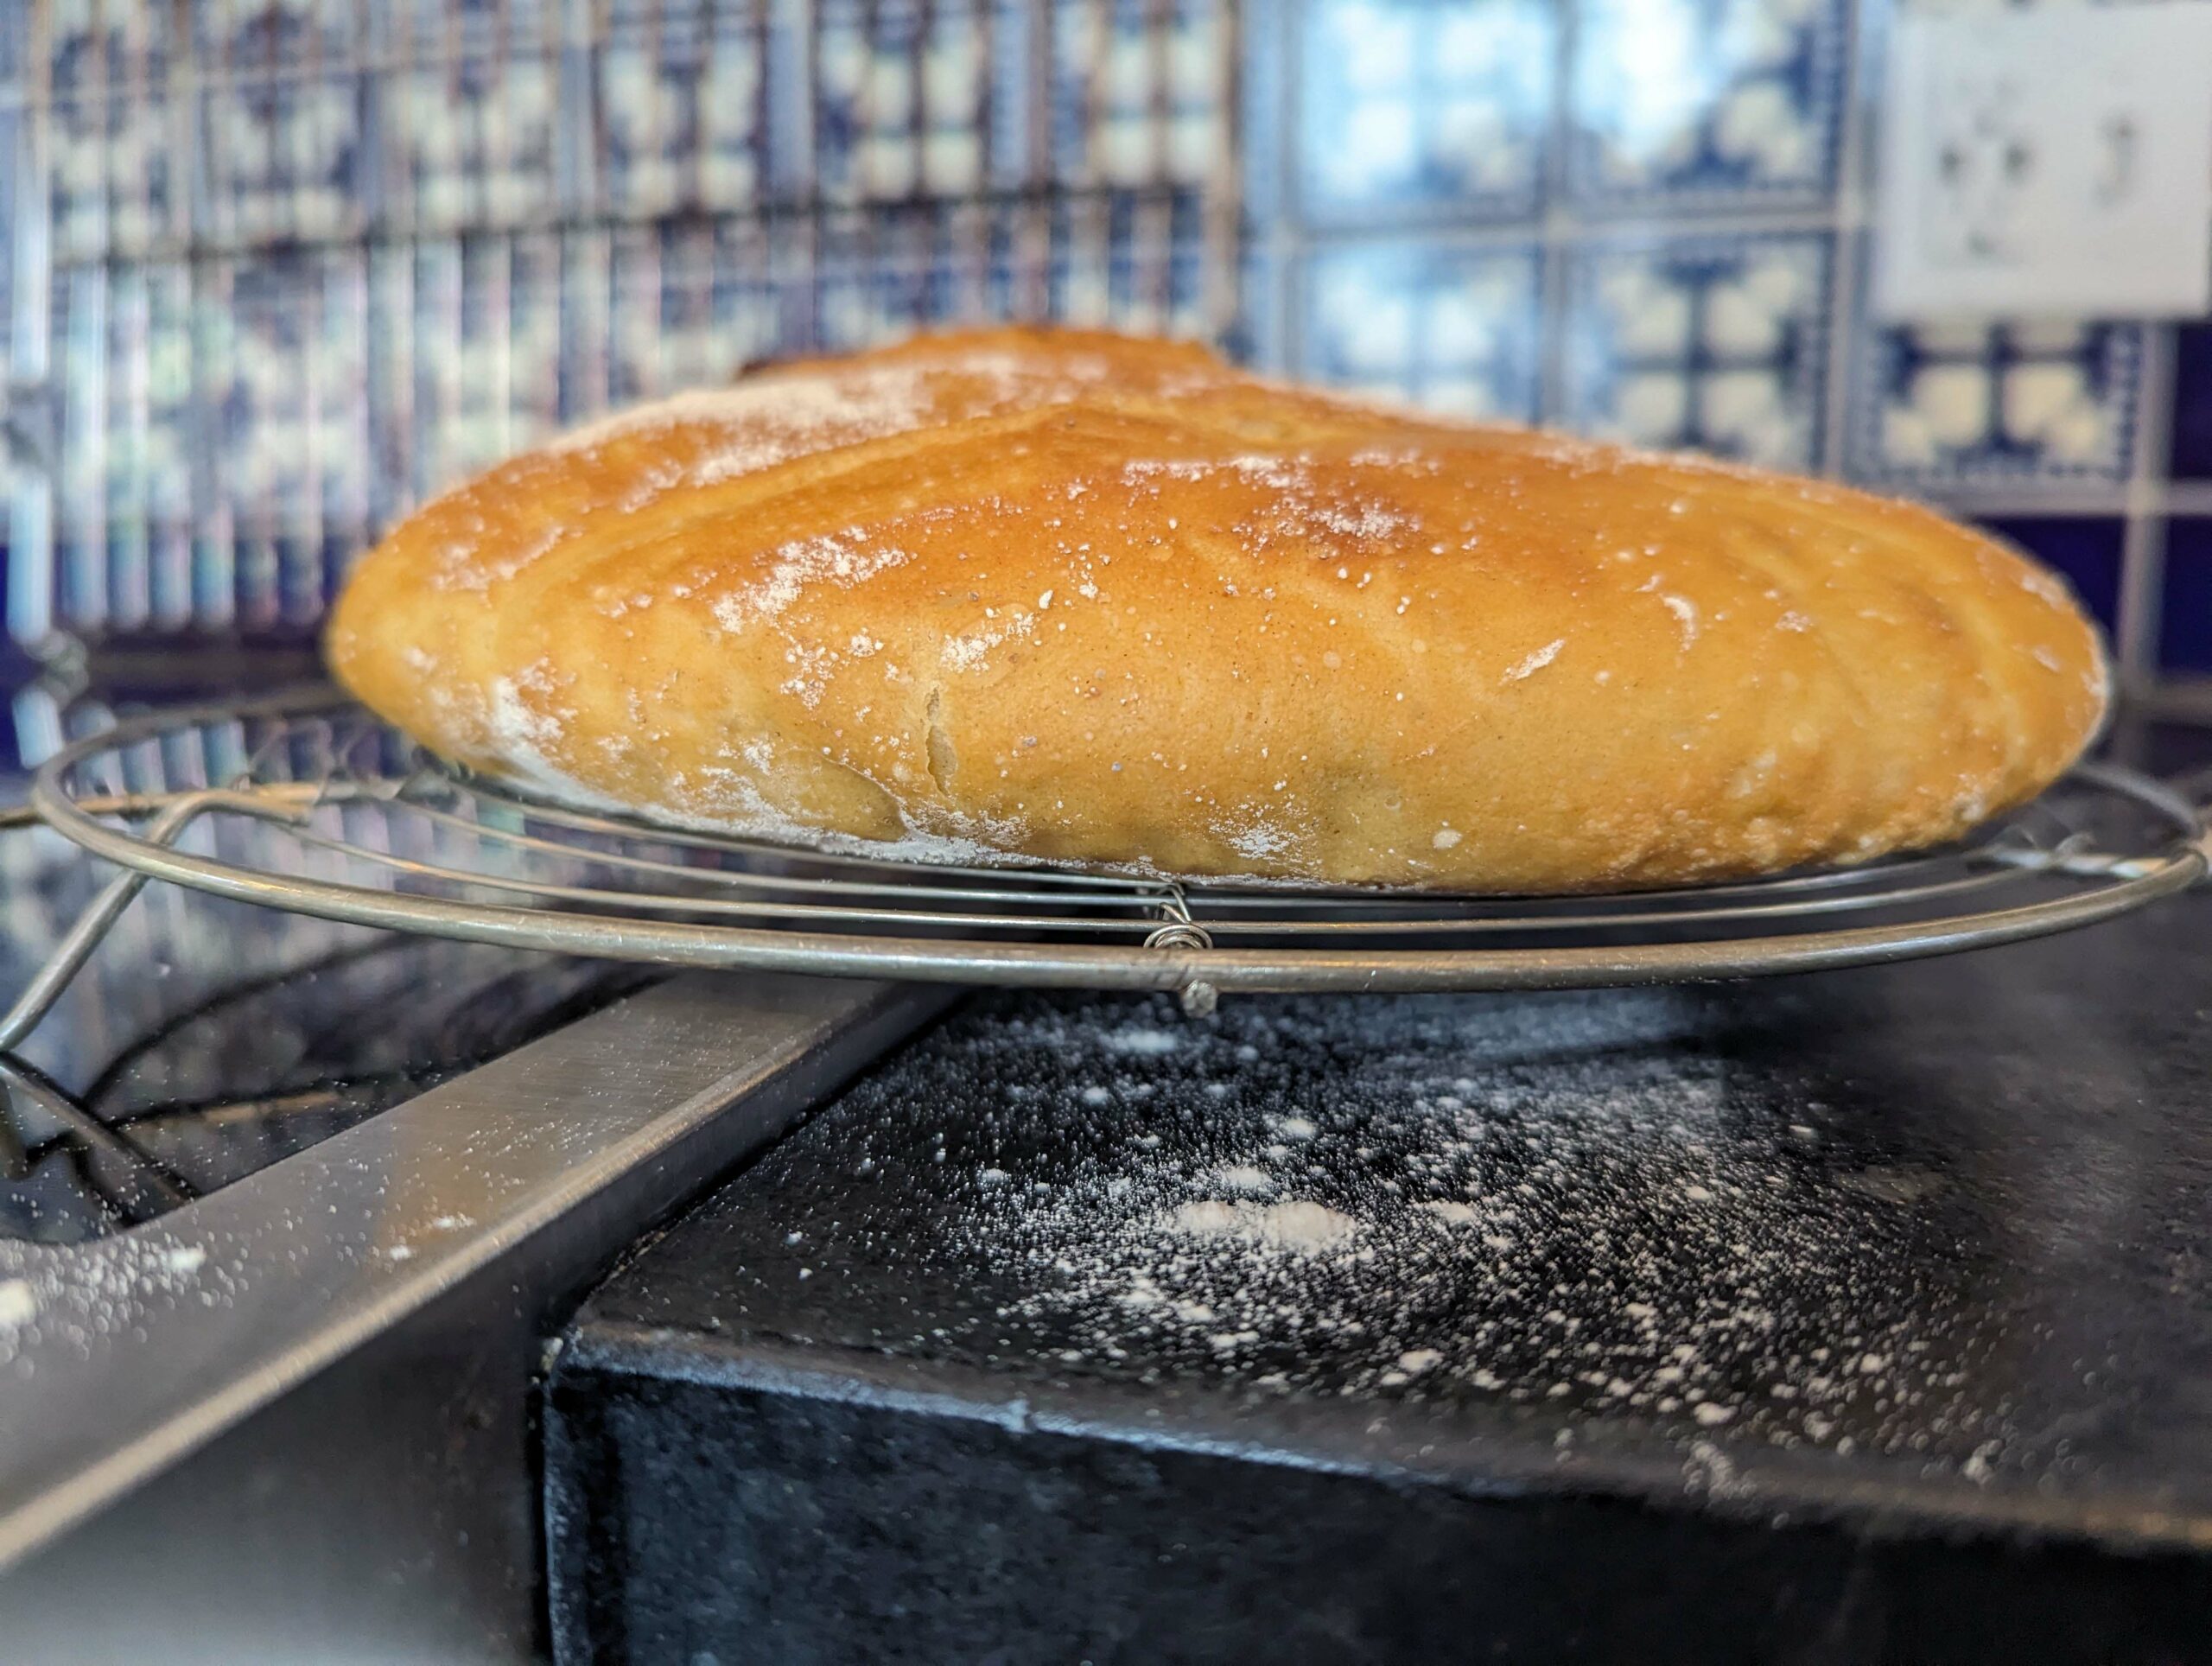
During the rest period, the loaf spread sideways more than it rose upward, but the key was expansion, yielding a reasonably open crumb structure even though there wasn’t much vertical rise. This turned out to be a semi-flat bread, about 2 inches tall when baked…
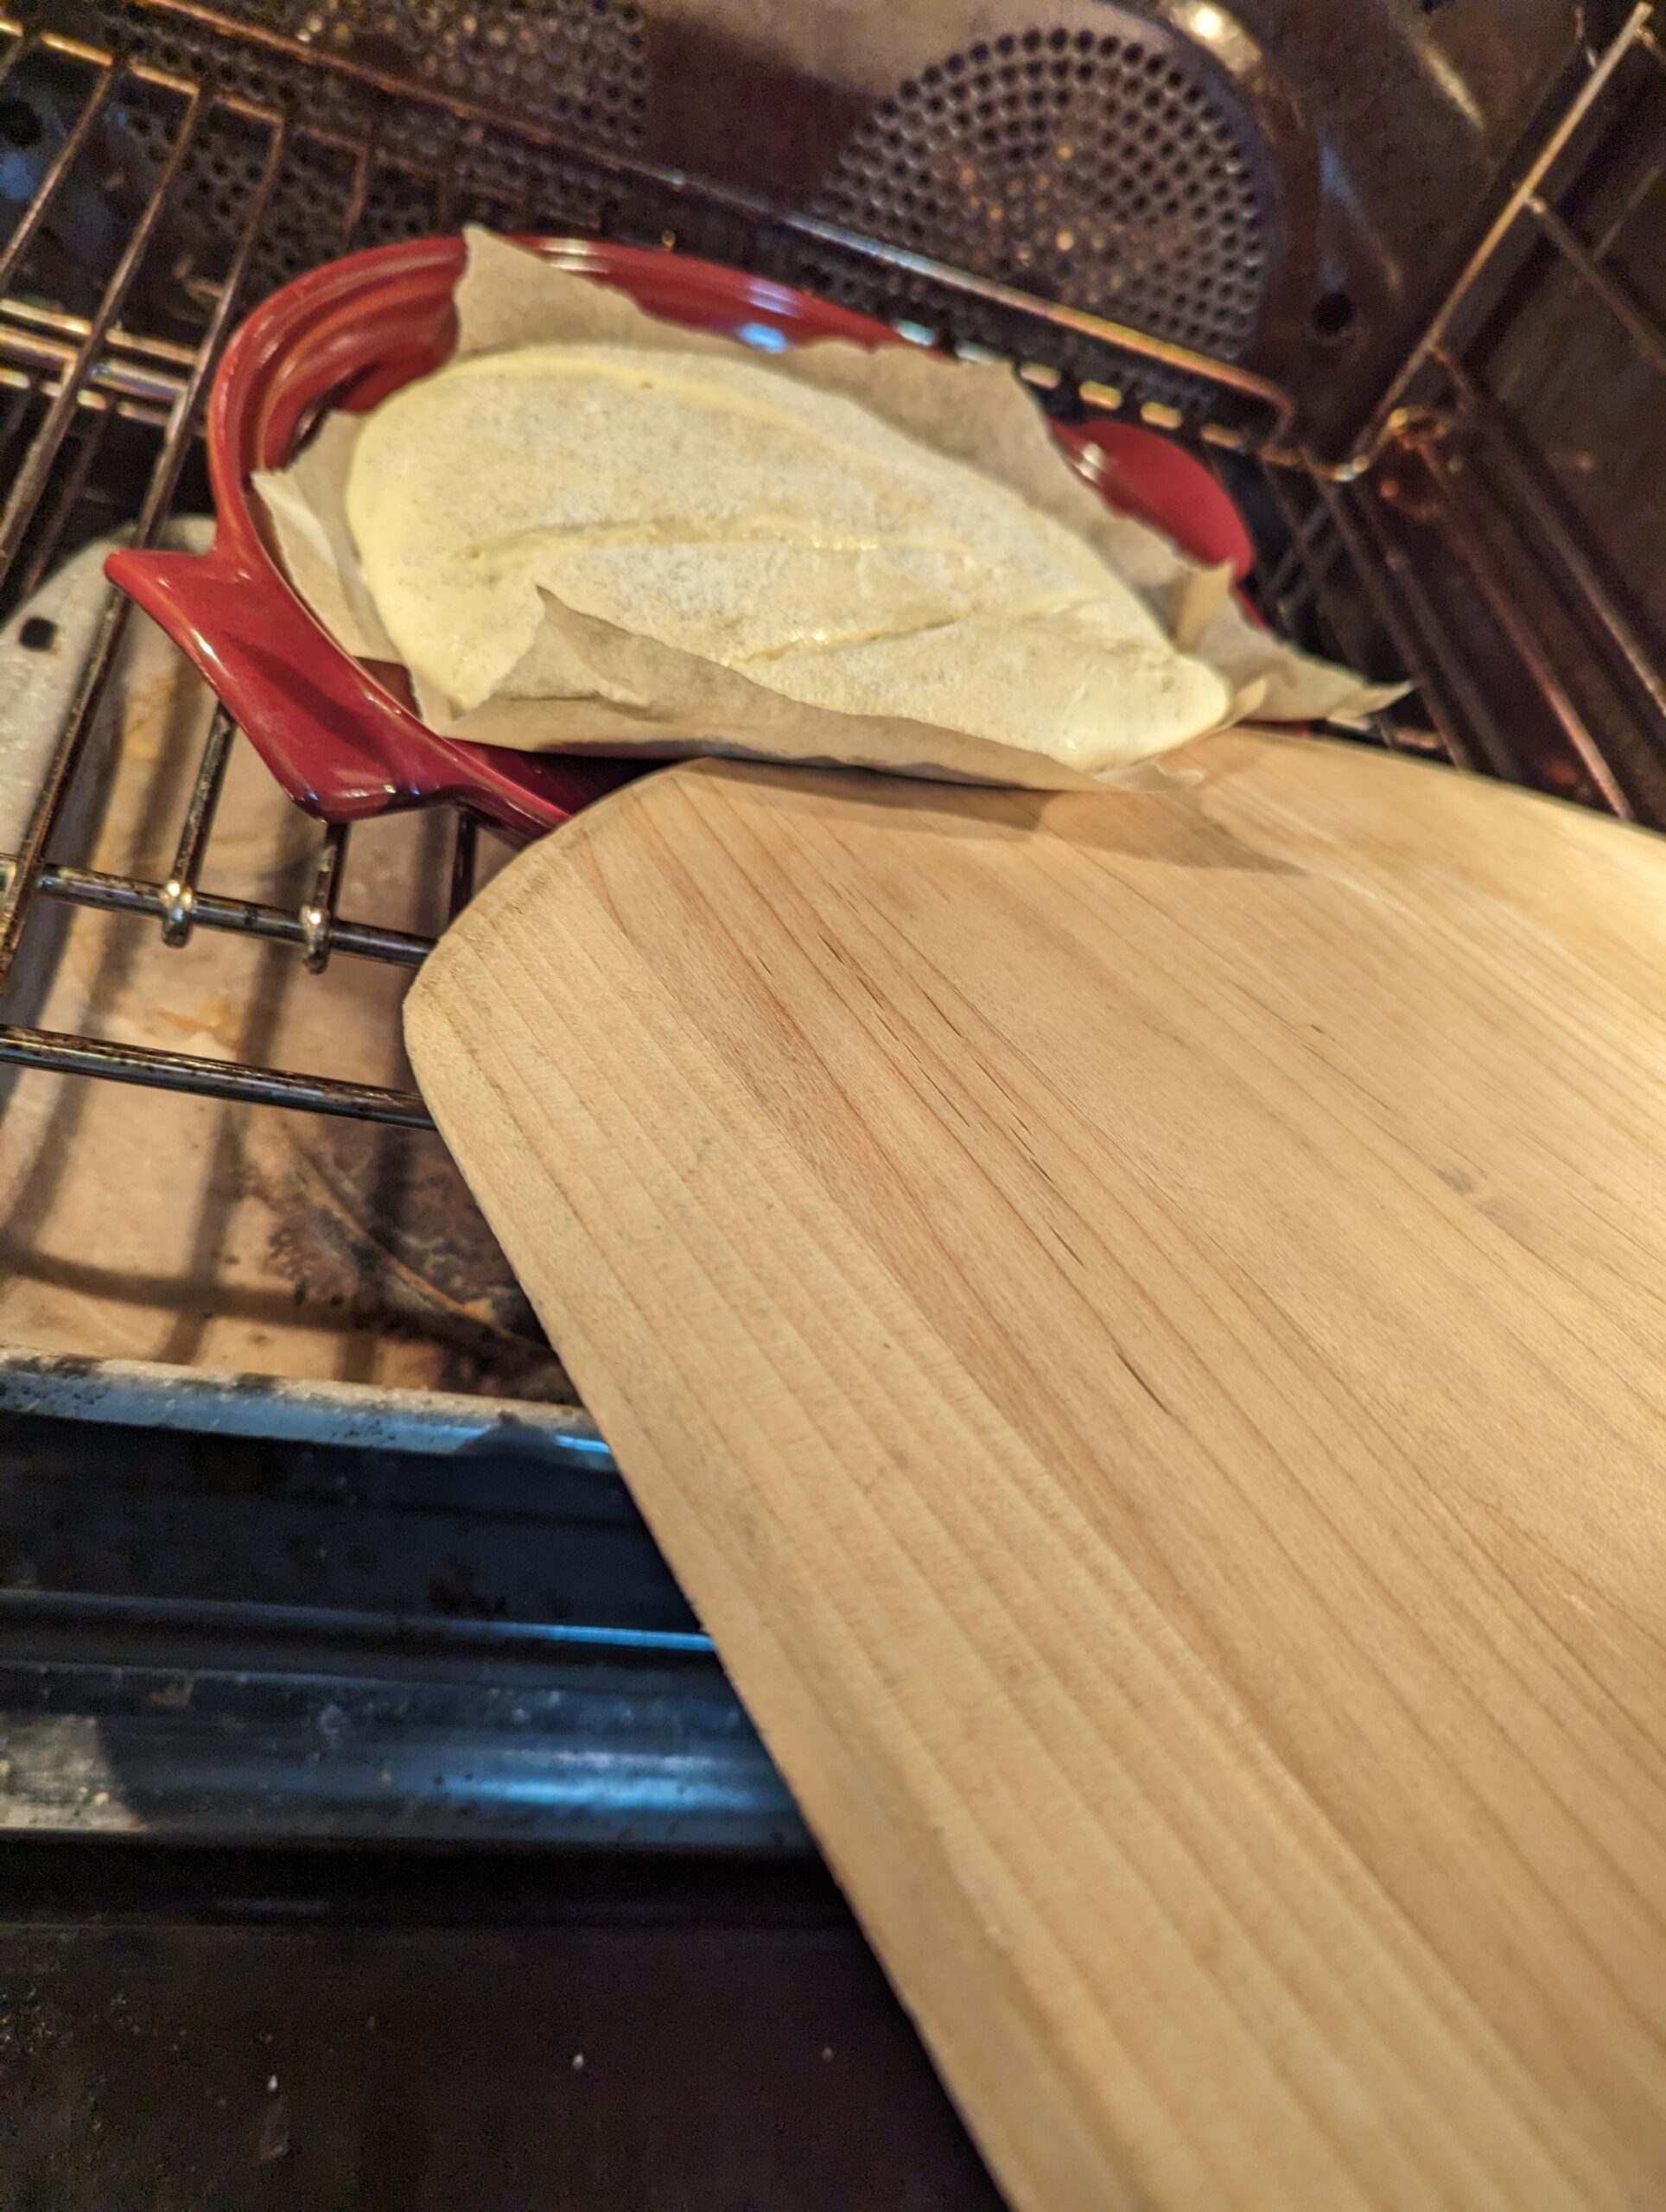
After sprinkling with flour, I gave it three slashes with a bread knife. Cut with the blade perpendicular to the surface for wet-dough loaves like this one (or any of my recipes)…
Get under the parchment with a pizza peel or a board…
… and slide the loaf, parchment and all, onto the hot baking stone.
Pour a cup of hot water into the broiler tray (same caution as above if your oven’s door doesn’t have tempered glass)
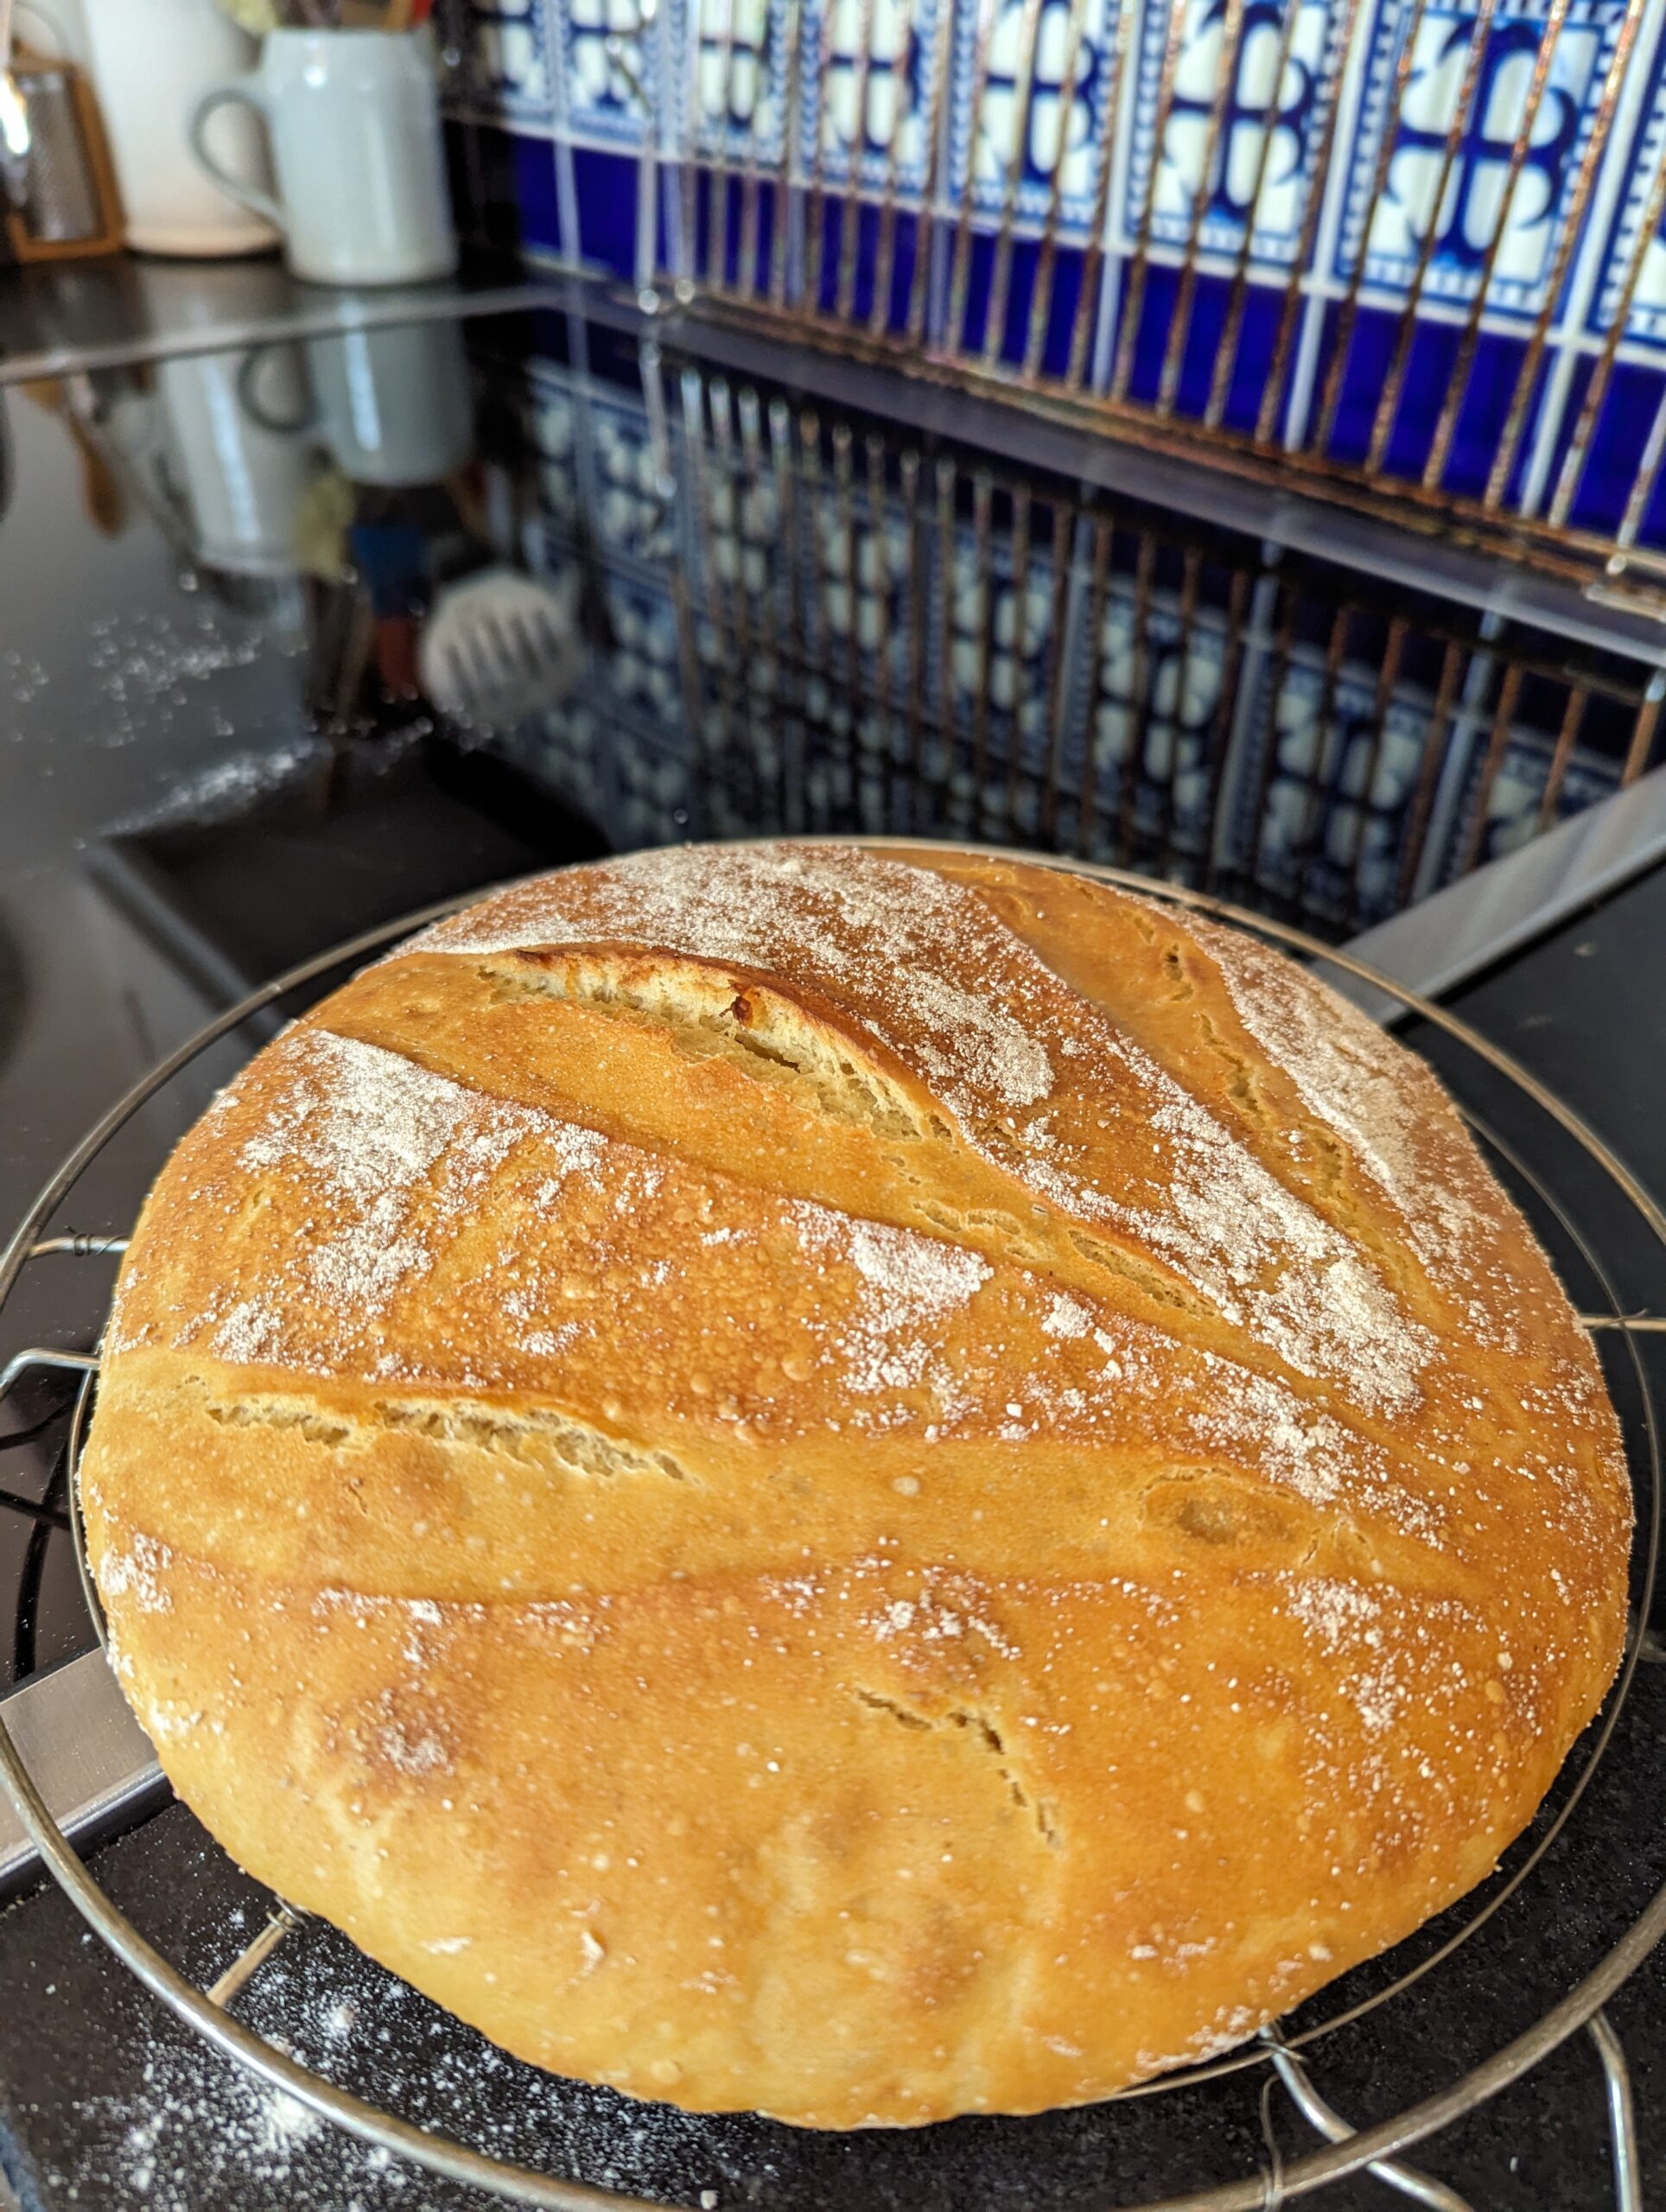
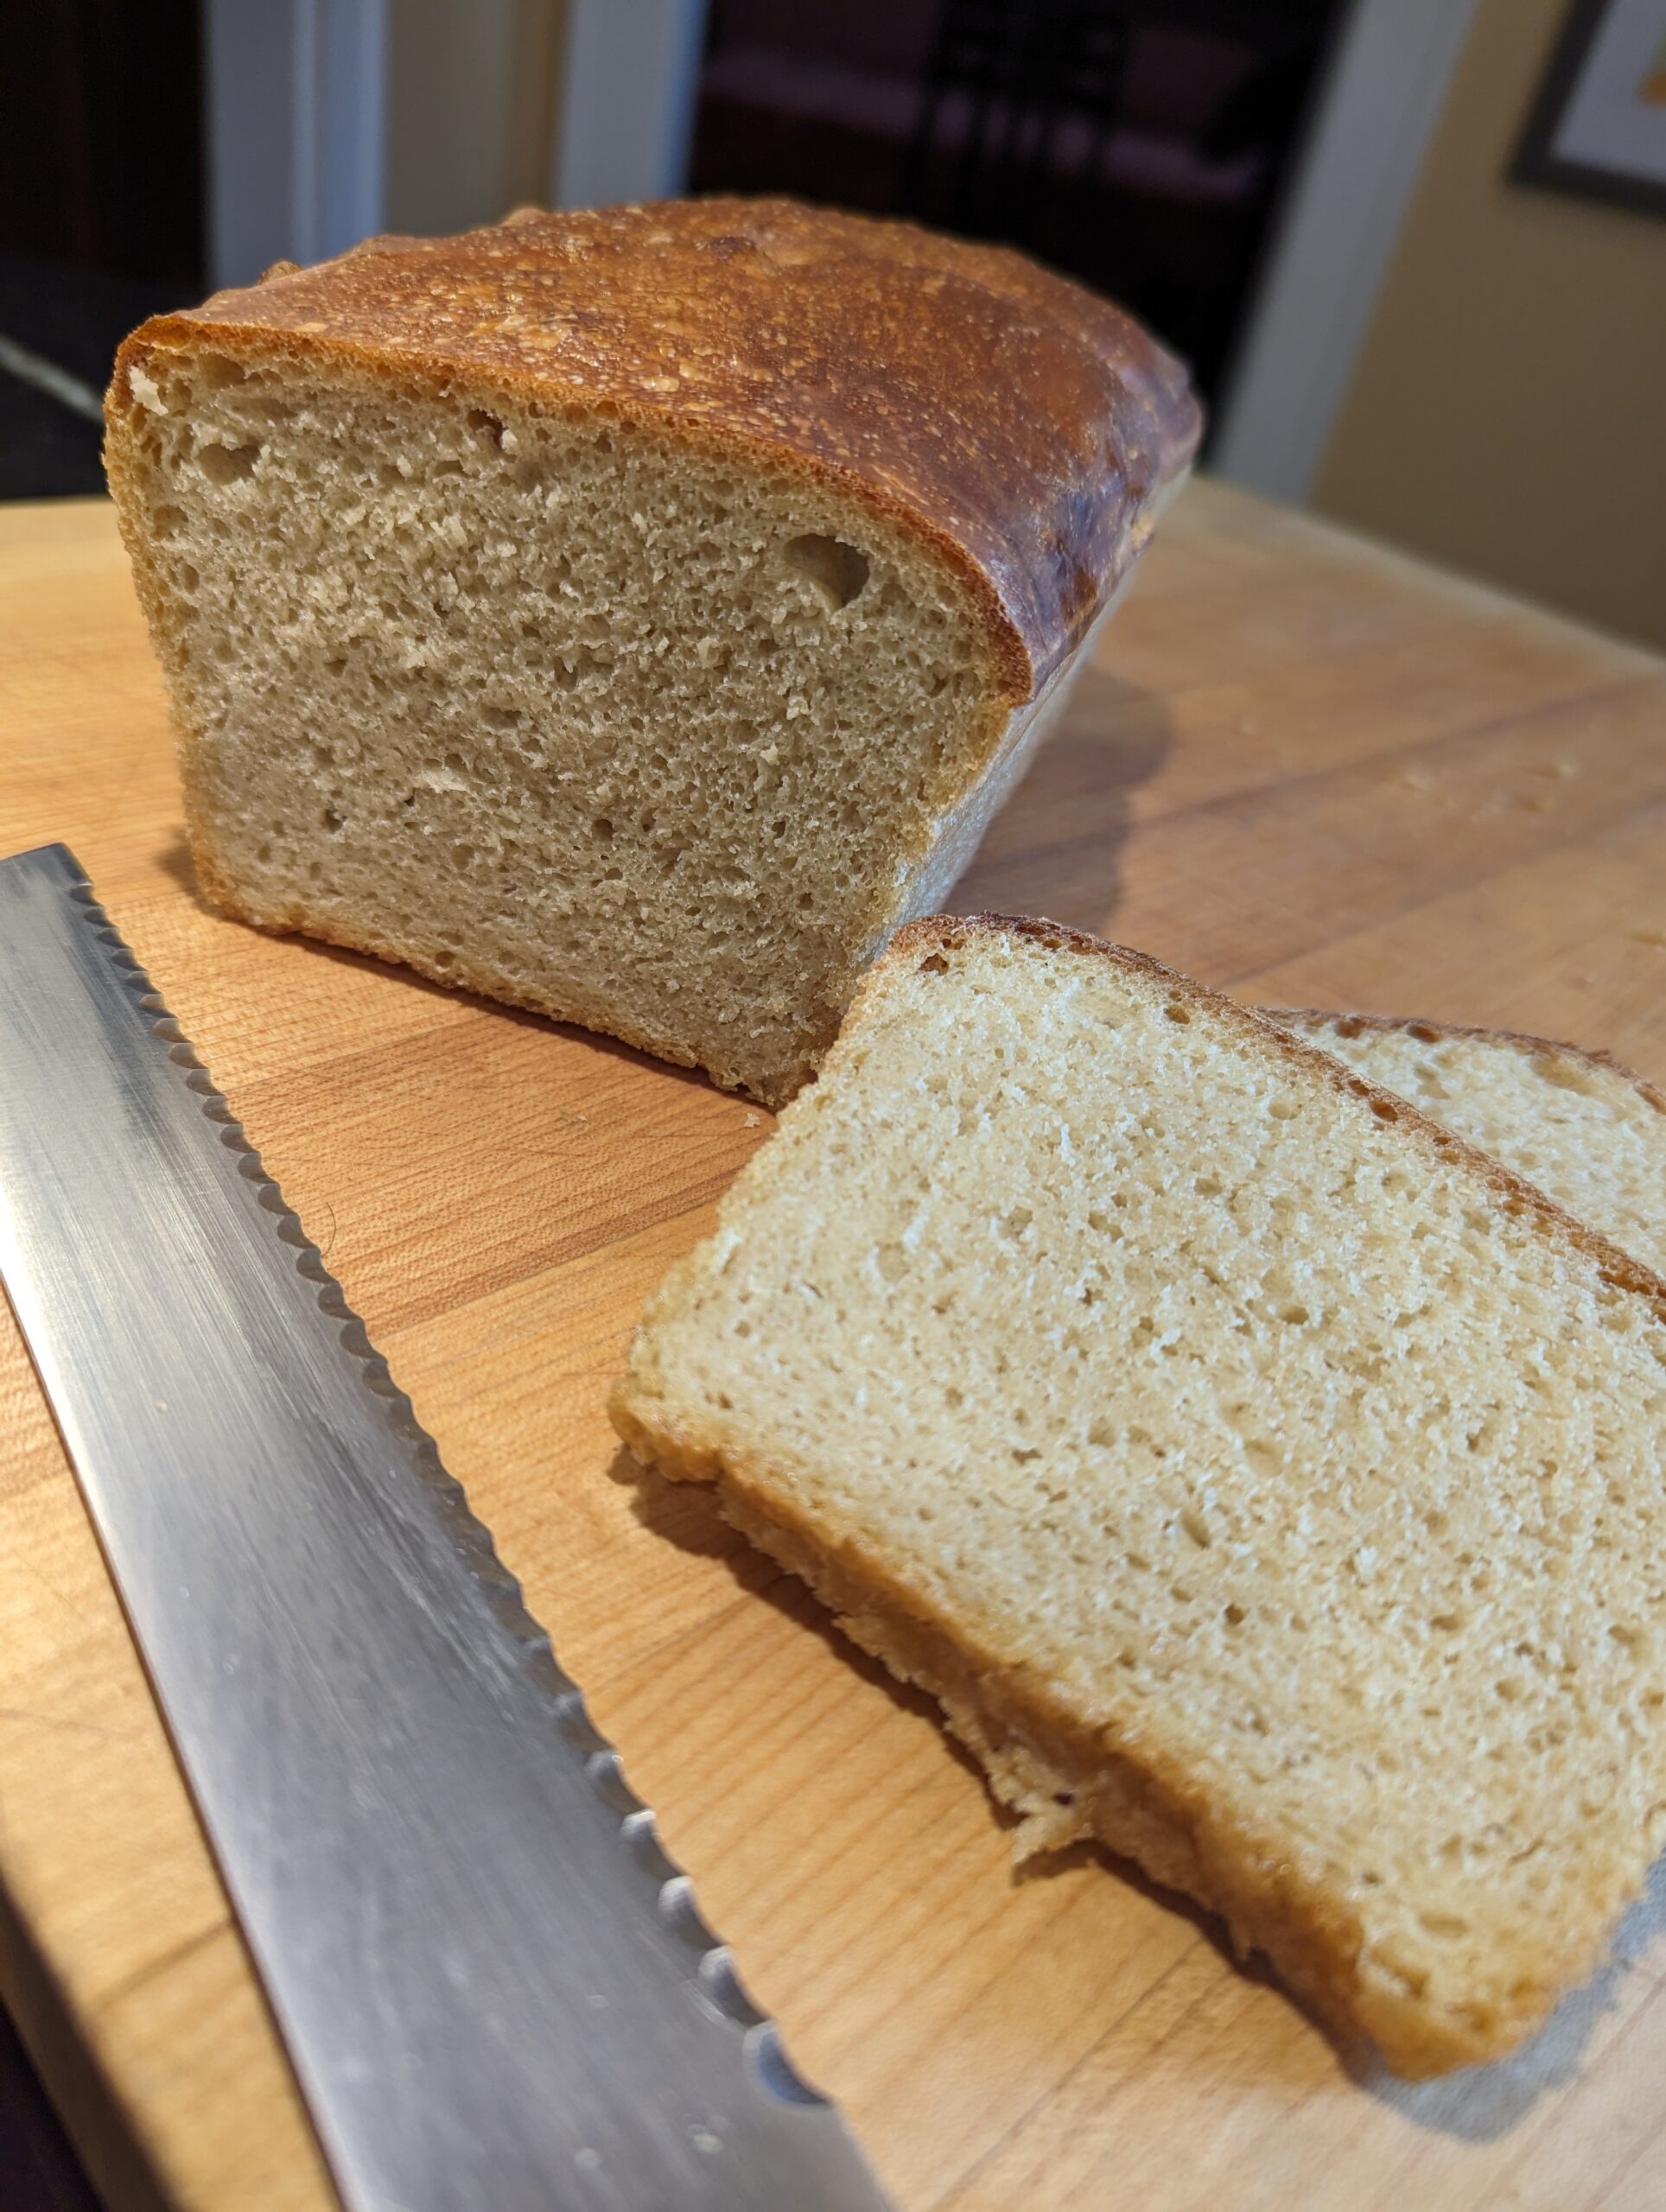
This baked up nicely, with some imperfections in the final crumb result (a bit dense in places). I wouldn’t store this dough for longer than 7 days.
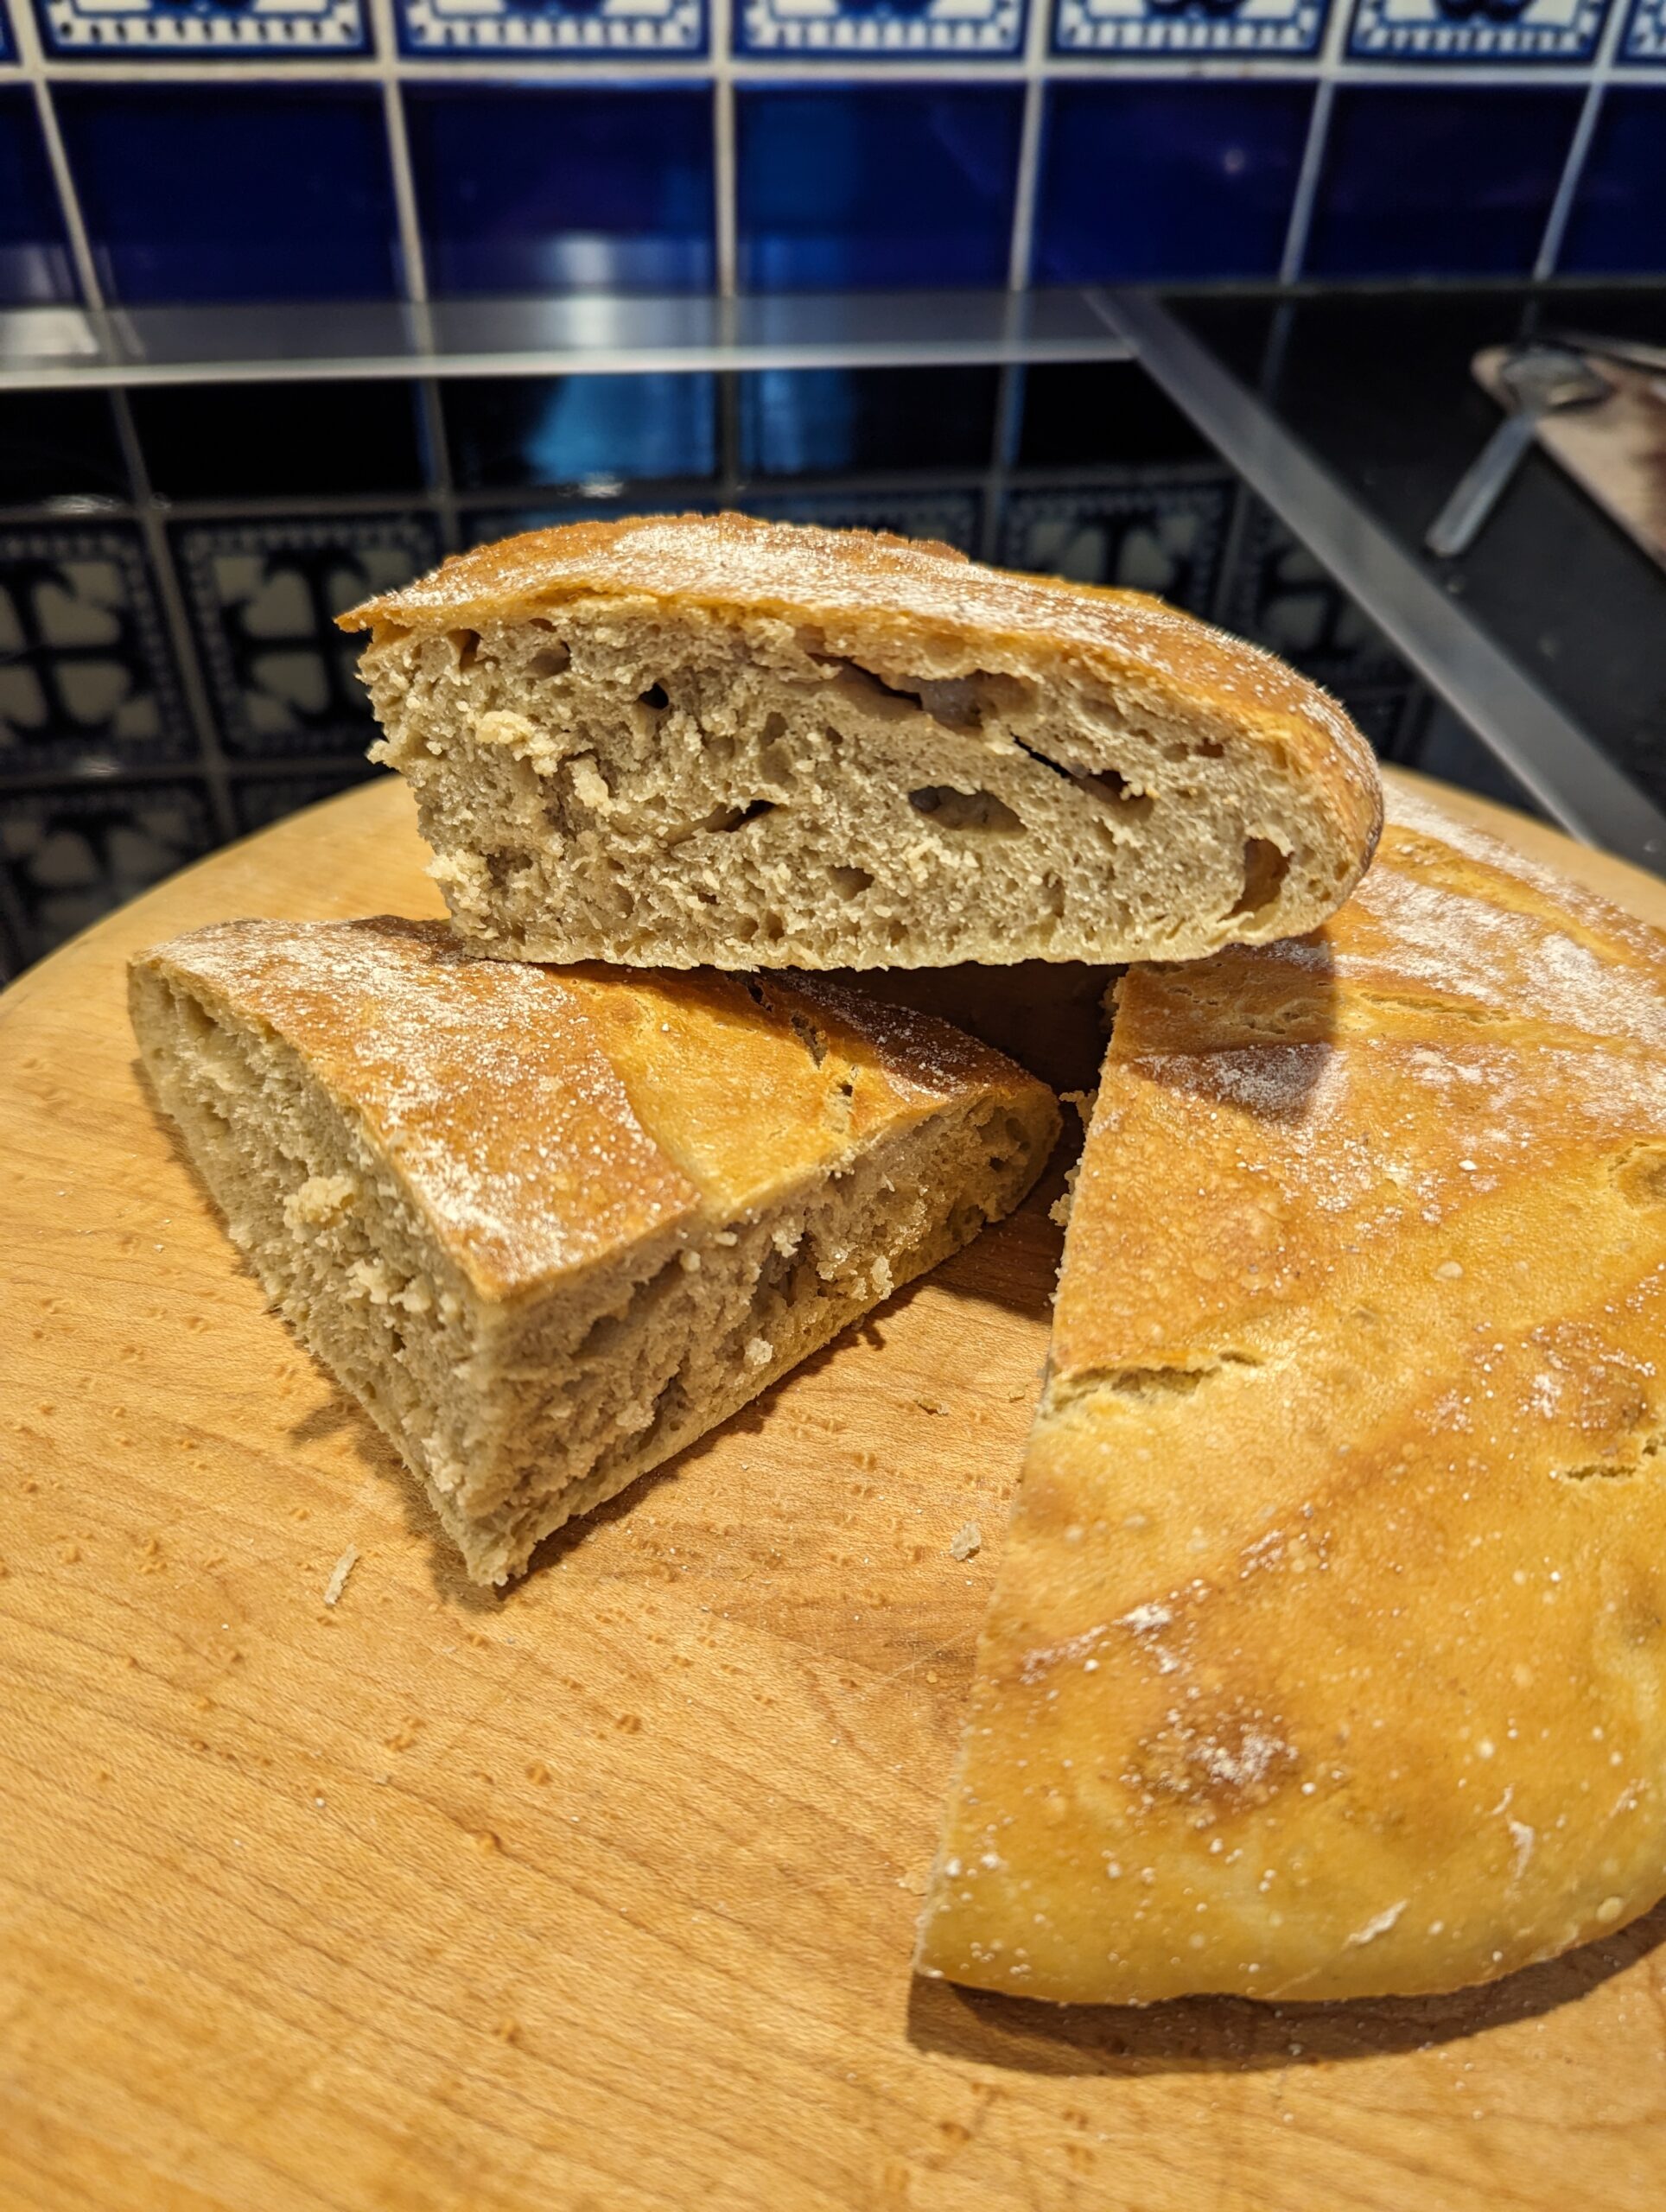
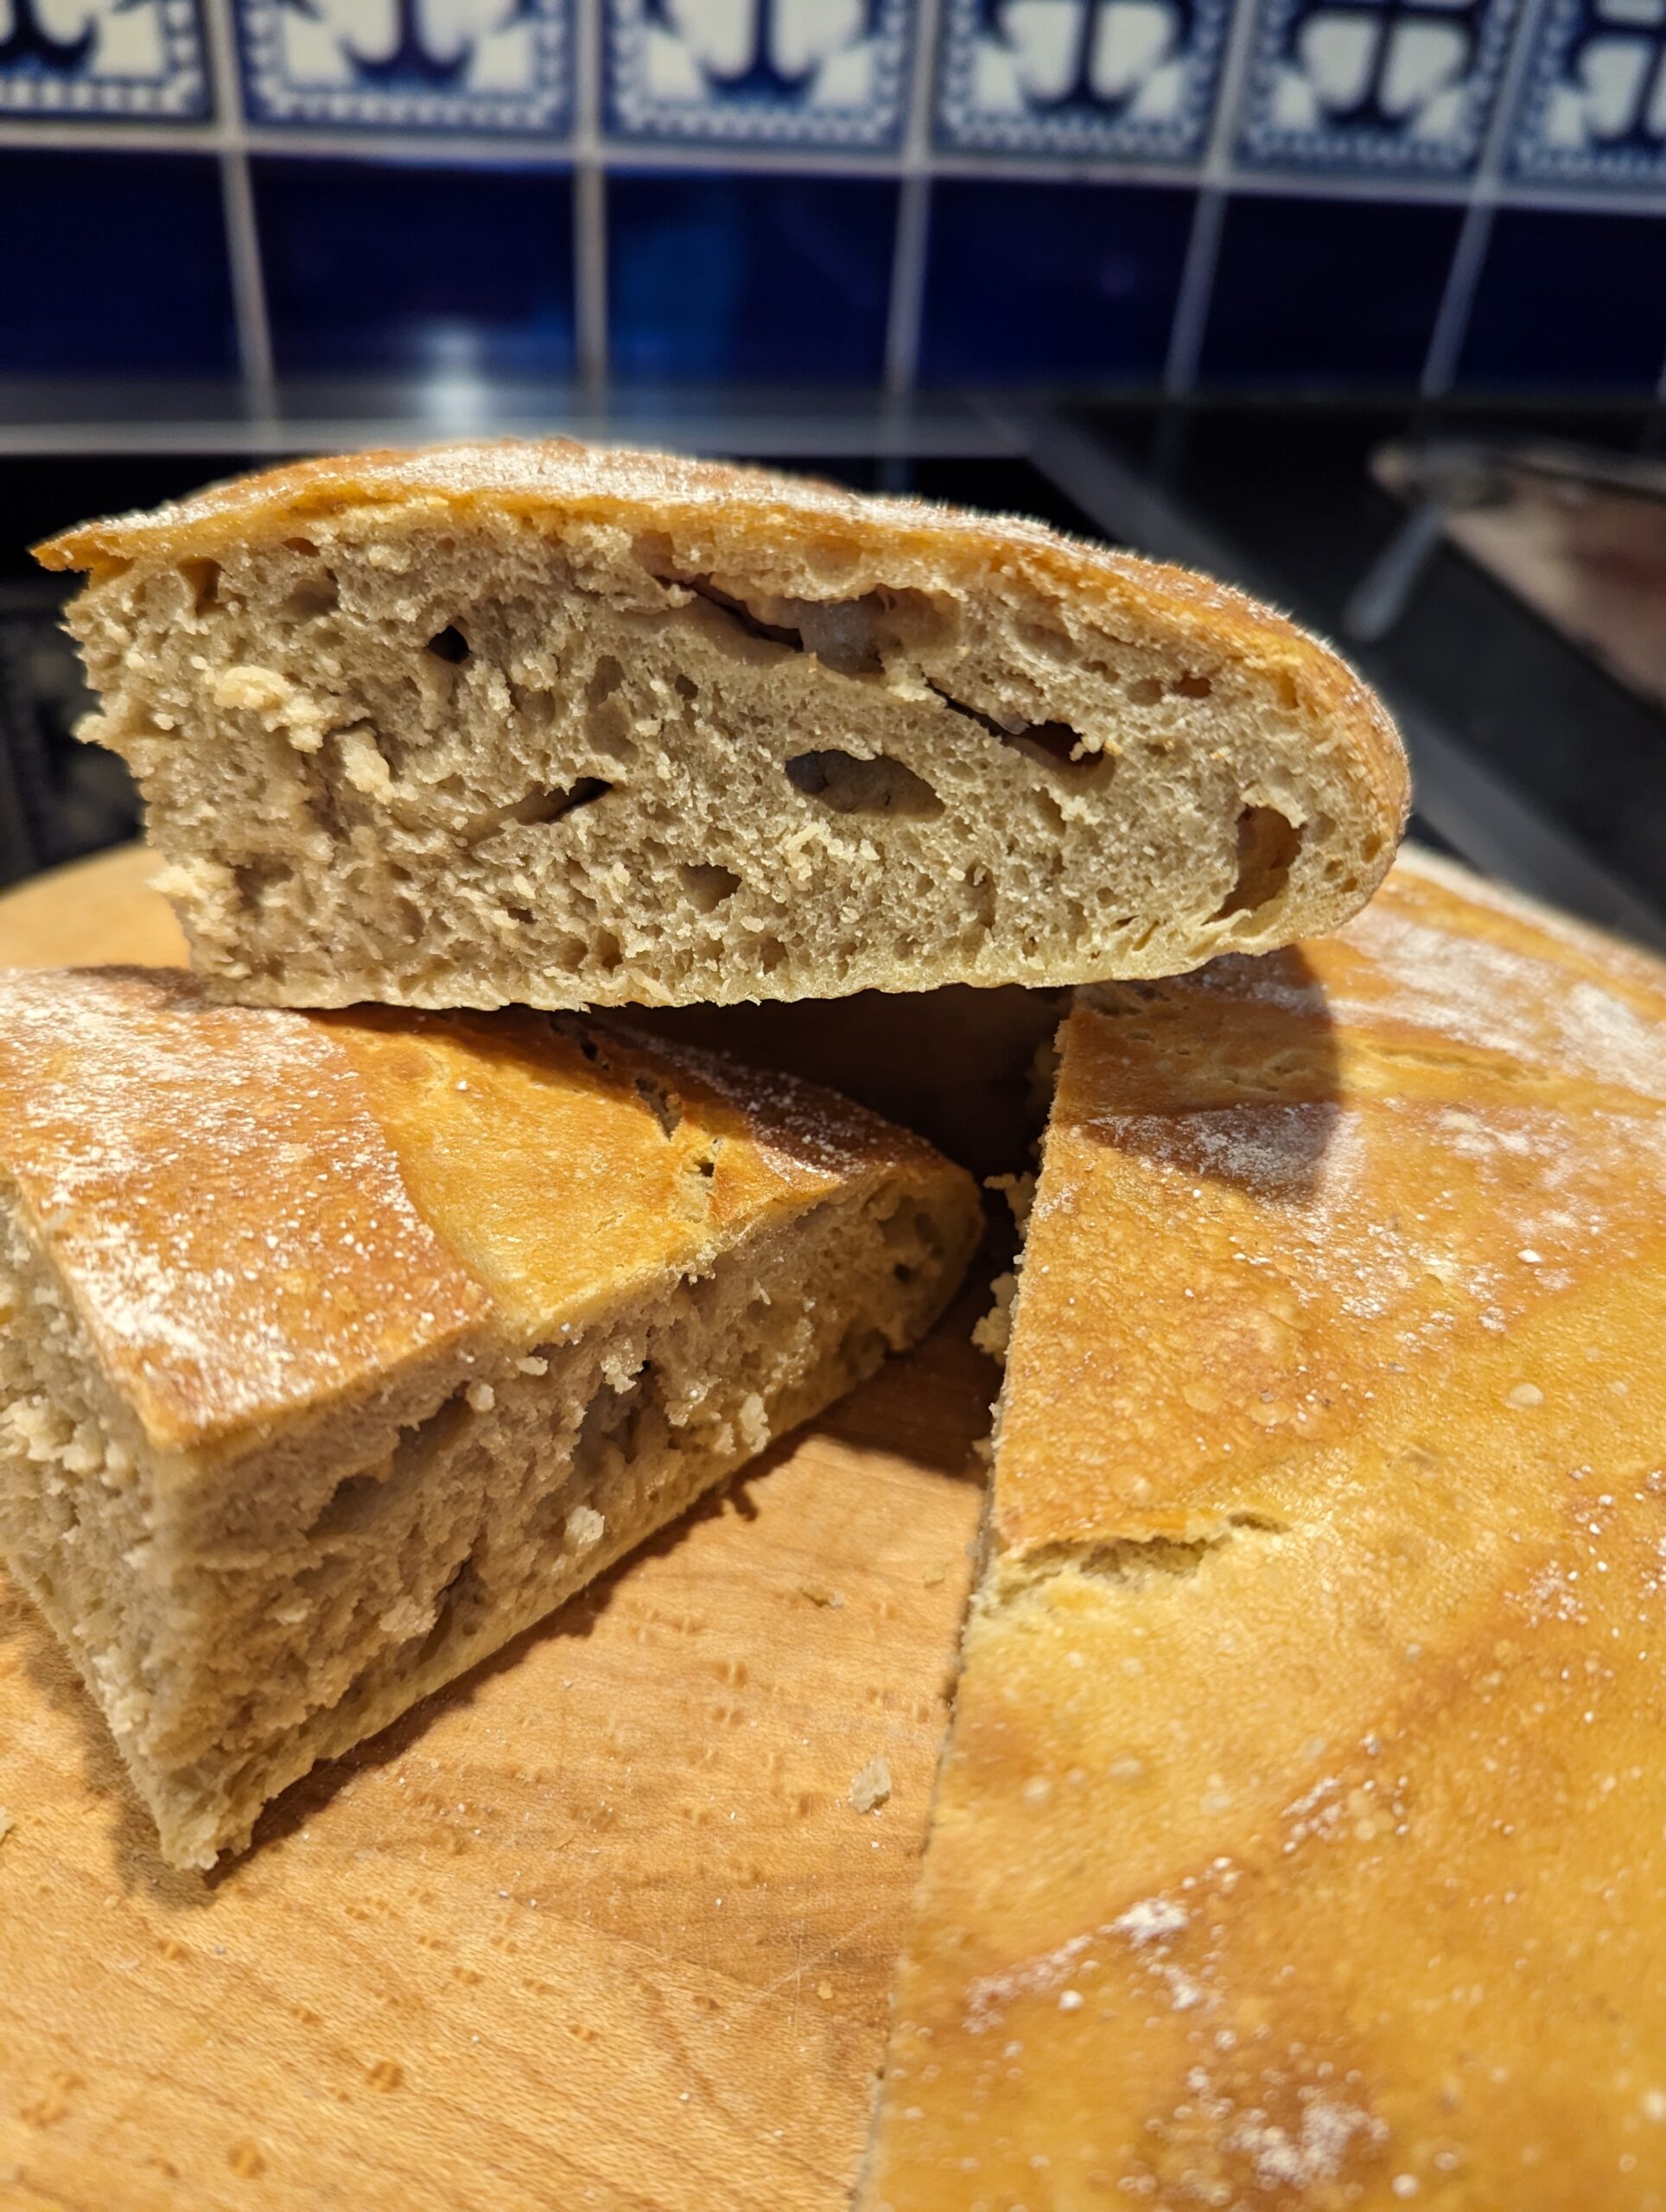
The verdict? The bread’s delicious, and that’s the main thing. I don’t think I’d choose einkorn for a lofty, high, freeform bread, but for loaf-pan breads, flatbreads and pizzas–fantastic.
Enjoy, have fun baking, and check out the FAQs page if you’re having trouble getting the bread to turn out the way you’d like.
Note: BreadIn5.com is reader supported–when you buy through links on the site, BreadIn5 LLC earns commissions.
